There’s something very satisfying about taking something that you would normally throw away and turning it into something amazing! One man’s trash is another man’s treasure so they say!
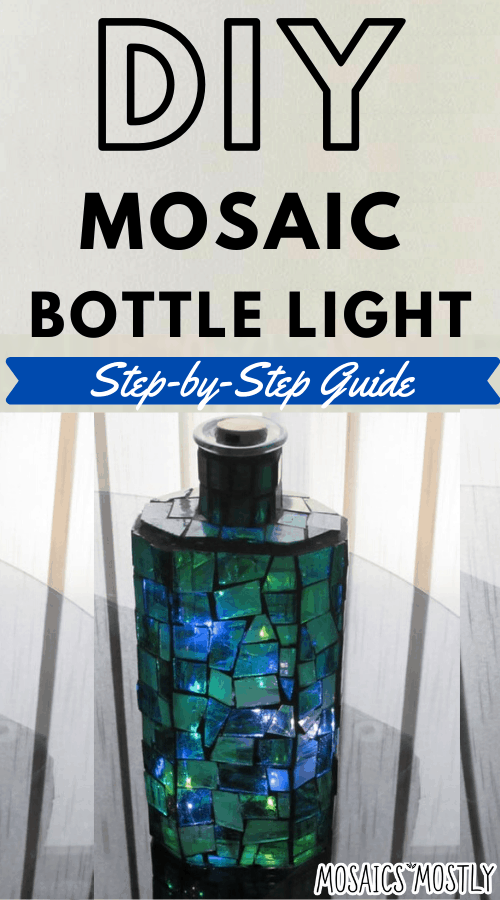
We had a 50th birthday party the other week and I bought this lovely rose flavored gin to share with friends and celebrate the occasion. Everyone commented on what a lovely bottle it was especially after it was empty! I decided to do something special with this bottle instead of tossing it in the recycling bin.
I found these bottle lights on amazon that have a cork as their battery base. They fit quite nicely in the neck of most liquor and wine bottles. They come in warm white light or in multicolored strands. I set out to turn this lovely shaped bottle into a glowing piece of mosaic glass art.
Materials Needed for DIY Mosaic Bottle Light
- Clear uniquely shaped bottle
- 1 set of cork lights
- Semi-translucent or translucent scrap stained glass
- Glass cutter
- Running pliers
- Mosaic cutter
- Clear water resistant adhesive
- Black grout
- Latex additive
- Mixing bowl, spoon, sponge, old rags and a marker
- Garden gloves
- Safety glasses
How to Make Your Very Own DIY Mosaic Bottle Light
Below you’ll find my step-by-step instruction on how to make your very own mosaic bottle light. Let’s get started.
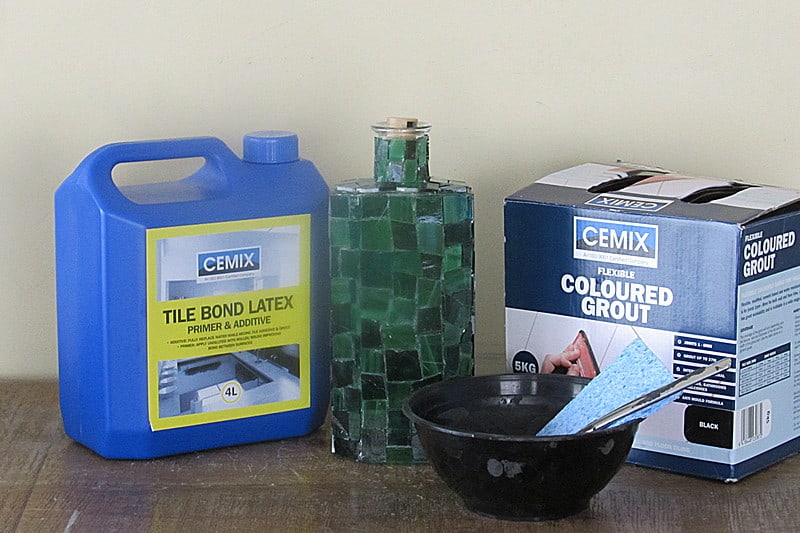
Step 1: Gather Your Materials and Tools
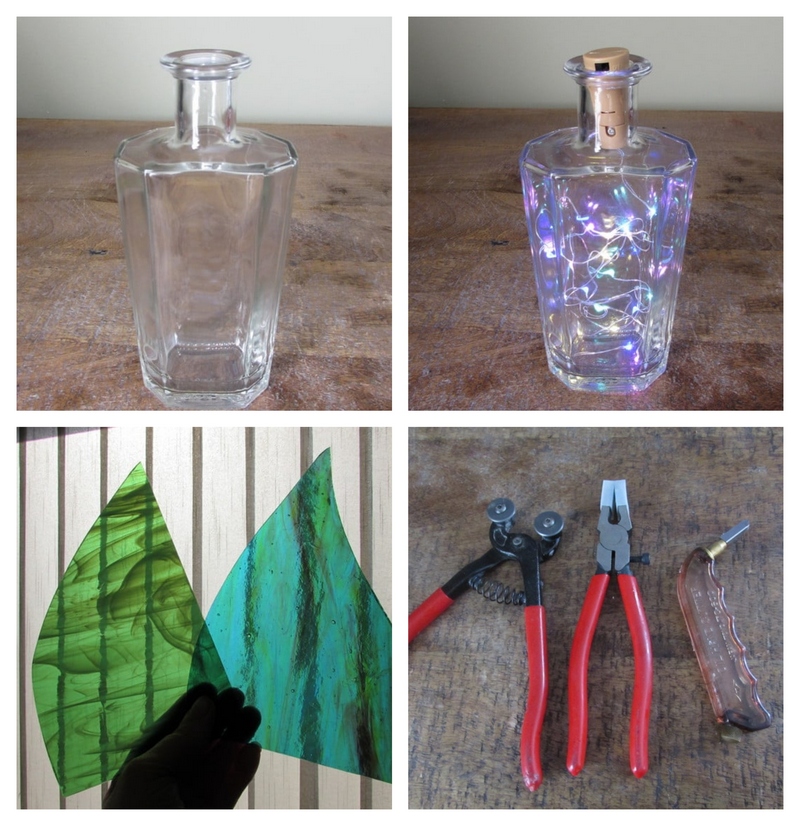
Before you get started, make sure that you have everything you need for your project within in arms reach.
Make sure your cork lights fit in the neck of your bottle. They have an of on/off switch to conserve battery life.
I’ve decided to cover my bottle with two different shades of green scrap stained glass.
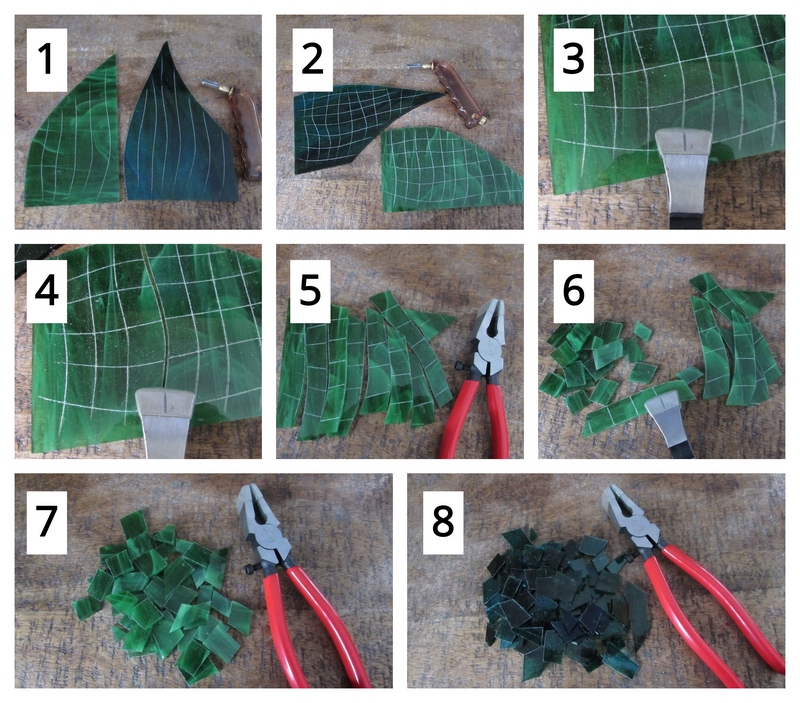
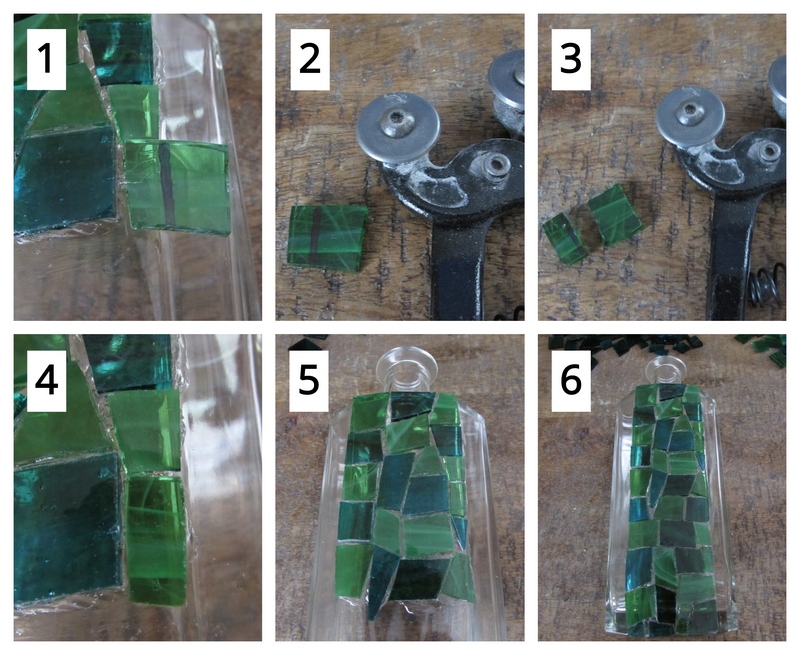
Step 2: Cut Your Glass
Score both pieces of glass vertically with our glass cutter. When rolling your cutter over your glass to create the score lines, remember to move in one direction only with the diamond head of your cutter. Do not move back and forth to score the glass as this will confuse the glass and perhaps create issues breaking the score with your running pliers.
If you’ve never cut glass before, check out my post on how to cut stained glass here.
Score the glass horizontally also creating irregular squares. This provides some unusual shaped pieces to cover your bottle with.
Line the center of the head of your running pliers up with your first score line and apply just enough pressure to break the score.
Break out all the vertical score lines and then break out all your horizontal scores creating your squares.
Repeat this process with the other shade of glass.
Step 2: Cut Pieces to Fit and Glue Them on Your Bottle
Using your mosaic cutters, cut some smaller pieces of glass to work with also.
Begin gluing on pieces of your glass on the first side. This bottle has 8 flat sides to cover.
Mark a piece to fit on the front edge of your bottle.
Cut the piece with your mosaic cutters and glue the piece in place.
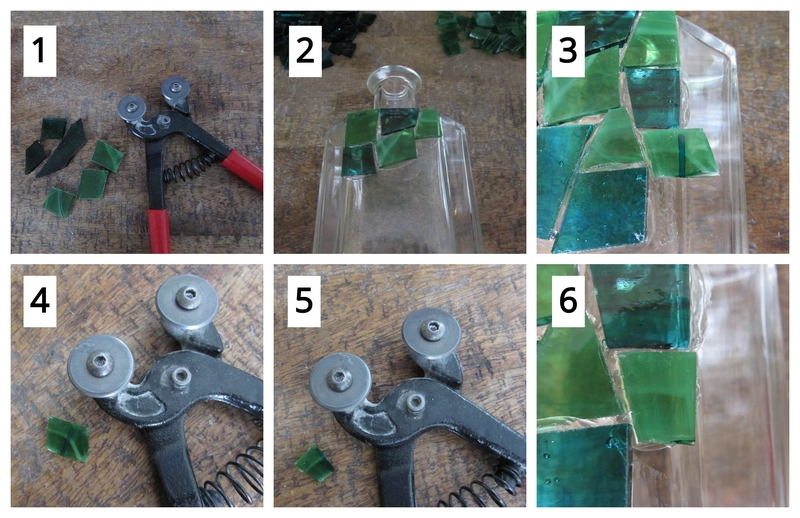
Mark another front edge piece to fit.
Cut the piece with your mosaic cutters and glue it in place.
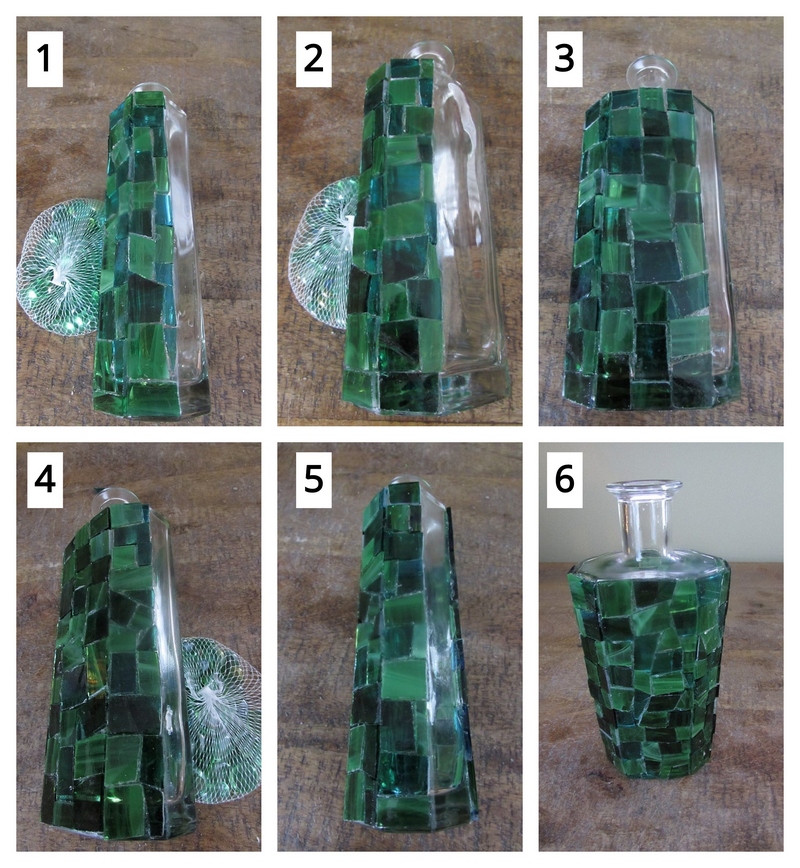
Continue marking, cutting and gluing on pieces of glass intermixing both colors as you go.
The front side is complete.
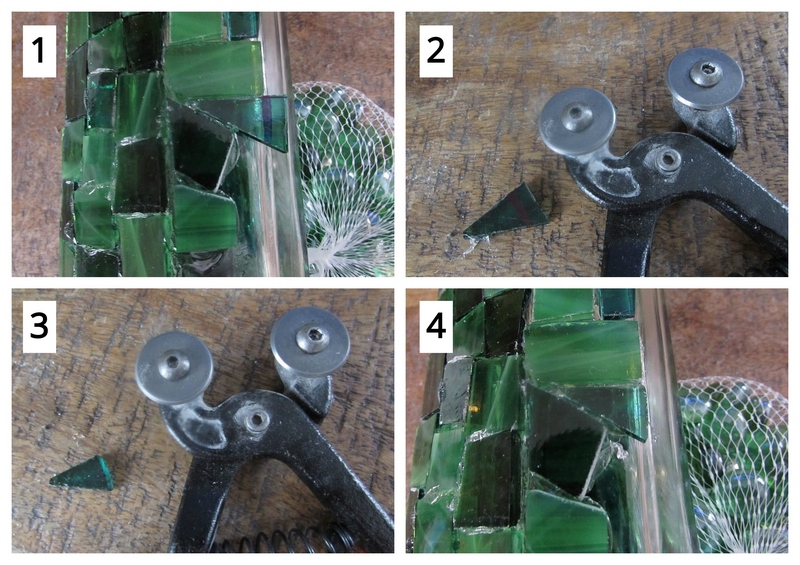
*Tip: Here’s another piece marked to fit. You’re probably asking yourself “when is it that I use the mosaic cutters to cut the piece to fit or use the glass cutter and running pliers to achieve this?” It depends on how long of cut it is. If it’s a cut longer than say 1/4″ or 6mm, you would typically use the glass cutter and running pliers to achieve the straight edge. But if it is a short cut, the mosaic cutters will do the job most every time. We’ll use the glass cutter for this one.

*Tip: There will also be triangular pieces needing to be cut. Simply mark them to fit, cut them with your mosaic cutter and glue them in place.
Cover the other seven sides of the bottle following the same process.
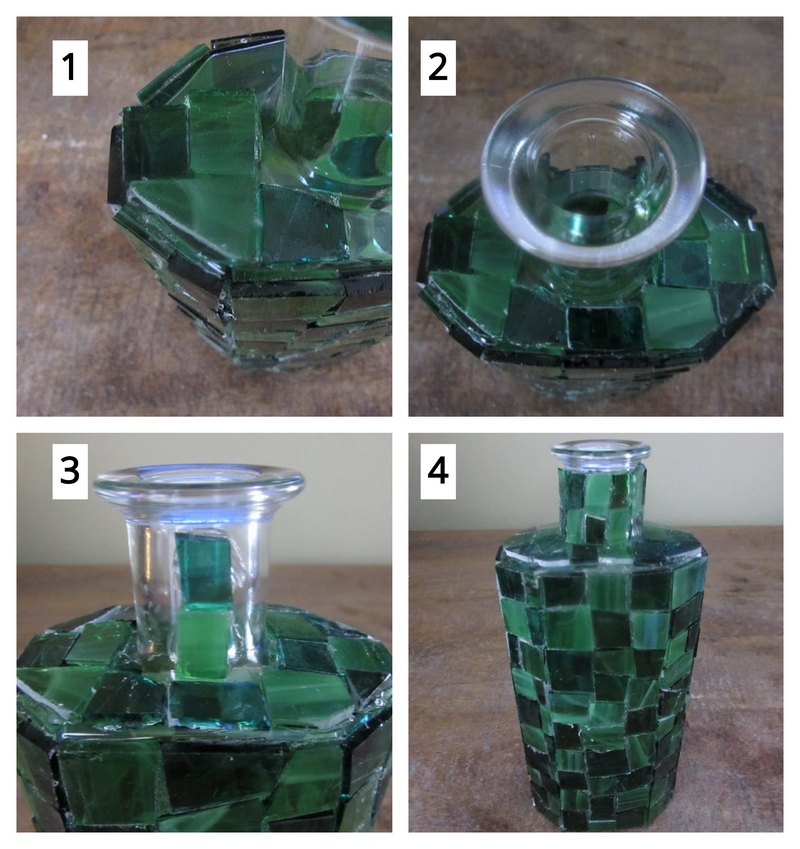
The last part to cover on your bottle is the neck and it’s base.
Again, mark pieces to fit, cut with mosaic cutters or glass cutter and running pliers. Glue the pieces in place.
Total mosaic coverage achieved!
Now, Time to Grout!
You’ve covered your bottle with stained glass and now it’s time to grout. You’ll need to prepare your grout mixture, apply the grout all over your bottle and then clean it thoroughly.
If you’ve never grouted before, check out my post on how to grout your DIY mosaics here.
Step 6: Gather Your Grouting Materials
To grout, all you’ll need is your dry grout, latex additive, mixing bowl, spoon, sponge, old cloths and towels, garden gloves and water.
I recommend covering the surface you’re going to grout on with either old newspapers or old towels to prevent any of the grout from staining your surface.
Step 7: Mix, Apply and Clean Off Your Excess Grout
You’re now ready for the actual grouting process!
Mix the dry grout with the latex additive to achieve the consistency of oily peanut butter. Don’t worry if you add to much additive and the mixture is soupy. Just add more dry grout to achieve the appropriate consistency.

Cover the entire surface of the bottle with the grout mixture.
Clean the grout mixture off with a moistened sponge and old rags until all the grout residue has been removed from the surface glass.
Insert your cork lights and switch them on!
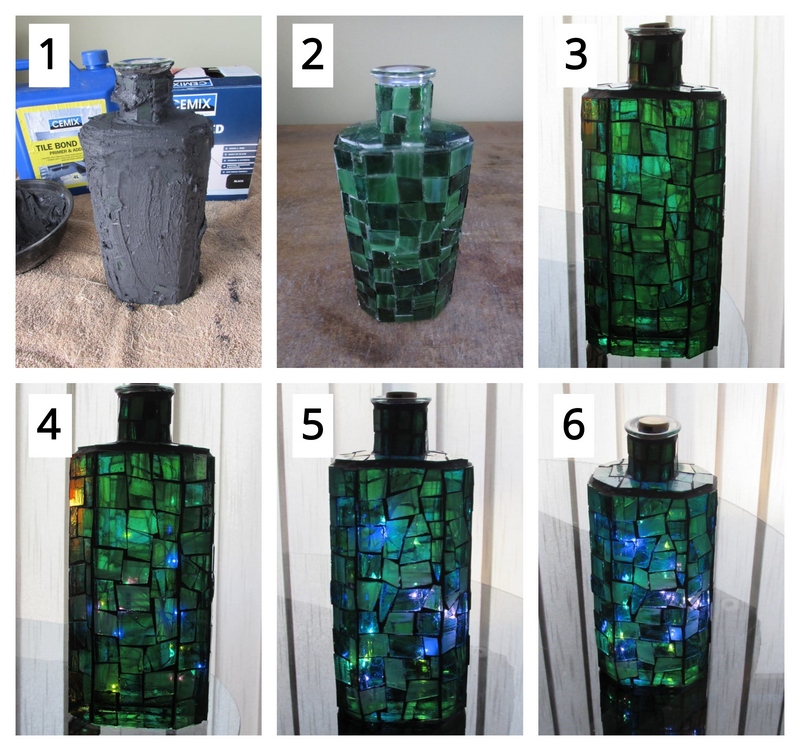
A very unique contemporary lit piece! I bet you’ll start looking at your empty glass bottles differently from this point forward. I know I did!
But don’t stop at just your empty glass bottles. They make other types of fairy lights that are connected to lids with an on-off switch. These lids fit many different types of jars even though they are specifically designed to fit in your everyday mason jar.
As I mentioned above, these cork lights come in multi-color strands and warm white strands. You can achieve a different look with warm white lights than is pictured here so try them both out and see which appeals to you.
*Tips regarding cleaning and detailing stained glass mosaic lit projects:
- Before ever grouting your piece, take a pair of tweezers and remove as much glue as you can from between the joints. This saves time having to do so after you grout your piece.
- Light your piece right after grouting so that you can see where there is glue blocking a joint where grout should be so that you can make your corrections by removing the glue with your tweezers and replacing grout in the joint.
- Even after grouting and cleaning with a moistened sponge and rag, go back to the piece a half hour later and clean with a both again as grout leaves a fine residue that needs to be removed.
- Make certain to create a nice grout line on the top and bottom edges of your piece. If need be, paint the edges to complete the piece with acrylic paint and a sealer.
- If you see the next day that you have left grout in place that you shouldn’t have, take a sharp edge or tweezers edge and remove the grout by scraping it off the glass pieces.
- It’s imperative that you use only latex additive mixed in to your grout when working with glass on glass mosaics. The latex additive allows the grout to adhere to the glass. Without it the grout would eventually pull away from the glass.
- It is also imperative that you use a clear water resistant adhesive. Attempt to cover each piece you glue on with full coverage on the underside. You will always get some seepage of grout under a few pieces of glass here and there but you can minimize this by making sure that you completely cover each piece prior to gluing it down.
- Select glass that isn’t overly textured as this will cause much work with the cleaning process after grouting. It’s also more difficult to score and break. For beginners, work with glass that is lovely but easy to score and break and clean after grouting.
- When cleaning up after the grouting process, make sure to place any left over grout in your mixing bowl in the garbage before rinsing your bowl. It’s always a good idea to rinse the least amount of grout down your drain. Just being environmentally conscious:)
In ending this post, open your minds to the amazing possibilities of what you can create with scrap stained glass on glass bases and some cheap battery operated fairy lights. Any time you’re at your craft store or at a garage sale, keep your eyes wide open to that glass object that could become your next potential gorgeous stained glass mosaic lit piece!
I hope you enjoyed this project. Make sure to check out my other posts showing you how to create other lit mosaic pieces such as my DIY Mosaic Lamp Project, DIY Christmas Ball Project and DIY Candle Holder Project here.

Danielle is the mosaic artist and teacher behind Mosaics Mostly. She has been creating mosaics for over 25 years, and has taught hundreds of people to create their very own mosaic DIY projects at home. She has been featured in multiple galleries and magazines, and has even had her own beginner mosaics book published! She loves crafts, and is always working on something new!
