The holidays are around the corner and they sneak up on you before you know it! Why not start now creating beautiful stained glass mosaic Christmas ornaments to give to your friends and family for this very special holiday season.
Years ago when I started making these ornaments, my idea was to create a mosaic gift for very special people in my life that resembled a mini stained glass window. I decided to use vintage images, in fact, vintage German images. I was living in Lititz, Pennsylvania in the middle of four Amish farms and I had a Menonite bookstore within walking distance of my home. The owner of this bookstore, to this day, imports sheets of vintage German cut outs of angels, Santa, children, etc. These images are the source for all of the ornaments that I make but there are tons of gorgeous vintage images out there that can be used to create absolutely gorgeous ornaments.
Materials Needed for DIY Mosaic Christmas Ornament
- Clear untextured glass
- Scrap stained glass
- Paper cut-out vintage images
- Glass cutter
- Running pliers
- Mosaic cutter
- Glass grinder with both a grinding head and a hole making grinding head
- Clear water resistant adhesive
- Black grout
- Latex additive
- Mixing bowl, spoon, sponge, old rags and scissors
*Tip: I get my clear glass to create my glass bases of my ornaments at the dollar store! I buy the cheapest picture frames and use the glass in the frame to create both the base and the glass pieces I need to cover the image itself.
How to Make Your Very Own DIY Mosaic Christmas Ornament
Below you’ll find my step-by-step instructions on how to create your very own lovely mosaic Christmas ornament or ornaments at home. So, let’s get started!
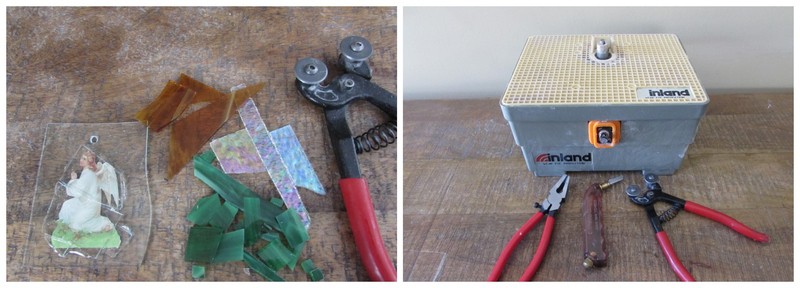
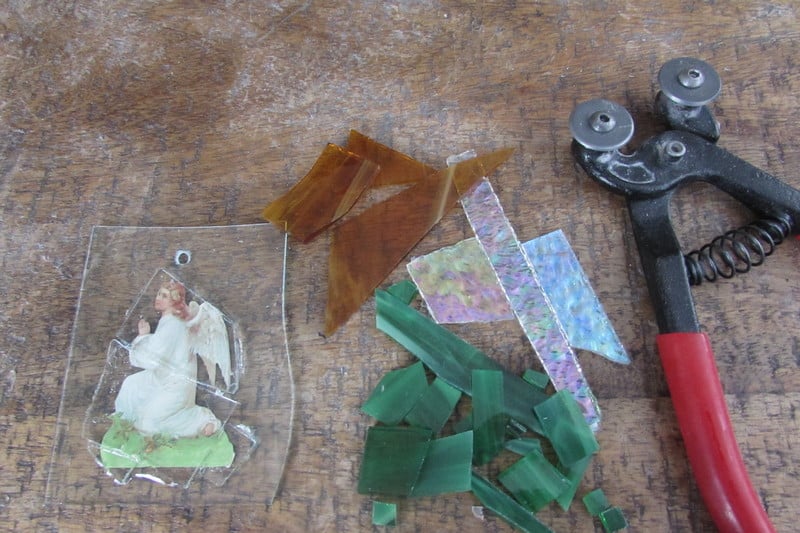
Step 1: Gather Your Materials and Tools
Before you get started, you want to make sure that you have everything that you’re going to be needing to create these ornaments with arms reach.
For this ornament, I am using a precious vintage angel cut-out that is kneeling and praying. I’ve also selected some lovely scrap stained glass to compliment the image. I’ve chosen a clear textured glass, green glass and brown glass.
Have your glass grinder and cutting tools close by as you will be using them every step of the way.
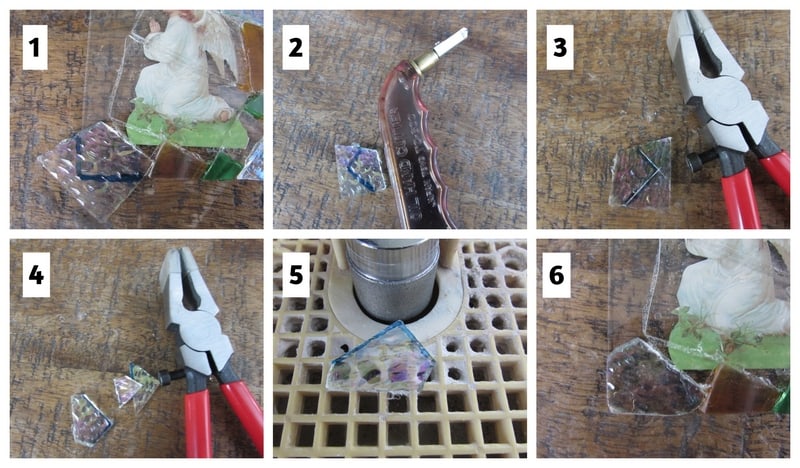
Step 2: Grind a Hole Through your Glass Base of Your Ornament
Your glass grinder has a number of different heads that can be used in order to achieve what you’re needing to do with your piece of glass that you’re grinding. The main grinding head simply shapes glass and for me, tile. It can be removed quite easily with an allen wrench that is supplied with your glass grinder and with alternative grinding heads you might purchase.
Once you remove the regular grinding head, simply tighten up the hole creating grinder bit with your wrench. Make certain you keep this grinding head wet with a moistened sponge behind the bit while attempting to create your hole.
Take the piece of clear glass that you have and cut it to the specific shape that you desire for your ornament with your glass cutter and running pliers. If you’re new to mosaics and would like to know how to cut glass or stained glass, please check out my post on How to cut stained glass.
Once the base piece is cut, you take it to the glass grinder and rock the piece of glass gently over the hole creating head while keeping it wet until a hole forms in the glass where you want the hole to be in order to hang your ornament.

Step 3: Transfer Your Image on to Your Base and Cover it with Clear Glass
Now that you’ve prepared the base of your ornament it’s time to transfer the image on to it that you will be covering with clear glass. Use your clear water resistant adhesive to glue it to the base.
Cut smaller pieces of clear glass to cover the image. Keep in mind that you’ll be covering the rest of the ornament with small stained glass pieces. Cover each piece of clear glass with your adhesive and attempt to push out as many of the air bubbles that you can when placing it on the image.
Once you’ve covered the image with clear glass smooth the edges of your base on the glass grinder to make it safe for handling. You could have actually done this straight after cutting the base for your ornament:) I simply forgot!
![]()
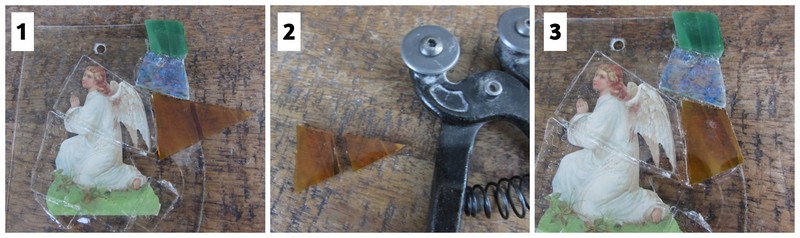
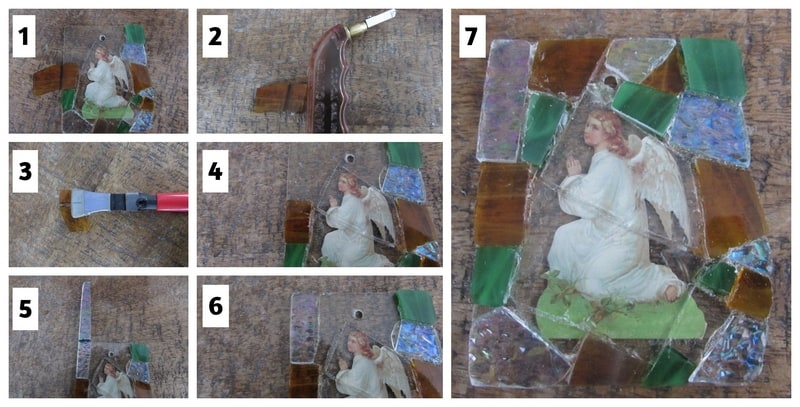
Step 4: Mark and Cut Your Pieces of Scrap Stained Glass to Surround Your Image
Select lovely colors of scrap stained glass to surround your image.
Mark a piece to fit, cut it with your mosaic cutters and glue the piece in place.
![]()
Some of your stained glass pieces, like you corner pieces, may need to be cut with your glass cutter. Once the the glass has been scored, break the scores with your running pliers. When necessary, take the piece to your glass grinder and shape it to fit nicely on your ornament base.
Continue this process until you’ve completely surrounded your lovely vintage image with stained glass.
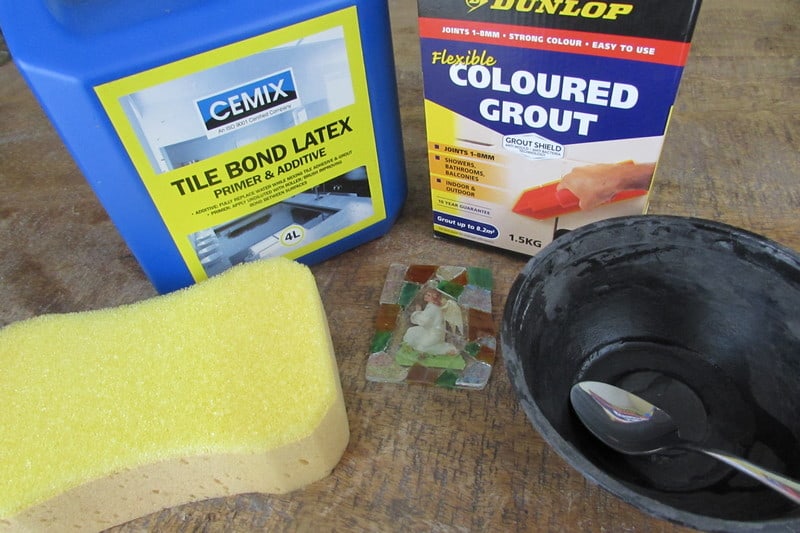
Step 5: Gather Your Grouting Materials
To grout your lovely ornament all you’ll need is your black grout, latex additive, mixing bowl, spoon, sponge and old cloths. Make sure you’re near a water source as you’ll need to wash you sponge several times when cleaning the excess grout off your ornament.
I recommend covering the surface you’ll be working on with newspaper or old rags to prevent staining your work surface with you black grout mixture.
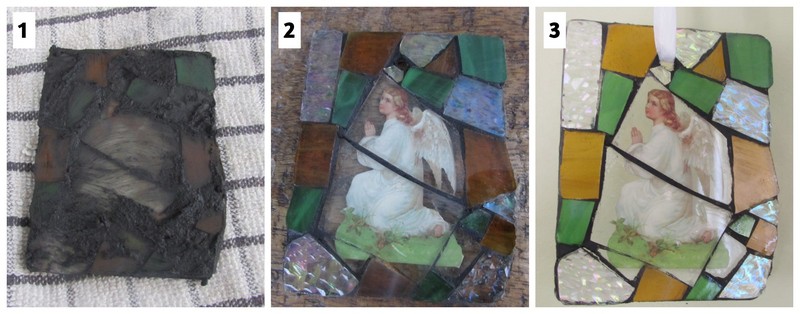
Step 6: Mix, Apply and Clean Off Your Excess Grout
Now you’re ready for the actual grouting process. Place some dry grout in a bowl and add some latex additive to it. You’re need to achieve the consistency of oily peanut butter. Don’t worry if you add to much and you mixture is soupy. Just add some more dry grout until you achieve the proper consistency.

Apply the some of the grout mixture over the top of your ornament. Remove the excess grout with a moistened sponge. Finally, clean the ornament with a cloth polishing the glass until every bit of the excess grout is removed.
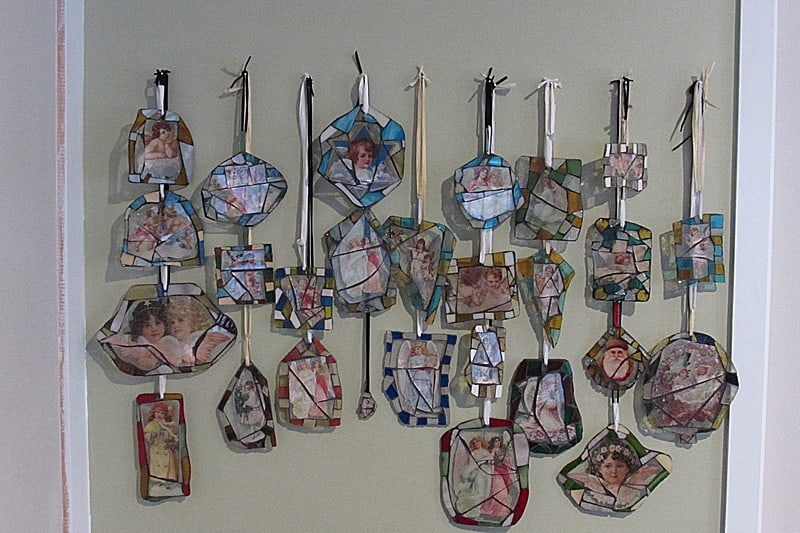
This gorgeous ornament is now ready for hanging! I’ve sold these ornaments for years! Some people place them on their Christmas trees, some place them on special gift wrapped packages and some simply hang them in their homes in the windows or on their walls. Tiny little stained glass windows to enjoy:)
*Tips regarding cleaning and detailing stained glass mosaics:
- Before ever grouting your piece, take a pair of tweezers and remove as much glue as you can from between the joints. This saves time having to do so after you grout your piece.
- Inspect your piece with light passing through it right after grouting so that you can see where there is glue blocking a joint where grout should be so that you can make your corrections by removing the glue with your tweezers and replacing grout in the joint.
- Even after grouting and cleaning with a moistened sponge and rag, go back to the piece a half hour later and clean with both again as grout leaves a fine residue that needs to be removed.
- Make certain to create a nice grout line around the edges of your ornament. Take your finger and smooth the grout around the edges.
- If you see the next day that you have left grout in place that you shouldn’t have, take a sharp edge or tweezers edge and remove the grout by scraping it off the glass pieces.
- It’s imperative that you use only latex additive mixed in to your grout when working with glass on glass mosaics. The latex additive allows the grout to adhere to the glass. Without it the grout would eventually pull away from the glass.
- It is also imperative that you use a clear water resistant adhesive. Attempt to cover each piece you glue on with full coverage on the underside. You will always get some seepage of grout under a few pieces of glass here and there but you can minimize this by making sure that you completely cover each piece prior to gluing it down.
- Select glass that isn’t overly textured as this will cause much work with the cleaning process after grouting. It’s also more difficult to score and break. For beginners, work with glass that is lovely but easy to score and break and clean after grouting.
- When cleaning up after the grouting process, make sure to place any left over grout in your mixing bowl in the garbage before rinsing your bowl. It’s always a good idea to rinse the least amount of grout down your drain. Just being environmentally conscious:)
This process of sandwiching images under clear glass can lend itself to many other project ideas!!! Imagine creating personalized ornaments with special photos of your loved ones! How cool would that be!??

Danielle is the mosaic artist and teacher behind Mosaics Mostly. She has been creating mosaics for over 25 years, and has taught hundreds of people to create their very own mosaic DIY projects at home. She has been featured in multiple galleries and magazines, and has even had her own beginner mosaics book published! She loves crafts, and is always working on something new!
