I’ve been scratching my head trying to figure out what project I could offer all of you related to the Thanksgiving holiday! I then thought to myself, “What’s one of the most important part of the whole dinner experience Dani?” and I replied to myself, “The table setting for this festive event!”
I came up with a project using a miniature bottle and a tiny battery operated light that can be turned on and off to set at each place setting at your Thanksgiving table. A small stained glass mosaic table light for each of your guests to enjoy! Here’s the Tiny battery operated light that I use for this project.
So now let’s get into exactly what you need to create these lovely little lit additions to your Thanksgiving table!
Materials Needed for DIY Mosaic Table Setting Light
- Miniature bottles
- Tiny battery operated light
- Scrap glass that you choose to cover the bottle with
- Glass cutter
- Mosaic cutter
- Running pliers
- Clear water resistant adhesive
- Black grout
- Latex additive
- Mixing bowl, spoon, sponge, old rags and a marker
How to Make Your Very Own DIY Mosaic Table Setting Light
Below you’ll find my step-by-step instructions on how to make your very own lovely mosaic table setting lights for your Thanksgiving dinner! Let’s get started!
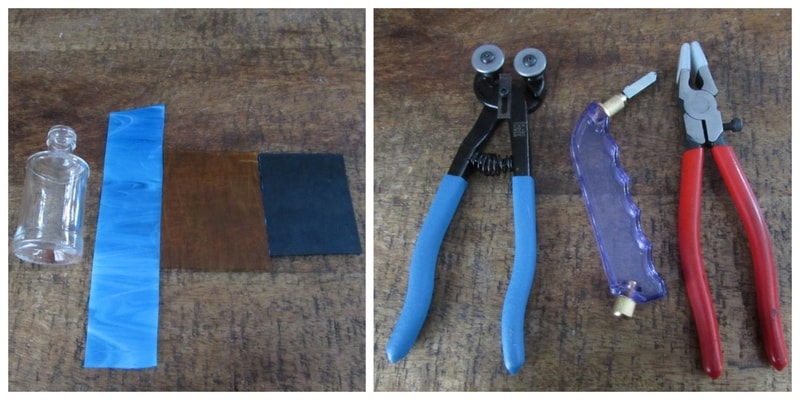
Step 1: Gather Your Materials and Tools
Before you get started, you want make sure that you have everything you need within hands reach. For this particular little light project, I decided to use two different shades of scrap turquoise stained glass and some scrap amber stained glass.
It’s optional as to whether or not you need to use a glass grinder as these little strips you will cut will not always have straight edges and you may opt to shape them more perfectly, but that is completely up to you. You will definitely need your glass cutter, running pliers and mosaic cutter though.
*Tip: Always take a look at your glass with light passing through it so that you have an idea of what it will look like when lit.
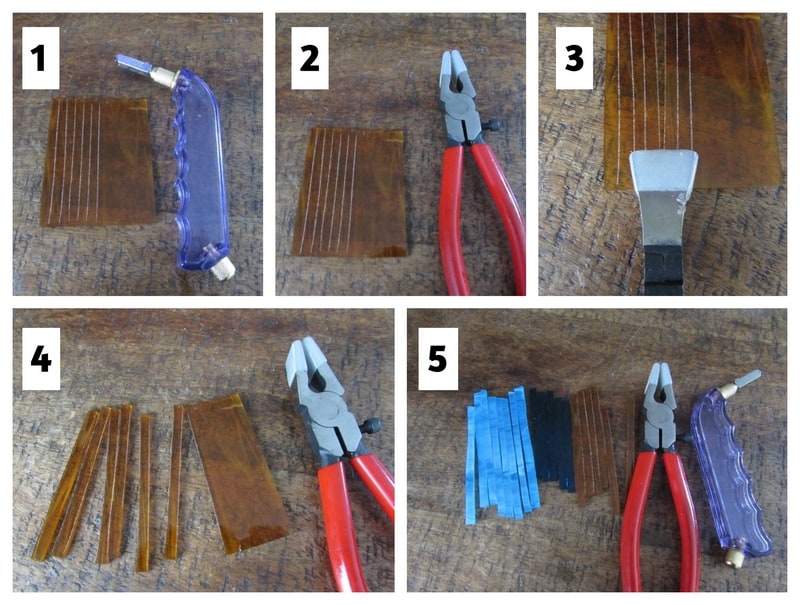
Step 2: Cut your Glass Strips
Let’s start by creating our strips that we’ll be covering this little cordial bottle with.
Score your amber glass vertically into thin strips with your glass cutter. Then line the center of the head of your running pliers up with one of the score lines. Apply just enough pressure to break the score. Continue breaking out all the vertical scores leaving you with a pile of thin strips.
Repeat this process with the other 2 colors of turquoise stained glass.
You now have a variety of strips to work with.
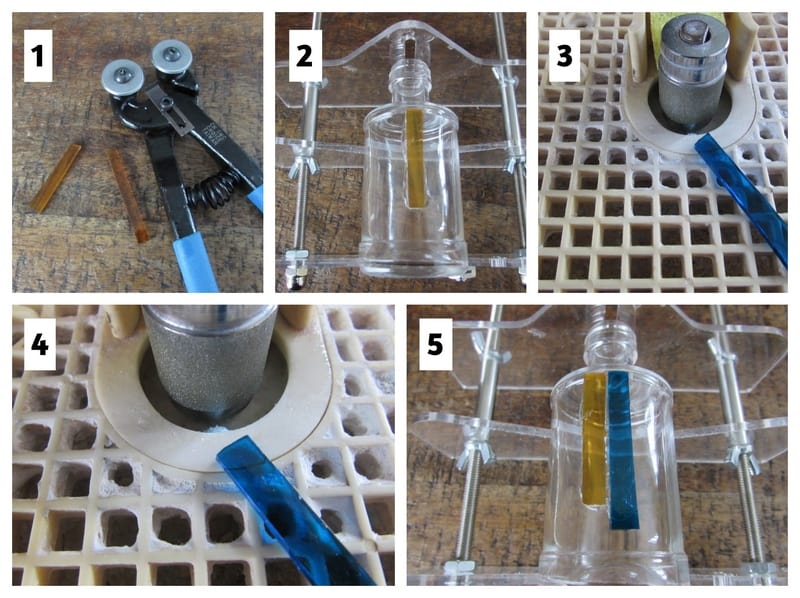
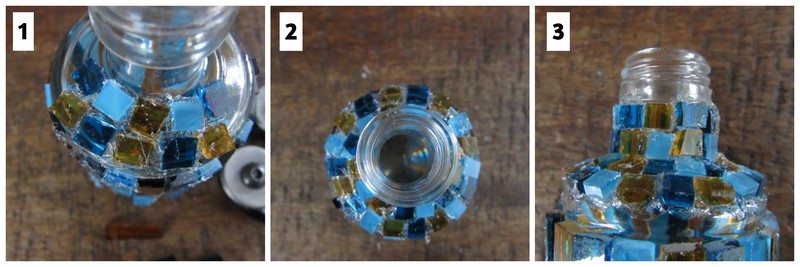
Step 3: Cut and Glue Your Glass on Your Base
Now we’re going to take these lovely glass strips that we just cut and use mosaic cutters to cut them at all different lengths to disperse the three different colors of glass interestingly around the body of the bottle.
It’s optional to smooth the edges of the tips of each strip to straighten them as you can create this design using slanted edges. It’s completely up to you. I’ve decided to smooth all the edges straight.
Take the slanted edge to your grinder and gently smooth the edge until it’s straight. Then, glue the piece in place.
The pieces that are to be glued underneath your initial top row need to be marked and then cut with your mosaic cutters.
Repeat this process until you have covered the entire body of your little bottle.
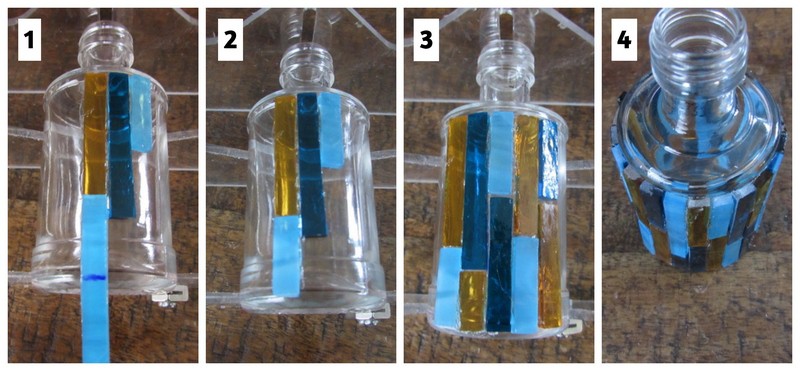
To finish covering your little bottle, cut small square out of your strips to glue on to the top and neck of the bottle.
Now it’s Time to Grout!
You’ve covered your little bottle with stained glass pieces and are now ready to grout.
We’ll need to prepare the grout mixture, apply it to the little bottles surface and thoroughly clean it.
If you’ve never grouted before, checkout my post on How to Grout Your DIY Mosaics here.
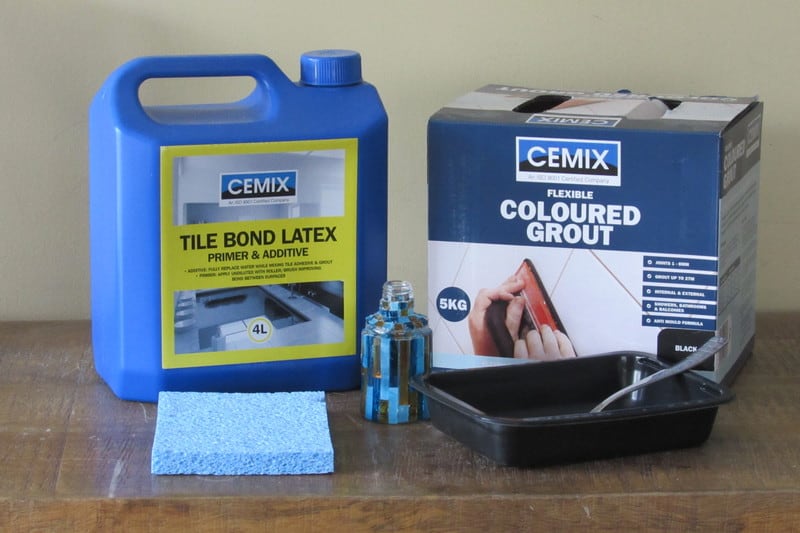
Step 4: Gather Your Grouting Materials
To grout, all you’ll be needing is your grout, latex additive, mixing bowl, spoon, sponge, some old cloths and water.
I recommend covering the surface you’ll be grouting on with either old newspaper or cloths to prevent any of the grout from staining your work surface.
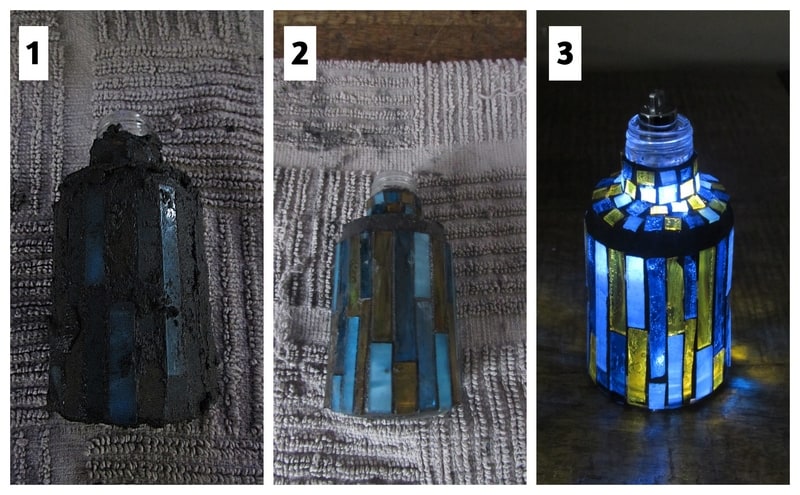
Step 5: Mix, Apply and Clean Off Your Excess Grout
KK! Now you’re ready for the actual grouting process. First, you want create your grout mixture. Mix enough additive into your dry grout to achieve the consistency of oily peanut butter.
Don’t worry if you’ve added too much additive and it’s runny. Simply add more dry grout to the mixture to achieve the proper consistency.

Cover your little light with the grout mixture. Thoroughly clean the excess grout off the surface of the bottle with a moistened sponge first and then with dry old cloths. Once thoroughly cleaned, light your little mosaic table setting light up with these bulbs I found on Amazon – Tiny battery operated light.
Here’s a pic of two other color options as I needed a set of 3 for my table and my family:)

Here’s a glimpse of what they look like included in your table setting. Gorgeous huh!!??

*Tips regarding cleaning and detailing stained glass mosaic lit projects:
- Before ever grouting your piece, take a pair of tweezers and remove as much glue as you can from between the joints. This saves time having to do so after you grout your piece.
- Light your piece right after grouting so that you can see where there is glue blocking a joint where grout should be so that you can make your corrections by removing the glue with your tweezers and replacing grout in the joint.
- Even after grouting and cleaning with a moistened sponge and rag, go back to the piece a half hour later and clean with a cloth again as grout leaves a fine residue that needs to be removed.
- Make certain to create a nice grout line on the top and bottom edges of your piece.
- If you see the next day that you have left grout in place that you shouldn’t have, take a sharp edge or tweezers edge and remove the grout by scraping it off the glass pieces.
- It’s imperative that you use only latex additive mixed in to your grout when working with glass on glass mosaics. The latex additive allows the grout to adhere to the glass. Without it the grout would eventually pull away from the glass.
- It is also imperative that you use a clear water resistant adhesive. Attempt to cover each piece you glue on with full coverage on the underside. You will always get some seepage of grout under a few pieces of glass here and there but you can minimize this by making sure that you completely cover each piece prior to gluing it down.
- Select glass that isn’t overly textured as this will cause much work with the cleaning process after grouting. It’s also more difficult to score and break. For beginners, work with glass that is lovely but easy to score and break and clean after grouting.
- When cleaning up after the grouting process, make sure to place any left over grout in your mixing bowl in the garbage before rinsing your bowl. It’s always a good idea to rinse the least amount of grout down your drain. Just being environmentally conscious:)

Danielle is the mosaic artist and teacher behind Mosaics Mostly. She has been creating mosaics for over 25 years, and has taught hundreds of people to create their very own mosaic DIY projects at home. She has been featured in multiple galleries and magazines, and has even had her own beginner mosaics book published! She loves crafts, and is always working on something new!

If you want to use the photo it would also be good to check with the artist beforehand in case it is subject to copyright. Best wishes. Aaren Reggis Sela
Hi There:) Which photo are you referring to? I always attempt to contact the artist. I have been given permission by 4 artist to interpret their work in mosaic medium. If I cannot locate the artist then I can’t. I am curious which photo you are referring to though:) Thank you for the advice:)
I like this internet site because so much useful material on here :D. Carolyne Michale Jillana
I’m so happy you’re enjoying it!!! Thanks for reaching out!
Thanks for sharing your info. I truly appreciate your efforts and I will be waiting for your further post thanks once again. Cissy Emmit Sunderland
You’re welcome:) Please enjoy the site!
Helpful information. Lucky me I found your site accidentally, and I’m stunned why this twist of fate didn’t happened in advance! I bookmarked it. Lindie Hunfredo Alicia
Happy to hear!! Please enjoy the site!
Excellent post! We are linking to this particularly great article on our website. Keep up the great writing. Deena Niall Merrilee
Great to hear!! Please enjoy the site!
So happy you enjoyed it! Please enjoy the site:)
I was examining some of your articles on this internet site and I believe this internet site is rattling instructive! Keep putting up. Neala Sarge Alfi
Thanks so much!!! Please enjoy the site!