Cutting stained glass for your DIY mosaic projects is easier than you might think.
This post is dedicated to showing you how simple it can be.
Tools Needed for Cutting Stained Glass
- Glass cutter
- Running pliers
- Mosaic cutter
- Safety glasses
Step 1: How to Cut Glass Using a Glass Cutter and Running Pliers
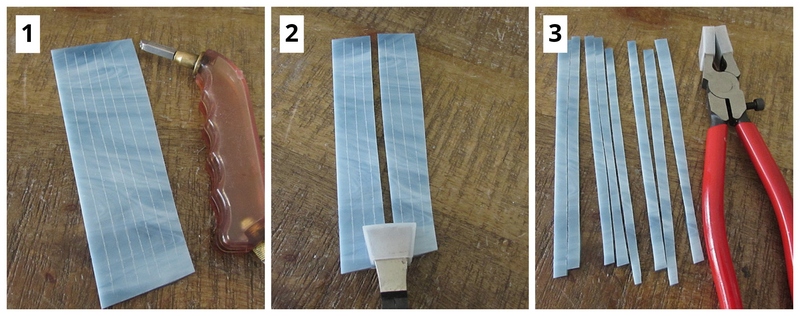
The process of scoring glass with a glass cutter is quite easy.
You simply roll the head of your glass cutter over the surface of your glass in one direction only from one edge of your glass to another edge. This is referred to as “scoring” your glass.
If you’re wanting to create squares, simply score your your glass vertically and then score it again horizontally creating a grid.
Then in order to create your squares, you need to “break them out” with your running pliers.
To do this, you need to line the center of the head of your running plier up with one of your vertical scores. Apply just enough pressure to break the glass along the score.
Break out all the vertical scores with your running pliers leaving you with strips.
Take each one of your strips and break all the horizontal scores with your running pliers leaving you with a pile of squares to work with.
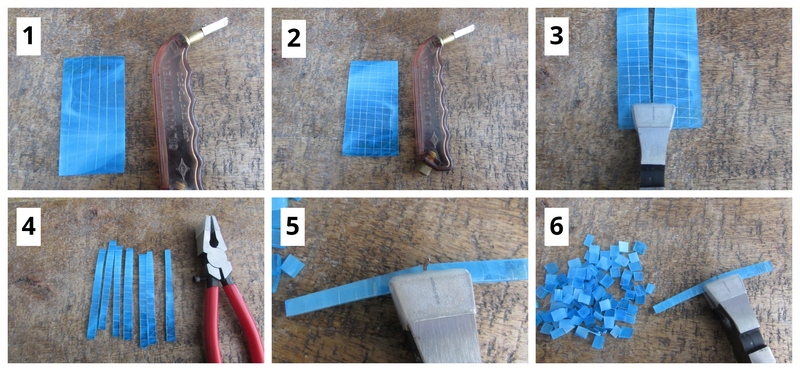
You also have the option of working with strips of glass by just breaking out your vertical scores.
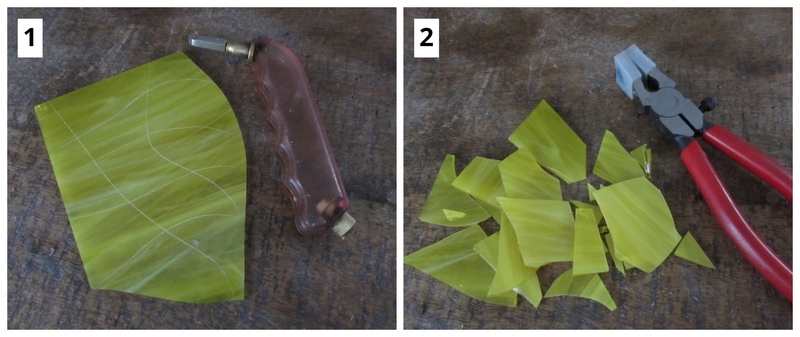
You can cut irregular pieces of glass with your glass cutter and running pliers repeating this same process of scoring and breaking.
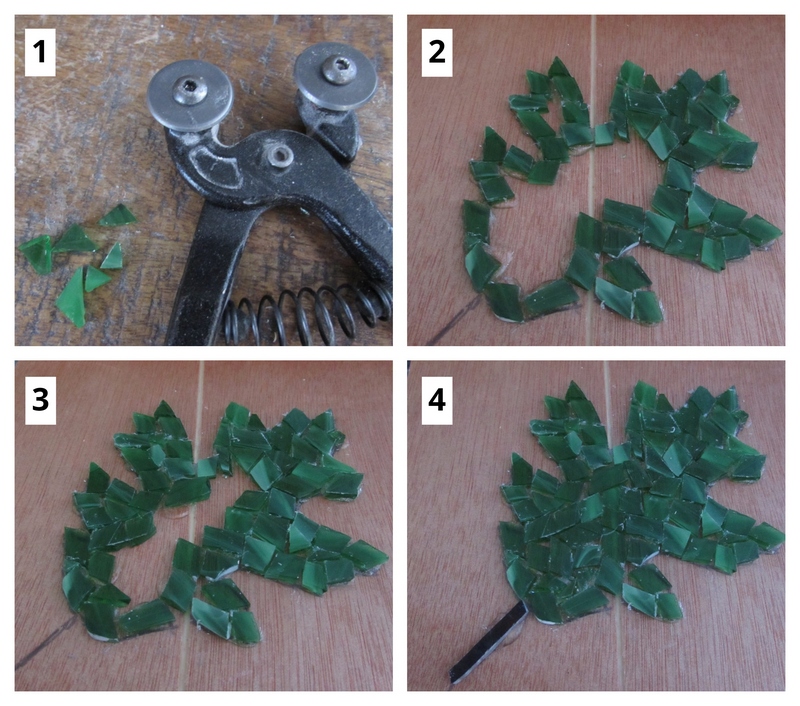
Step 2: How to Cut Glass Using a Mosaic Cutter
You select a mosaic cutter for cutting glass when you need small bits cut.
Typically you mark pieces to fit, cut them with your mosaic cutter and glued them in place.
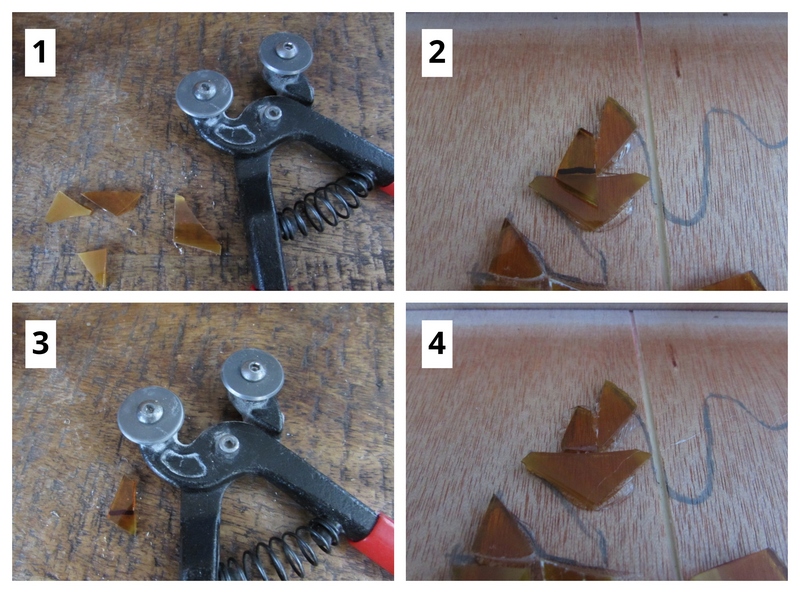
Small pieces cut with the mosaic cutter can also be used to create the interior portion of a design such as this leaf or to cover an entire piece randomly with glass.
I hope this post helps in coordination with following my instructions for each of my project posts.

Danielle is the mosaic artist and teacher behind Mosaics Mostly. She has been creating mosaics for over 25 years, and has taught hundreds of people to create their very own mosaic DIY projects at home. She has been featured in multiple galleries and magazines, and has even had her own beginner mosaics book published! She loves crafts, and is always working on something new!

Excellent post. I was checking constantly this blog and Im impressed! Extremely helpful info specifically the last part 🙂 I care for such information much. I was looking for this particular information for a very long time. Thank you and good luck.
Thank you!!! Enjoy the site!