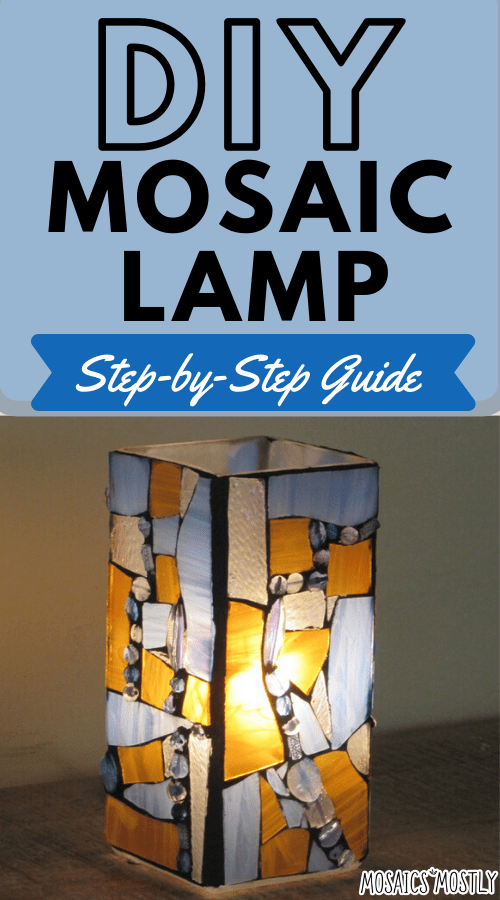
There’s something extremely rewarding about turning an ordinary table lamp into a beautiful lit mosaic piece. The color combinations and design possibilities are endless! The other great aspect of creating a lit mosaic piece on a $10 table lamp is that rain or shine, night or day, the piece can always be lit if you so desire.
My chosen color scheme for this project is amber and sky blue. I’ve also decided to incorporate some lovely glass blue beads with my scrap stained glass.
You can create mosaic lights out of any type of light fixture. You could use an outdoor lamp post, plug-in night light, hanging ceiling lamp, outdoor patio light, and solar lighting. The possibilities are really endless.
So now let’s get into what exactly you’ll need to make your very own DIY mosaic lamp.
Materials Needed for DIY Mosaic Lamp
- Glass table lamp
- Amber and light blue scrap stained glass
- Blue glass or acrylic beads
- Glass cutter
- Tweezers
- Safety glasses
- Mosaic cutters
- Running pliers
- Glass grinder (optional)
- Clear water resistant adhesive
- Black grout
- Latex additive
- Mixing bowl, spoon, sponge, old rags and a marker
How to Make Your Very Own DIY Mosaic Lamp
Below you’ll find the step-by-step instructions on how to make your own beautiful mosaic lamp at home. Let’s get started!
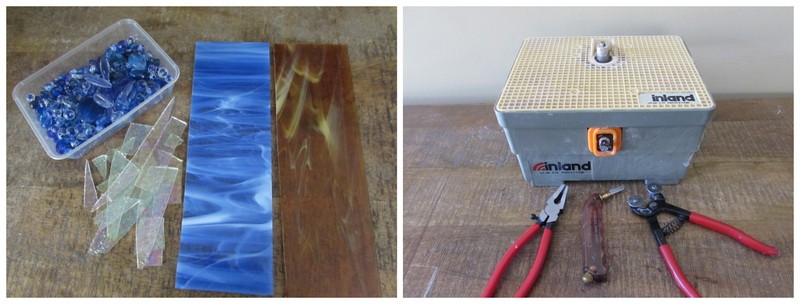
Step 1: Gather Your Materials and Tools
Before you get started, you want to make sure you have everything you need close by in one area. For this particular lamp project, I decided to use a rectangular desk lamp that I bought at my local home improvement store as my base, but feel free to use whatever base you have or would like!
*Tip: Before getting started, always take a look at your glass with light passing through it so that you know what it will look like when lit.
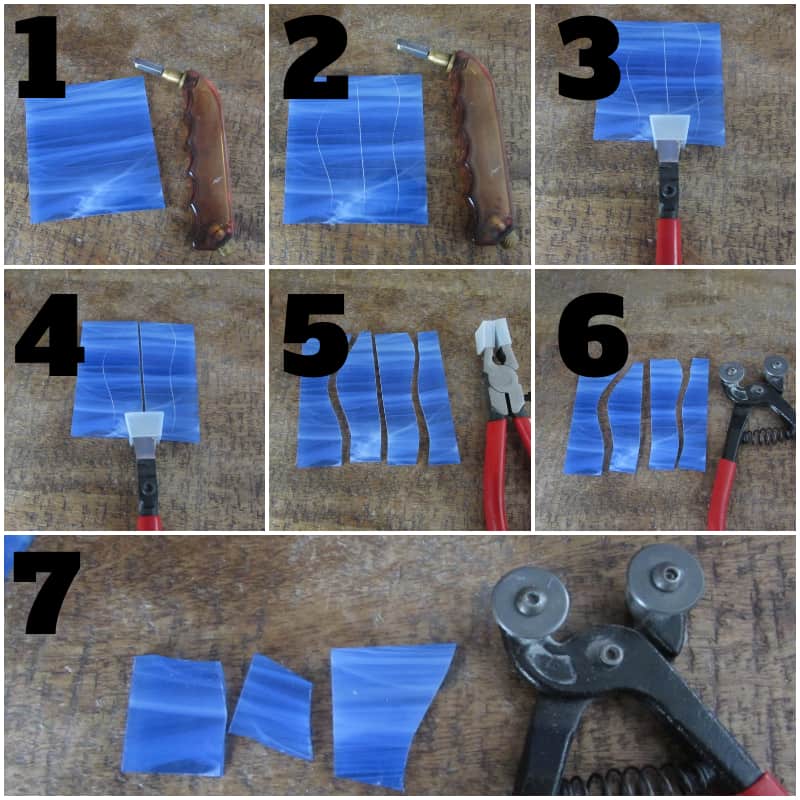
Step 2: Cut Your Glass
First we’ll start by creating irregular shapes with our sheets of stained glass. In this project, since we are using completely abstract shapes, there is no need to outline or trace any pattern onto your base.
If you are new to creating mosaics and need to learn how to cut glass properly, check out my post on how to cut stained glass here.
First start out by cutting your first color of glass. You can choose to cut the pieces small, large, or somewhere in between. The idea is to have a variety of irregular shapes to work with to create a dynamic abstract design.
After you’ve scored and cut your first color of glass, repeat the process for your second color. If you chose to use a third color, then repeat the process for this as well. In this project, I just used leftover scrap glass I had already from a previous project.
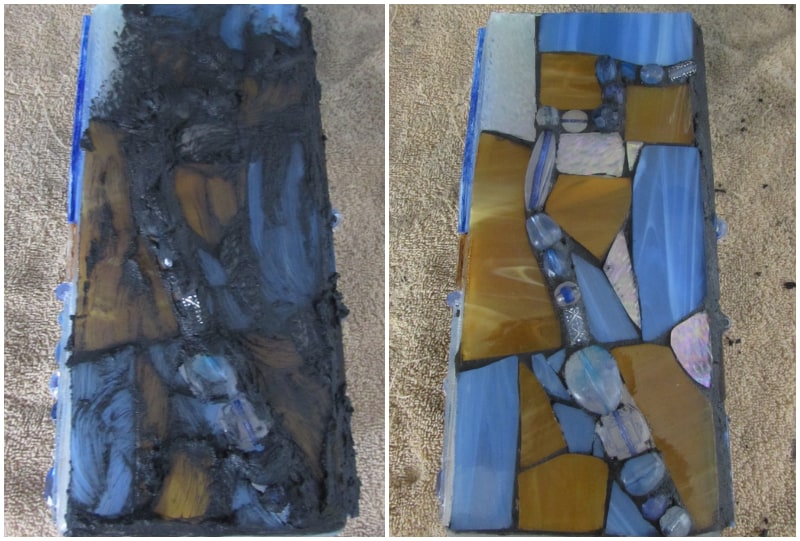
Step 3: Glue Your Glass Onto Your Base
Now we’re going to begin to glue our mix of irregular cut glass pieces onto the base. In this project, I also decided to use beads! You can choose to use whatever material used like to create a different texture throughout the piece, or you can choose to stick with your stained glass.
Intermixing different types of glass such as opaque and translucent is another great way to add in some contrast through your design, and comes out looking very pretty!
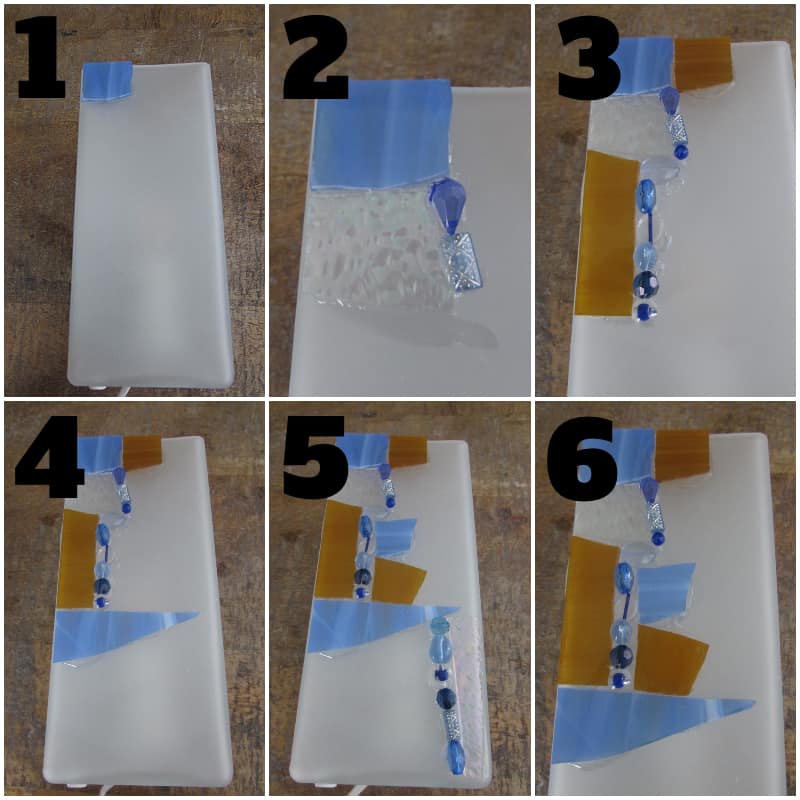
You are in complete control of your design here. Just play around by laying different pieces in different ways on your base and see what looks most pleasing to you. Just have fun with it! 🙂
*Tip: As your gluing on all of these pieces, you will notice excess glue will seap out around the glass. As the glue dries, it becomes rubber-like, and you will easily be able to remove it with your tweezers.
What to Do When a Piece Doesn’t Fit
Since this is not a preplanned design, you will often come into contact with pieces that are slightly too long or too wide and just not the appropriate shape for where you intend to put them.
To remedy this, there is a simple process:
- Place the piece where you’d like it to fit.
- Mark where the piece needs to be cut.
- Either A) cut it with your mosaic cutters if it’s small enough or B) score the glass on the marking line and break it with your pliers.
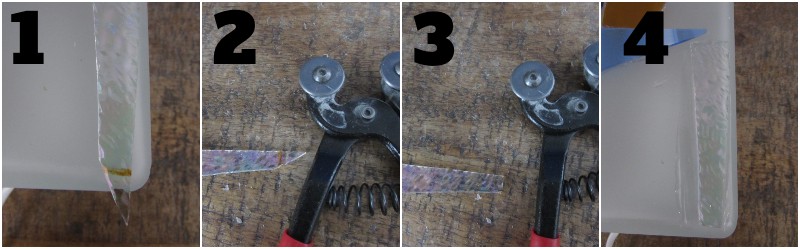
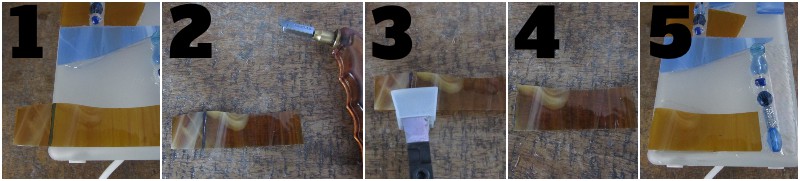
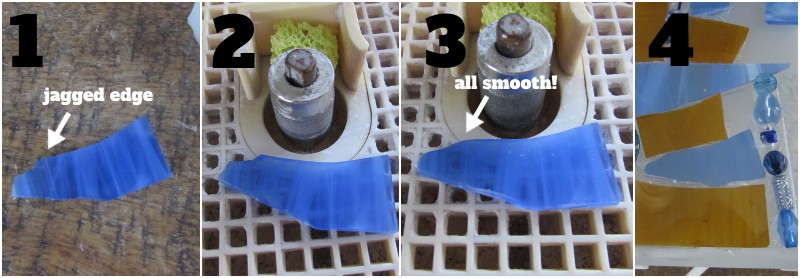
After you cut or break your piece to fit, you also have the option to take it to your grinder to smooth out the edges before gluing it in. This can be helpful if you cut a piece to fit and the edges come out very jagged and irregular.
Step 4: Complete Your First Side
Continue to mark, fit, cut, and glue the rest of your pieces to complete your first side. By now, it should be starting to come together and resemble the abstract design that you have created.
So you’ll basically just be continuing to fit pieces, and cut and smooth them if needed until you have covered the entire surface.
And then your first side is complete!
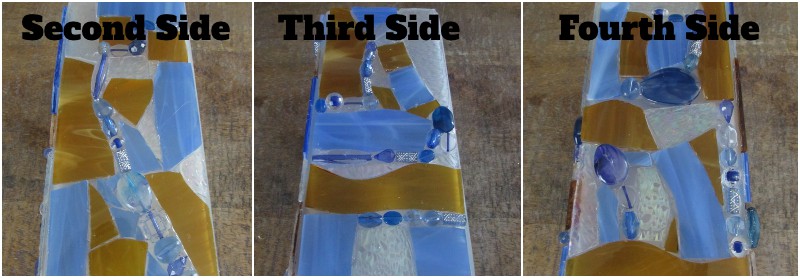
Step 5: Complete the Other Three Sides
Now repeat this process on the other three sides! Remember, have fun with the design. The sides do not have to match in design; I think the designs being so different is what makes projects like this so unique!
Now, Time to Grout!
You’ve gotten through the first phase of your mosaic lamp project, now you’re more than halfway done! The last portion of creating your lamp is simply prepping your lamp to be grouted, preparing your grouting mixture, applying the grout to each side, and cleaning each side.
If you have never grouted before, check out my post on how to grout your DIY mosaics here.
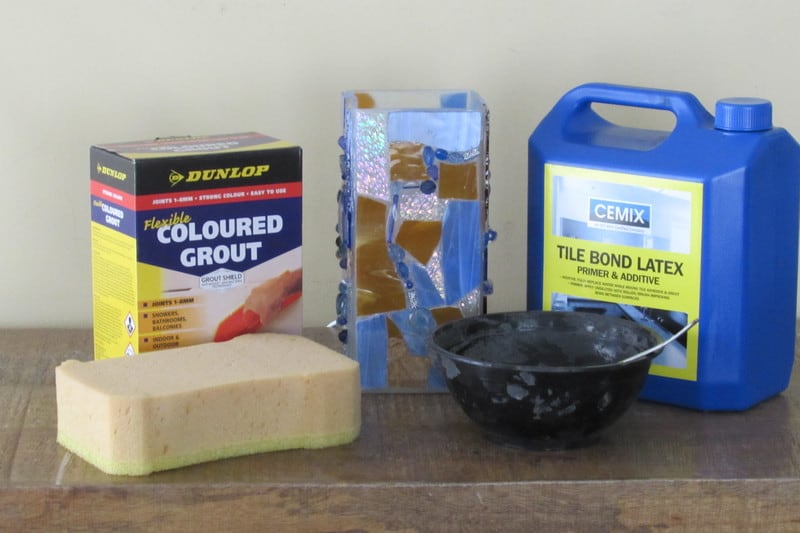
Step 6: Gather Your Grouting Materials
To grout, all you’ll need is your grout, latex additive, painter’s tape, mixing bowl, spoon, cloth, sponge, and water. And of course your project :). I would recommend covering the surface you are going to grout on either with newspaper or old rags to prevent any of the grout from staining your surface.
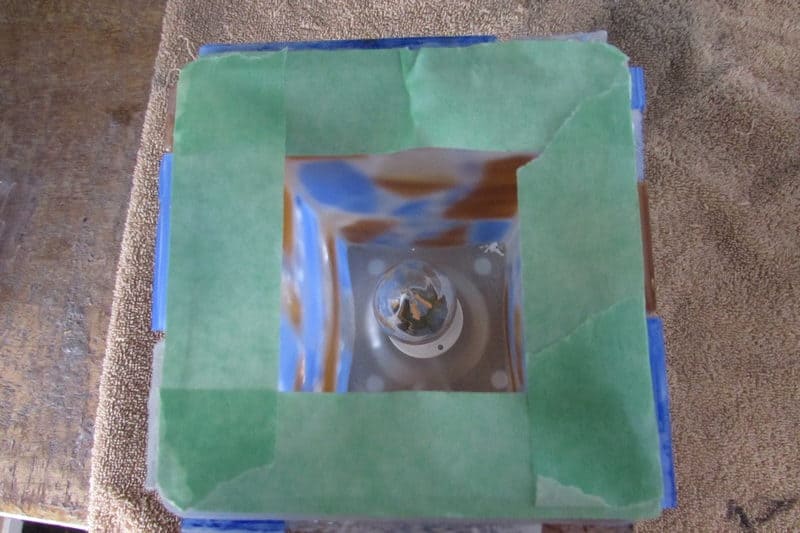
Step 7: Prepare Your Lamp to Be Grouted
You want to make sure you’re protecting your edges from the grout. This includes any edge that is not being mosaic’d. This not only created a nice clean edge, but also prevents grout from crumbling into your lamp if your base is an open design like mine is.
You can do this with cheap painter’s tape, or masking tape if that’s what you have on hand. Just apply the tape to the edges as you would if you were painting the trim on a wall. This will create a nice protective border.
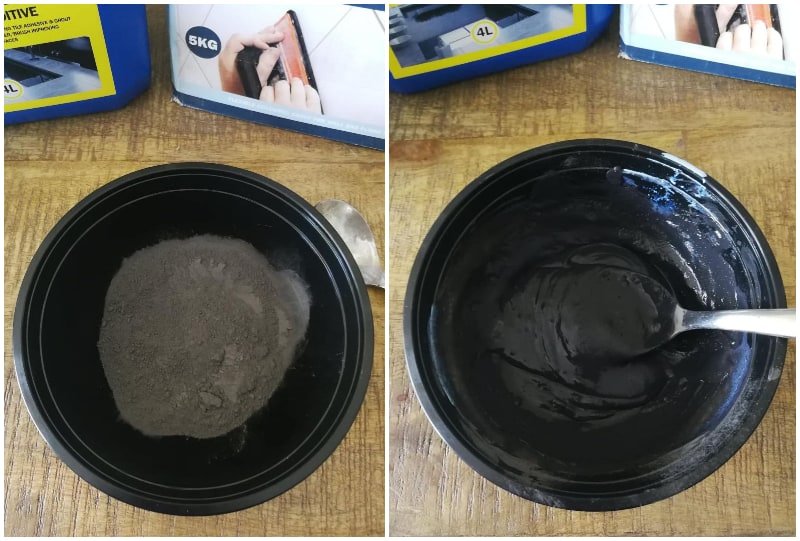
Step 8: Mix, Apply, and Clean Off Your Excess Grout
Now you’re ready for the actual grouting process. First, you want to mix your grout. Make sure you mix your grout with enough latex additive to achieve the consistency of oily peanut butter.
Slowly pour the additive into the dry grout mix, routinely mixing them with a spoon and checking the consistency. You may have to add more grout in if you accidentally make it too thin.
Once your grout is mixed to the correct consistency, begin to cover the surface of your lamp with some of the grout mixture. You want to make sure you cover the entire side and get grout into every crevice. Don’t be afraid to use too much grout as you’re just going to be cleaning it off the surface.
After you’ve covered the side completely, take your sponge and wet it, squeezing out the majority of the water, and wipe it over the surface of your lamp, removing any excess grout.
After you’ve wiped the majority of the grout off with your sponge, finish cleaning it with a soft cloth towel or rag.
Continue to grout and clean the other three sides. Make sure you are grouting and cleaning one side at a time to prevent the grout from the excess drying on the surface. Once it dries, it’s a real pain in the butt to get off!
Step 9: Clean Off Excess Glue and Replace with Grout
Once your entire piece is grouted, turn the light on so you can inspect for any areas where glue has dried, prevent grout from seaping in. Use your tweezers to remove the dried up glue, and then regrout that area and go through the cleaning process again, repeating this process until you’ve gotten all of the spots.
This part can be a bit time consuming and tedious, but it is well worth it to achieve a finished and professional looking lamp!
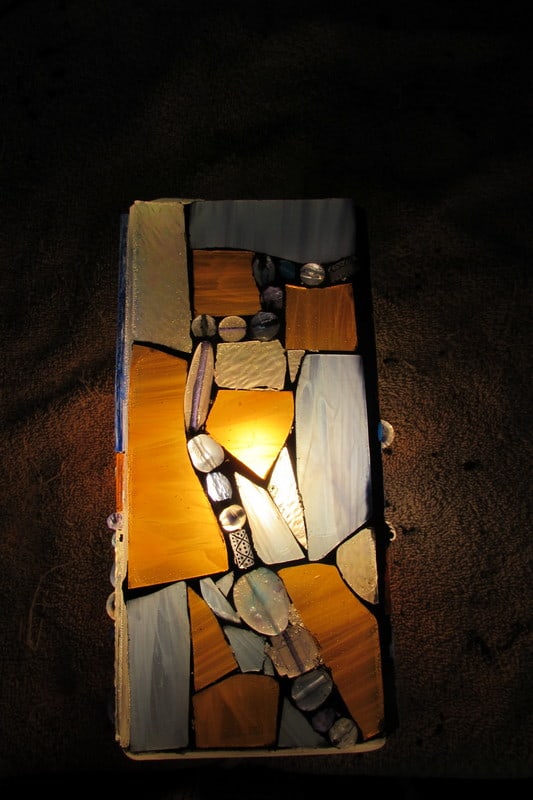
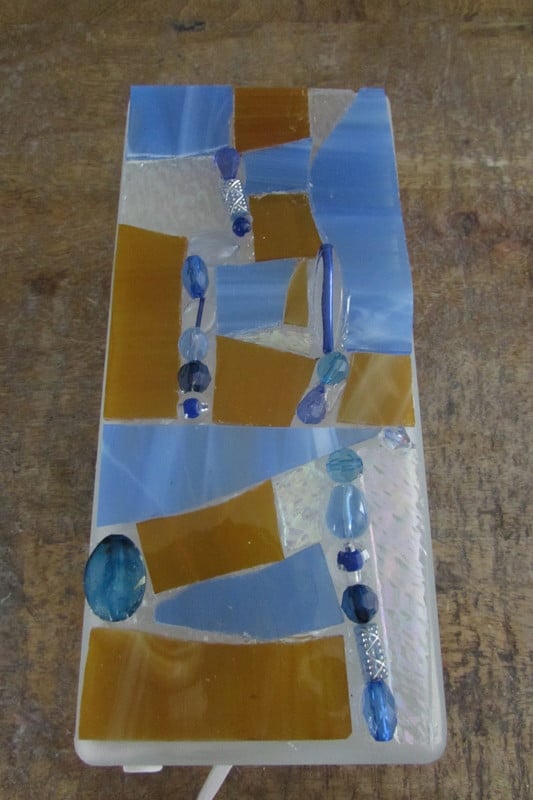
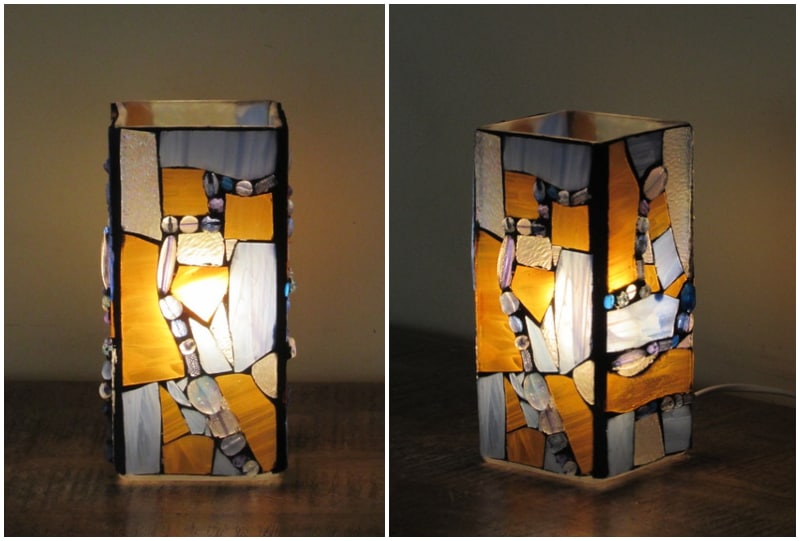
And oila! You’ve just completed your very own gorgeous, abstract DIY mosaic lamp!
Here’s what my finished lamp looks like! Once you’ve cleaned it, you can light it up right away, the grout dries very quickly! If you made your mosaic lamp to go outdoors, I would wait at least 1.5-2 hours before exposing the lamp to the elements outside.
I hope you enjoyed making this! The fun thing about abstract mosaic design is you never know how it’s going to end up until it’s finished! I’ve never made an abstract design that honestly didn’t end up looking cool. Since you’re combining so many different beautiful colors and materials, you really can’t go wrong!
A Few tips:
- Make certain to completely cover each piece of glass with your clear water resistant glue to avoid any seepage of grout underneath the glass.
- Clean the excess glue as you go to save time. Allow the glue to dry slightly and then remove with a pair of tweezers as the glue dries to a rubbery consistency.
- Smooth grout with your fingertip along each connecting edge of your lamp to achieve a nice finished edge.
- Make certain to always wear your safety goggles when working with glass and especially when grinding glass on the glass grinder.

Danielle is the mosaic artist and teacher behind Mosaics Mostly. She has been creating mosaics for over 25 years, and has taught hundreds of people to create their very own mosaic DIY projects at home. She has been featured in multiple galleries and magazines, and has even had her own beginner mosaics book published! She loves crafts, and is always working on something new!

Pretty insightful submit. Never thought that it was this simple after all. I had spent a good deal of my time looking for someone to explain this topic clearly and you’re the only 1 that ever did that. Kudos to you! Keep it up
Thanks so much:) Please enjoy the site!