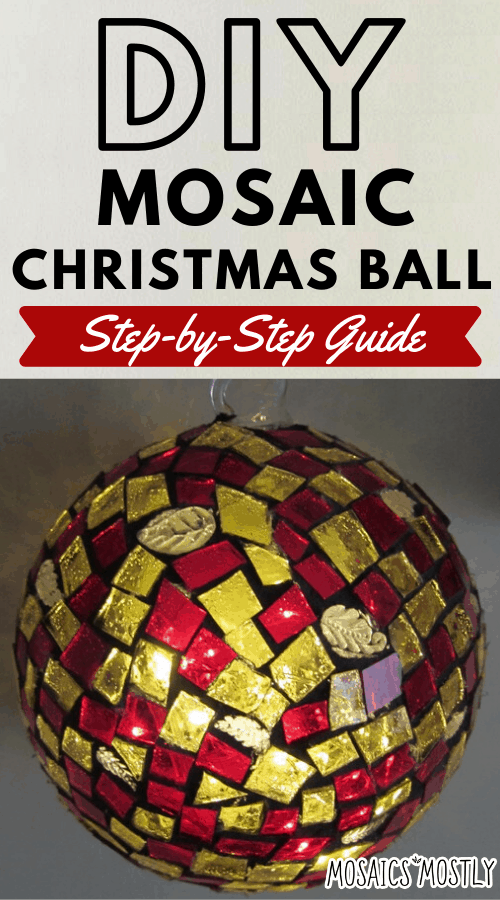
Who doesn’t love decorating during the Christmas season! Those lovely warm lights that you snuggle up to while sipping on mulled wine and spiked eggnog…ah…my favorite time of year!
It’s also the season for giving and times are tight but we all still love to see that smile on our loved ones face when they open something very special that we’ve picked out for them. Why not, instead of picking something out for them, make something for them.
This project is about making something very special for someone you care about. The amazing part of this project is that it costs so little to create and is also quite simple to make but it is amazingly elegant.
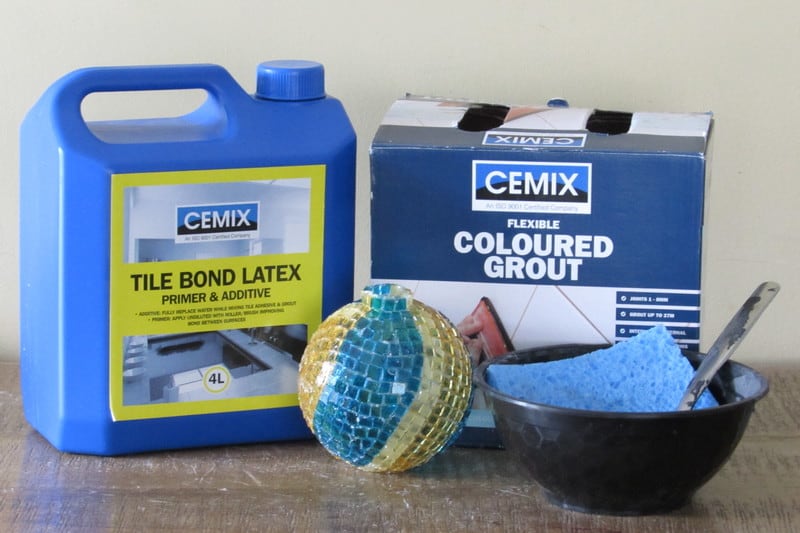
Materials Needed for DIY Mosaic Christmas Ball
- Clear glass Christmas ball that you can find at any craft store all through the year.
- Cork battery operated fairy lights that can be purchased off Amazon for approximately $1 a piece.
- 3 different shades of scrap stained glass. For this project I used a translucent blue and amber and a semi-translucent tan glass.
- Glass cutter
- Running pliers
- Mosaic cutter
- Safety glasses
- Clear water resistant adhesive
- Black grout
- Latex additive
- Mixing bowl, spoon, sponge and some old rags.
- Dish or box to stabilize the ball as you rotate it to work on it.
How to Make Your Very Own DIY Mosaic Christmas Ball
Below you’ll find the step-by-step instructions on how to make your own beautiful mosaic Christmas Ball at home. Let’s get started!
Step 1: Gather Your Materials and Tools
![]()
For this particular project, I decided to use turquoise translucent glass and two different shades of amber translucent and semi-translucent glass.
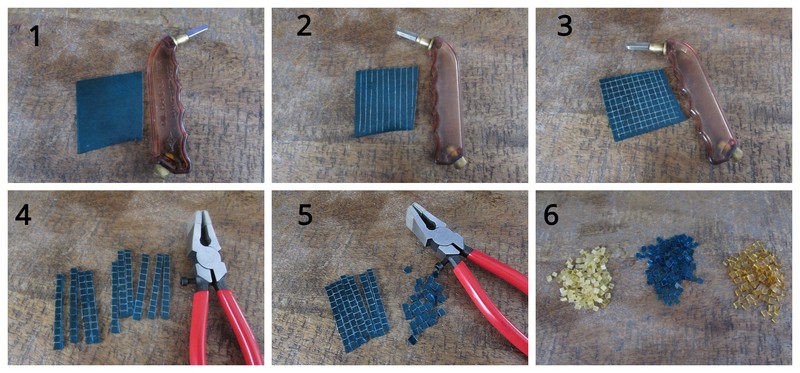
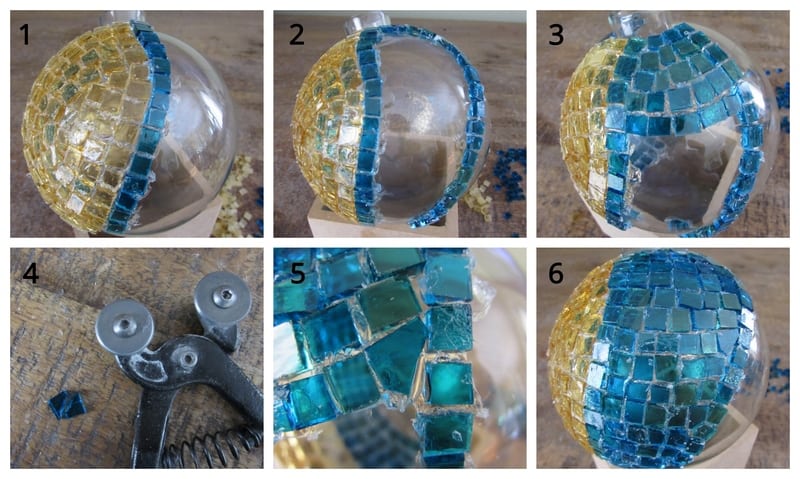
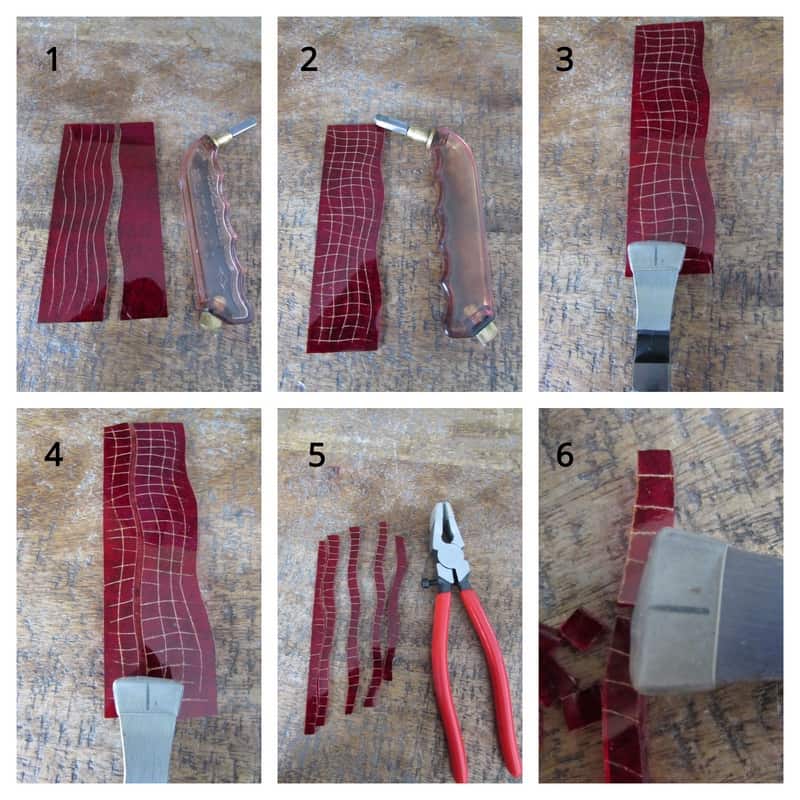
Step 2: Cut Your Glass
For this project, I’ll be covering the glass ball with small irregular squares that I will create by scoring each piece of glass first vertically and then horizontally creating a grid basically. If you’re new to creating stained glass mosaics and need to learn how to cut glass properly, check out my post on how to cut stained glass here.
Once the glass is scored vertically and horizontally, break out each square with your running pliers by first breaking out all your vertical score lines and then breaking out all of your horizontal score lines, leaving you with many small irregular squares. Repeat this process for each of your three different colors of glass.
*Tip: Make certain when you’re scoring your glass that you move the glass cutter across the surface of the glass in only one direction. If you score the glass in a back and forth motion with your cutter you will confuse the glass and the ability to break your scored lines easily with your running pliers will most probably not be possible.
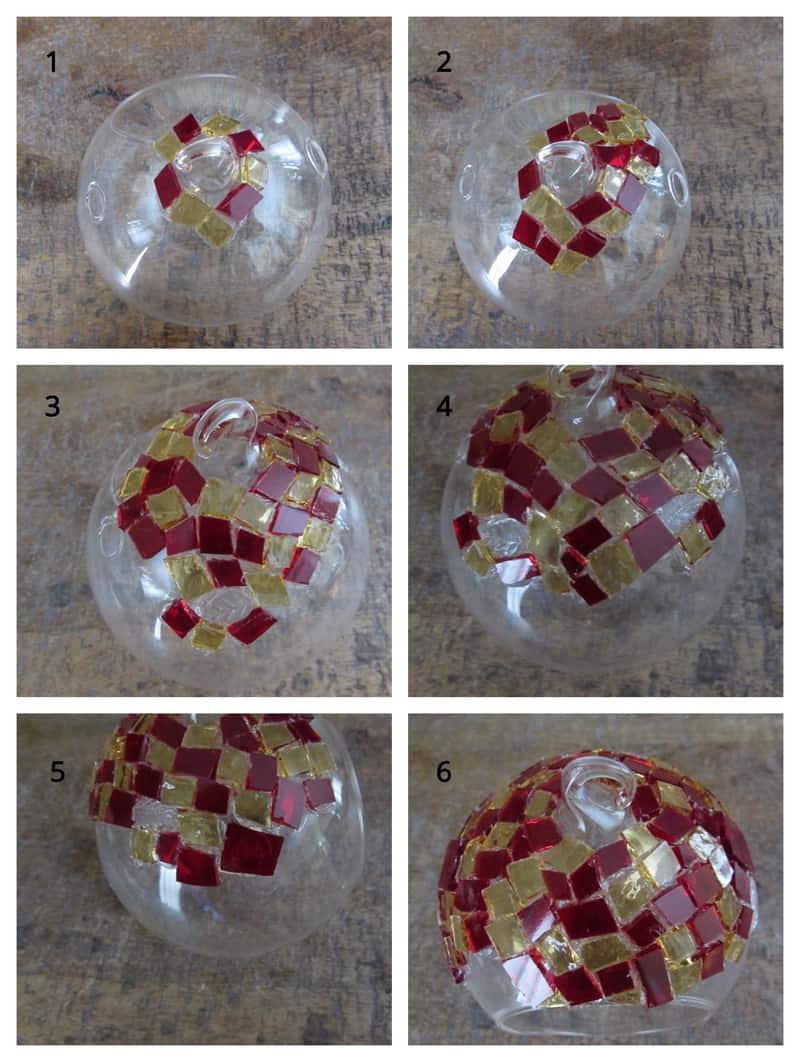
Step 3: Glue Your Glass Onto Your Base
Now we’ll begin to glue our 3 different colored glass squares on to the glass ball. I’ve decided to create sections of each color of glass instead of just randomly intermixing them…but feel free to do whatever you’d like! It’s your Christmas ball!
I’ll start with a blue section first. Create an exterior curved line out of the blue squares. This design will be flowing, not rigid.
This first blue section will contain four rows. Simply follow the pattern that you’re creating!
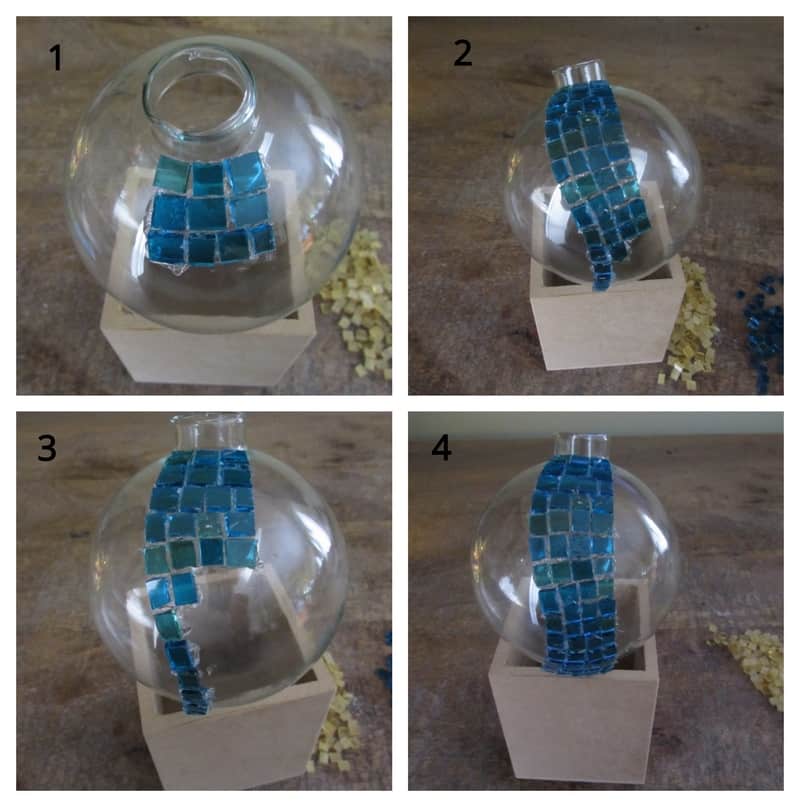
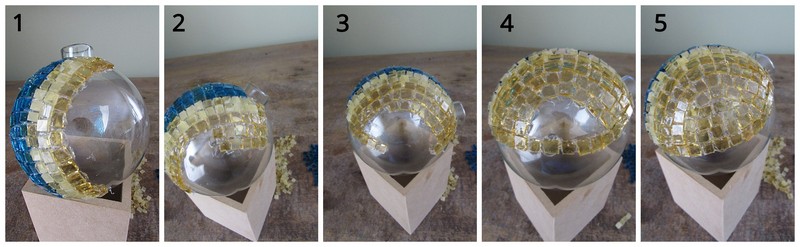
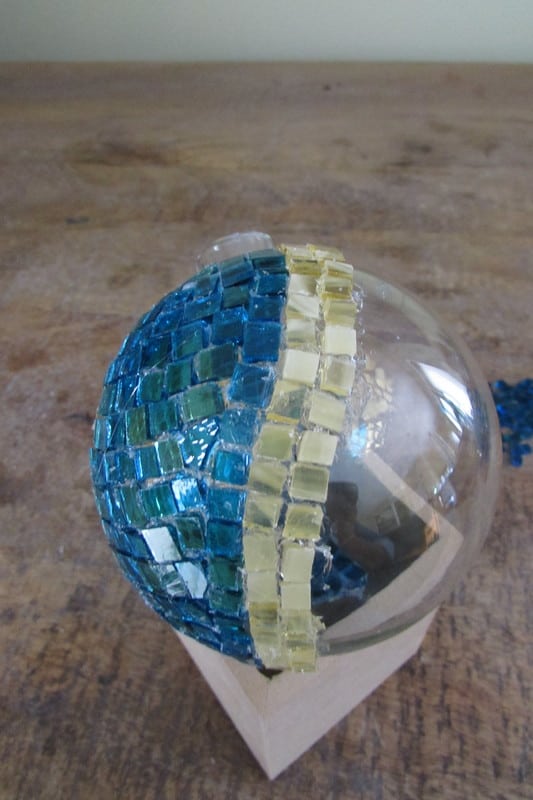
The semi-translucent amber glass will be used as a kind of border around the other two colors. Glue on a row of amber glass hugging your blue section. Complete a second row of amber glass hugging the row you just completed. Border section complete!

Next complete your translucent amber section. Define a border for you to work toward. Then simply fill it in.
And now complete your second blue section. Again, create a border for you to work toward filling in. If you run into an awkward space to fill, simply cut a piece to fit with your mosaic cutters and glue it in! 2nd blue section completed.
Glue another semi-translucent amber border on next to the blue section you just completed.
Complete another translucent amber section next. I made this section 4 rows wide following the curve of my border section.

Now to complete the last section of your ball. Cover the remaining section with your blue glass squares. Work on your final blue section in coordination with your final semi-translucent border section. This makes everything piece together much easier. When necessary, cut irregular pieces with your mosaic cutter to fit. Complete the bottom of your ball by connecting each section however you see fit.
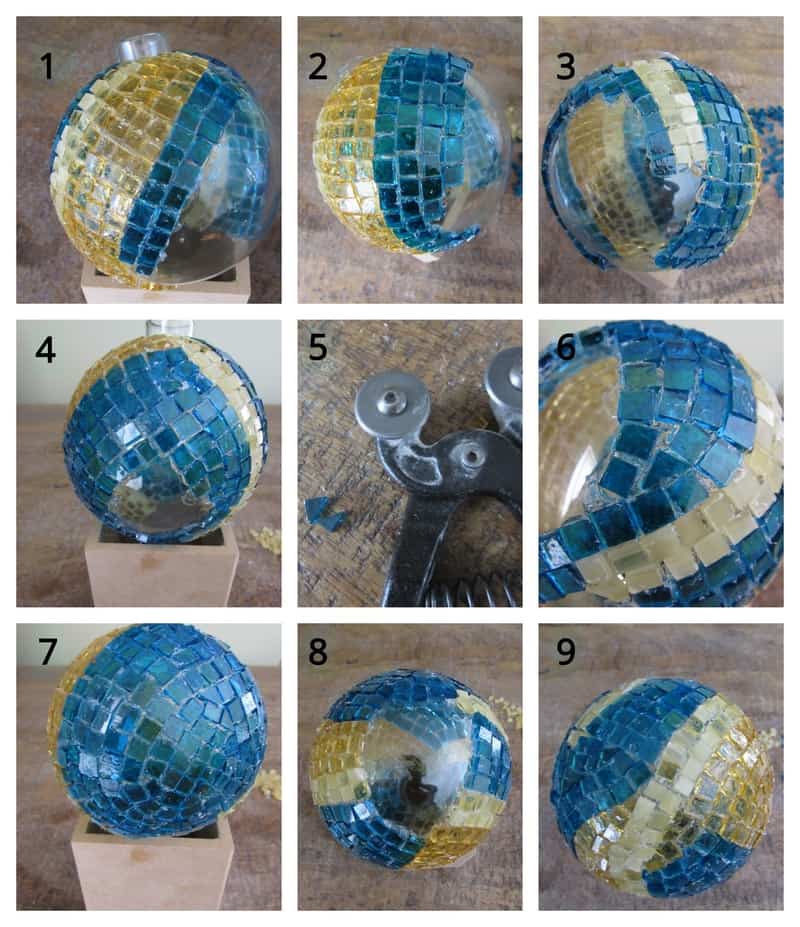
And last but not least! Cover the top rim with individual pieces of glass matching the color of each section.
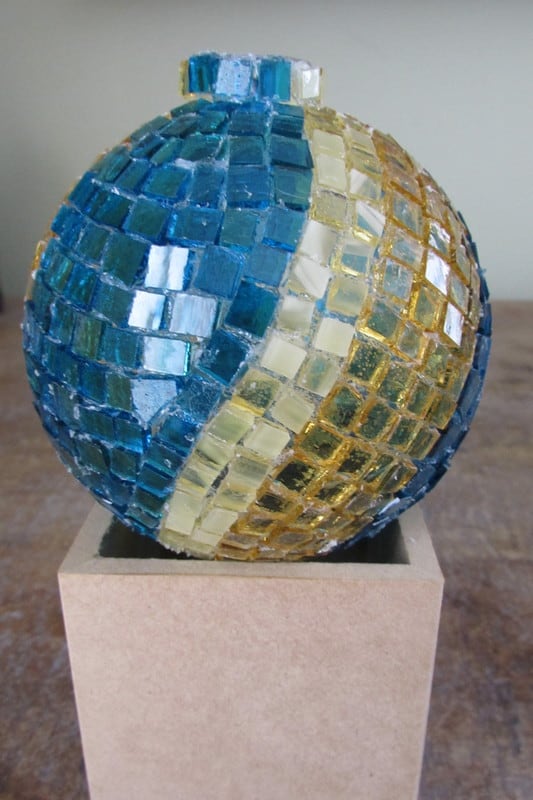
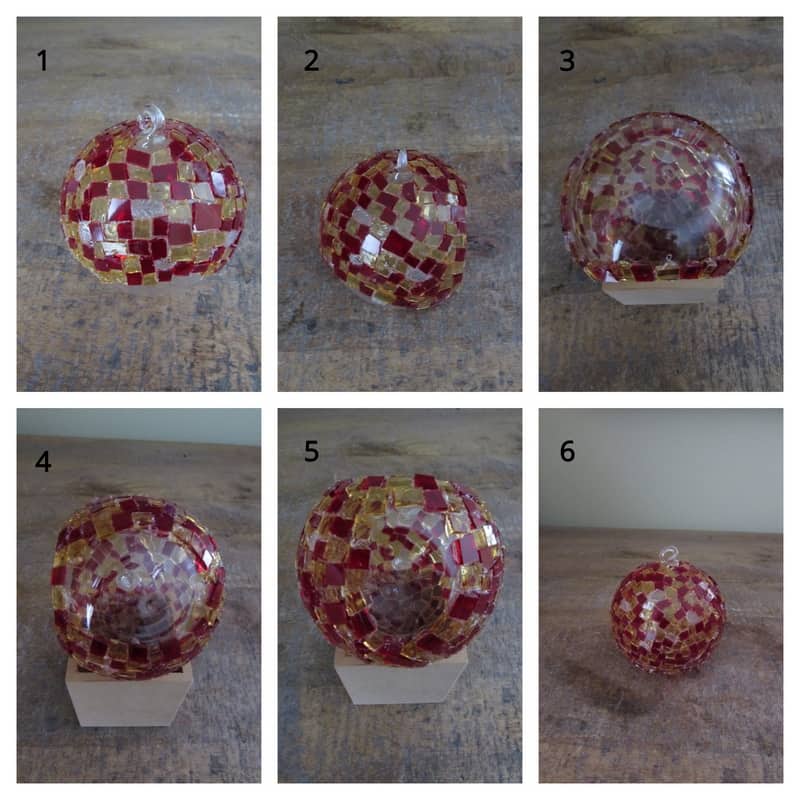
Now, Time to grout!
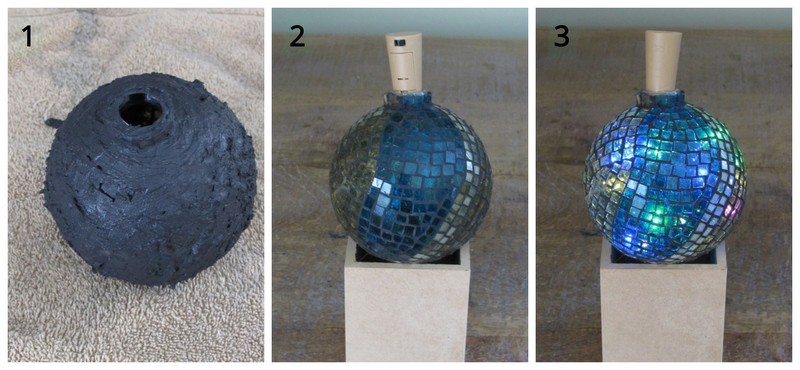
You’ve fully covered your ball with your mosaic glass pieces. You’re almost ready to light it up! But first, it needs to be grouted. We need to prepare the grout mixture, apply the grout and finally, clean the ball.
If you have never grouted before, check out my post on how to grout your DIY mosaics here.
Step 4: Gather Your Grouting Materials
To grout your ball, all you’ll need is your grout, latex additive, mixing bowl, spoon, sponge, old cloths or towels and water. Oh yeah…and your stained glass mosaic ball:) Always cover the surface you’ll be grouting on with old rags to prevent the grout that you might spill (and trust me you will spill it!) from staining your surface.
Step 5: Mix, Apply and Clean Off Your Grout
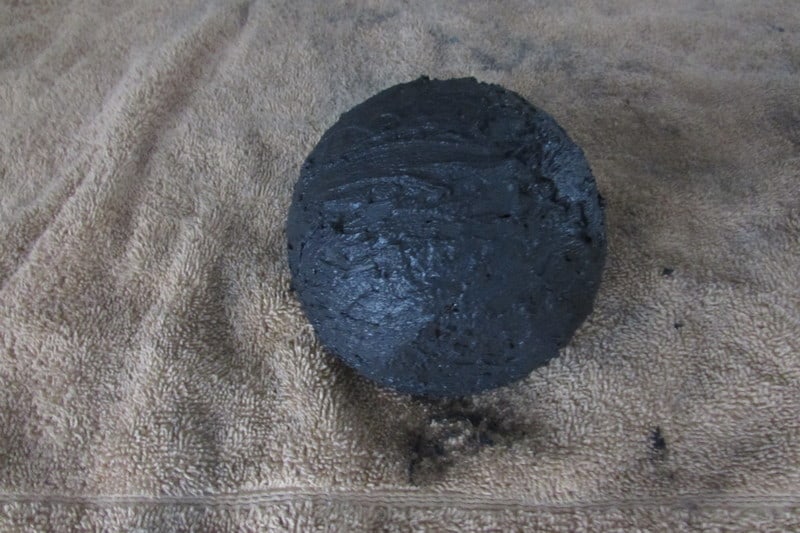
It’s time to grout! First you’re going to create your grout mixture that will be applied all over the surface of the ball by mixing the liquid latex additive into the dry grout. You’re going to want to slowly add the latex additive to the dry grout mixture until you reach the consistency of oily peanut butter. If by chance you make the mixture too thin, simply add more dry grout.

Cover the entire ball with grout being careful not to get grout inside your ball. You can block the hole if you’d like with a cloth or whatever you’d like. When the ball is completely covered with grout, take your wet sponge that has been squeezed out so that it’s not dripping wet, and begin cleaning all the excess grout off of your ball. Once you cleaned the majority of the excess grout off, begin cleaning the surface with your old towels or rags.
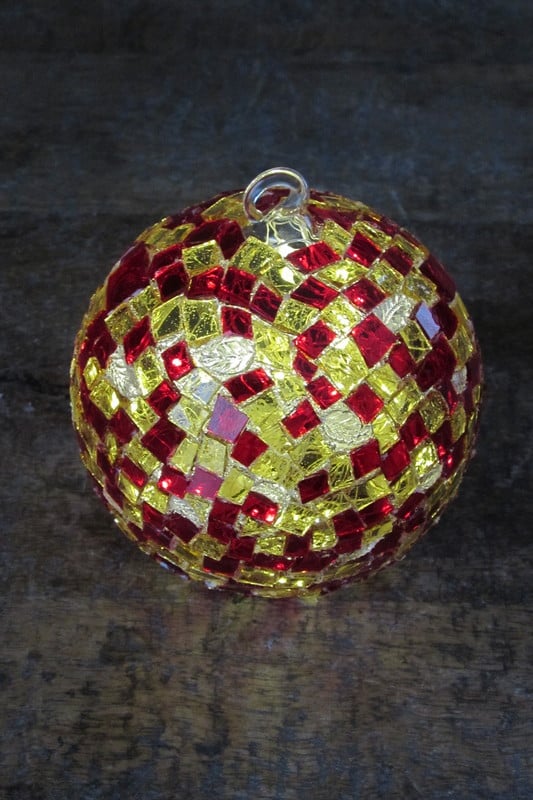
After your ball is cleaned, light it up! You’re doing this for 2 reasons at this point, (1) to see how lovely your ball looks lit and (2) to remove any glue that is between any two pieces of glass and replacing it with grout. This part of the cleaning process might seem a bit tedious, but trust me, it’s well worth it to achieved a polished and professional looking stained glass mosaic piece.
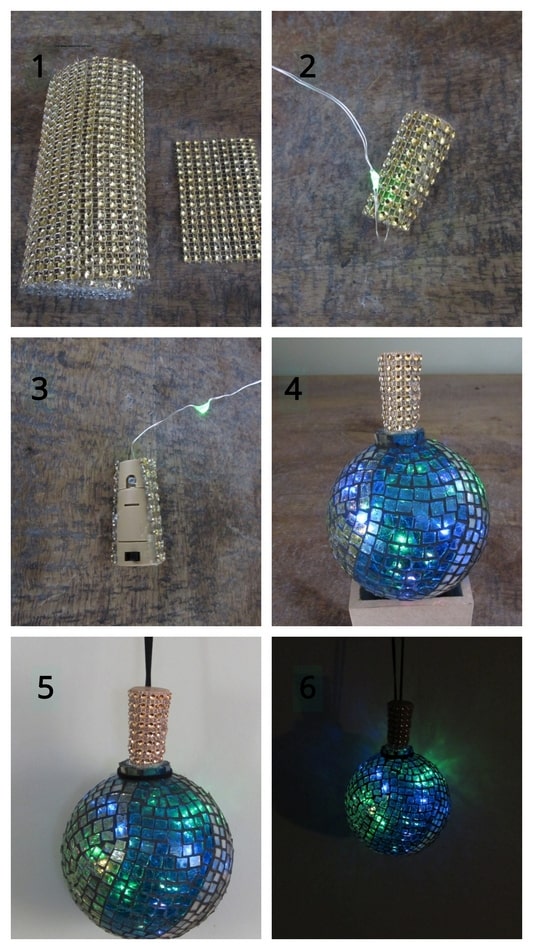
Step 6: Create a Decorative Cork Topper for Your Ball
Time to do something decorative to make the cork light look a bit more festive! I’ve selected some gold beaded mesh fabric that I will glue on to the cork. Make sure to leave the back uncovered when you glue the piece of gold beaded mesh on the cork base. This way you can turn the lights on and off and can replace the batteries as needed. I then tied some black velvet cord around the balls neck and it’s ready for hanging!
Glass Terrarium Christmas Ball
I found another glass base to use for a Christmas ball! it’s a mini hanging glass terrarium. Again I found them on Amazon for around $5 each. The front of the terrarium has a cut out hole that is perfect to fit your strand of battery operated fairy lights in. So the back of the terrarium becomes the front of the Christmas ball.
Materials Needed For This DIY Mosaic Christmas Ball
- Small glass terrarium
- Transparent red and gold stained glass
- Small glass leaves
- Strand of battery operated fairy lights
- Mosaic cutters
- Glass cutter
- Running pliers
- Clear water resistant adhesive
- Black grout
- Latex additive
- Mixing bowl, spoon, sponge and old towels or rags
- Safety glasses
- String
Step 1: Gather Your Materials and Tools
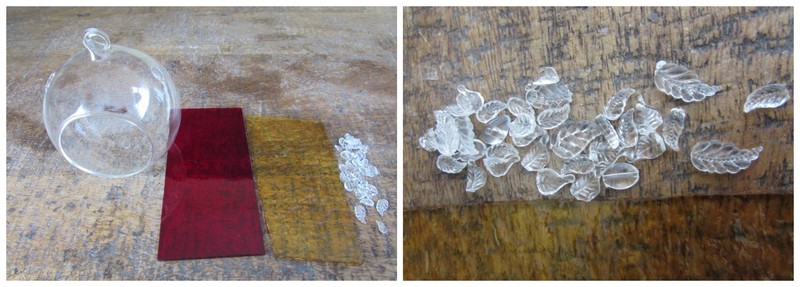
i decided to do this ball in traditional red and gold translucent glass. I found these lovely glass leaves that i will disperse within the design randomly.
Step 2: Cut Your Glass
Firstly, score the red glass in narrow vertical wavy lines with your glass cutter. The idea is to create some irregular shaped pieces about the same size as the glass leaves. Then score the glass horizontally creating irregular shaped squares. Break out all the irregular squares with your running pliers. Repeat this process with your gold glass.
Step 3: Glue Your Glass Onto Your Base
Begin by gluing on pieces of your red and gold glass. Randomly disperse each color. Glue on your first and second glass leaf and continue gluing on your red and gold pieces around the leaves. Glue a slightly larger red piece over one of the watering hole in the terrarium. When necessary, use your mosaic cutters to cut thin slivers of glass to fit to the edge of the terrarium opening.
Continue gluing on pieces randomly all over your surface until it’s completely covered.
This is what your Christmas ball looks like prior to grouting it and lit. It’s kind of gorgeous without grouting! But it will look more completed once it is grouted and there is that contrast between the black grout lines and your lovely glass.
Step 4: Grouting and Cleaning the Excess Grout Off Your Ball
After preparing the grout mixture and achieving the proper consistency, completely cover the ball with grout. Use a moistened sponge to clean the excess grout off and then continue cleaning with your towels or rags. Remember to light your ball up and look for areas where glue has dried between the pieces of glass and needs to be removed so that you can replace it with grout.
Your lovely mosaic Christmas ball is now ready to be hung and enjoyed for many Christmas’ to come!


Danielle is the mosaic artist and teacher behind Mosaics Mostly. She has been creating mosaics for over 25 years, and has taught hundreds of people to create their very own mosaic DIY projects at home. She has been featured in multiple galleries and magazines, and has even had her own beginner mosaics book published! She loves crafts, and is always working on something new!
