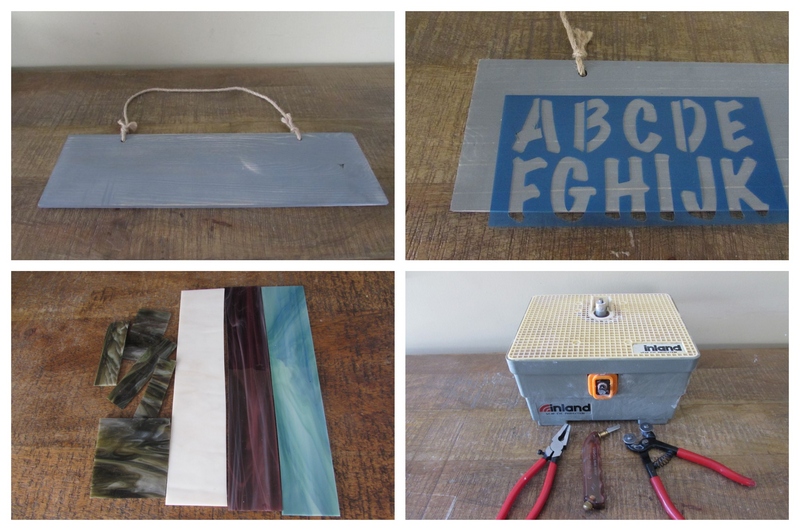
I picked this sign board up at a craft shop for a few dollars. Think of the variety of creative options this simple board provides you with! Phrases, names, numbers, random designs for kitchens or baby’s rooms and the list goes on and on. My daughter got engaged last year to my perfect future son in law and I decided to make them a first date anniversary present for their apartment. I’ve selected scrap stained glass colors based on the color scheme of their apartment and I’ve decided use their names on the sign.

I then had to make a decision about how to use the glass in the design and what font I should use for the letters of their names. I searched through tons of stencils until I found the font I wanted. It was kind of gothic looking so I decided I would use random cuts of the 4 colors of scrap glass I had chosen and attempt to create a sign that resembled a gothic stained glass window. I’ll be using black grout to grout the piece to make the joints look like the leaded and soldered joints of a stained glass window. So…let’s get started!
*Tip: Scrap stained glass can be purchased by the pound or individual bags at most stained glass shops. Lots of craft stores also sell bags of scrap glass. Amazon also has a huge selection.
Materials Needed for DIY Mosaic House Sign
- A hanging sign board
- Letter stencils
- Marker
- 4 different colors of scrap stained glass. For this project, I’ve selected plum, light blue, green and pale pink
- Glass cutter
- Mosaic cutter
- Running pliers
- Glass grinder
- Clear water resistant adhesive
- Black grout
- Latex additive
- Mixing bowl, sponge, spoon, old rags and old towels
- Safety glasses
- Garden gloves
How to Make Your Own DIY Mosaic House Sign
Below you’ll find my step-by-step instructions on how to make your very own lovely mosaic house sign at home.
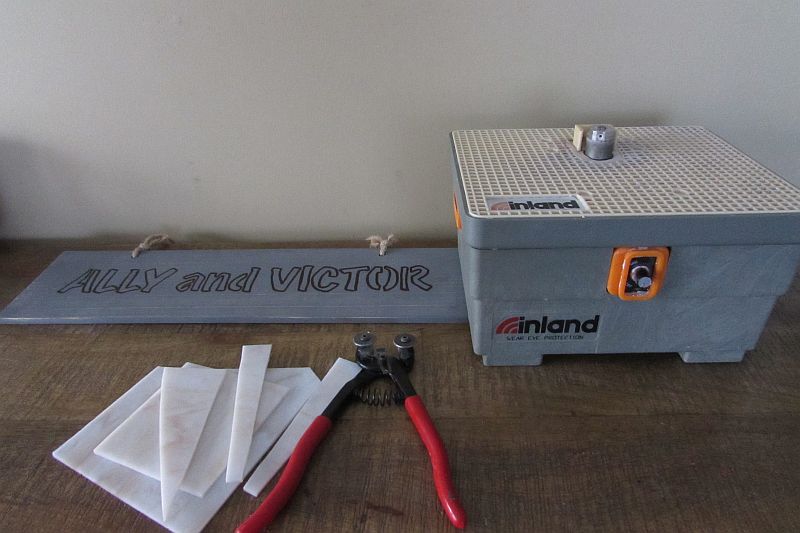
Step 1: Gather Your Materials and Tools
For this project I’ll be using four different colors of scrap stained glass. The white I’ll use for the letters, the other three colors for the background.
I have my tools for cutting and shaping and I found just the right size letter stencil for my wooden sign board. So, let’s begin!
*Tip: Glass grinders, running pliers and mosaic cutters can all be purchased at you local stained glass shop but can also be purchased off Amazon.
Step 2: Trace Your Letters on to Your Sign Board
Take the stencil and begin tracing the letters of whatever names you decide to use. Trace the letters in pencil first so that you can erase them if need be while attempting to center the names on the board. Once you have them centered, then retrace in permanent marker.

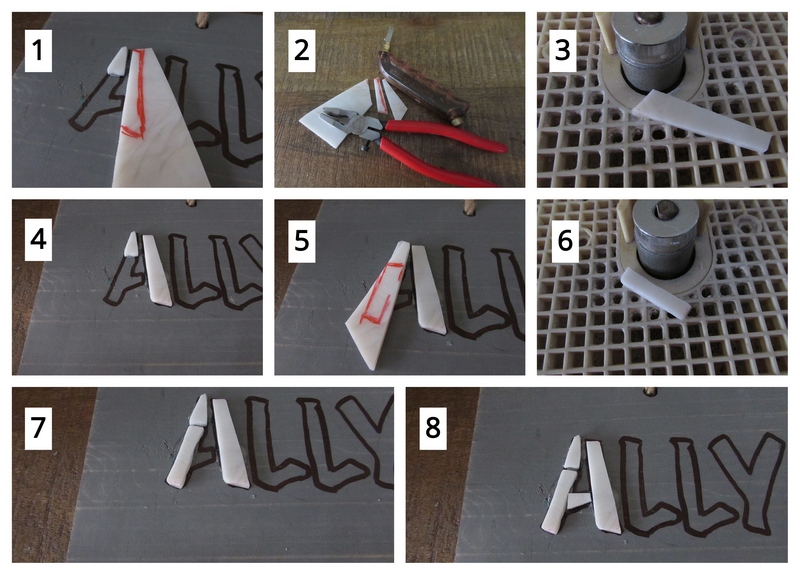
Step 3: Cut Glass to Form Your Letters and Glue in Place
Begin to cut all the pieces necessary for the letters. It’s simply easier to complete all the letters first before completing the background. This allows you to be precise with gluing on each piece to form you letters without any background pieces interfering with the shape of each letter.
Mark the piece for the tip of the A. Cut the piece with your mosaic cutters. The tip of the piece needs to be flattened a bit so take it to your glass grinder and grind the very tip off of the piece. Glue the piece in place.
If you’re new to creating mosaics and need to learn how to cut glass properly, check out my post on how to cut stained glass here.
Also, If you’ve never used a glass grinder before, check out my post on how to sculpt glass on a glass grinder here.

Mark a piece for the right leg of the A. Use your glass cutter to score the glass along your mark and then break out the score with your running pliers. Then take the piece to the glass grinder and smooth all the edges out. Glue the piece in place.
Next, mark a piece for the left leg of the A. Score the glass with your glass cutter and then break the score with your running pliers. Take the piece again to the glass grinder and smooth out all the edges before gluing the piece in place.
Glue in a piece for the center portion of the A an your A is now complete.
This process will need to be completed for each of the mosaic letters.


*Tip: Taking the time to define the exact shape of each of your letters is the most important part of this project. So defining your curves with your glass grinder makes all the difference.
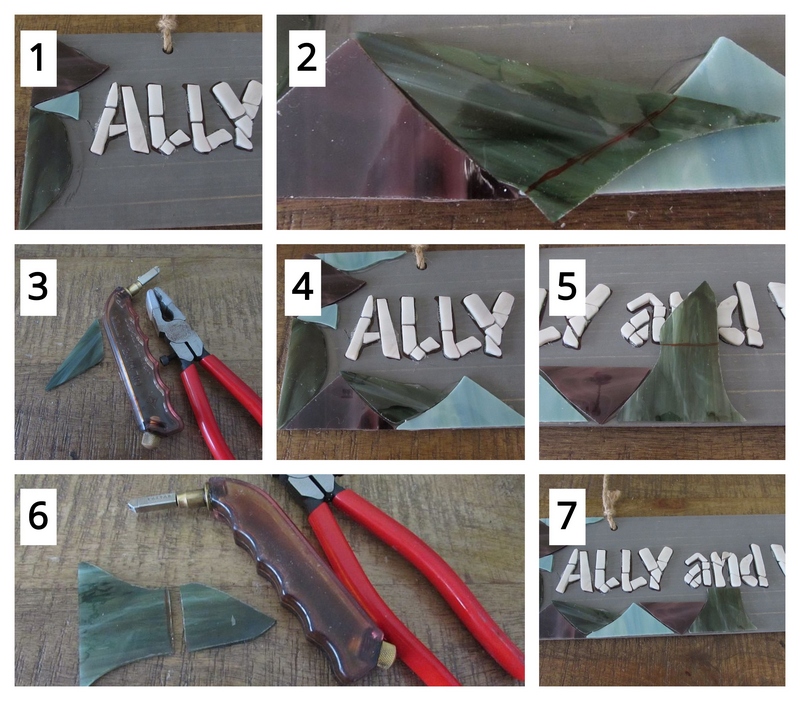
Step 4: Cut Glass for Your Background and Glue in Place
Gather your three colors of glass for your background. Score the three pieces irregularly with your glass cutter and break out the scores with your running pliers. You’re wanting some interesting shapes to work with for your background.
*Tip: A pistol grip glass cutter is much easier to control than the less expensive glass cutters that you can purchase at your home improvement stores. It might be a bit more expensive, but the additional control you have with it is well worth the investment.

Begin gluing on the 3 different shades of background glass around the border intermixing the colors. Mark pieces to fit.Then score the marked pieces with your glass cutter and break the scores with your running pliers. Glue pieces in place
Continue marking, cutting and gluing on the border pieces until the border is complete. Whenever necessary, take your piece to the glass grinder and smooth out the edges and fine tune the shape.

Now it’s time to move on to the interior pieces. You’ll be continuing the process of marking, scoring, cutting and gluing on.
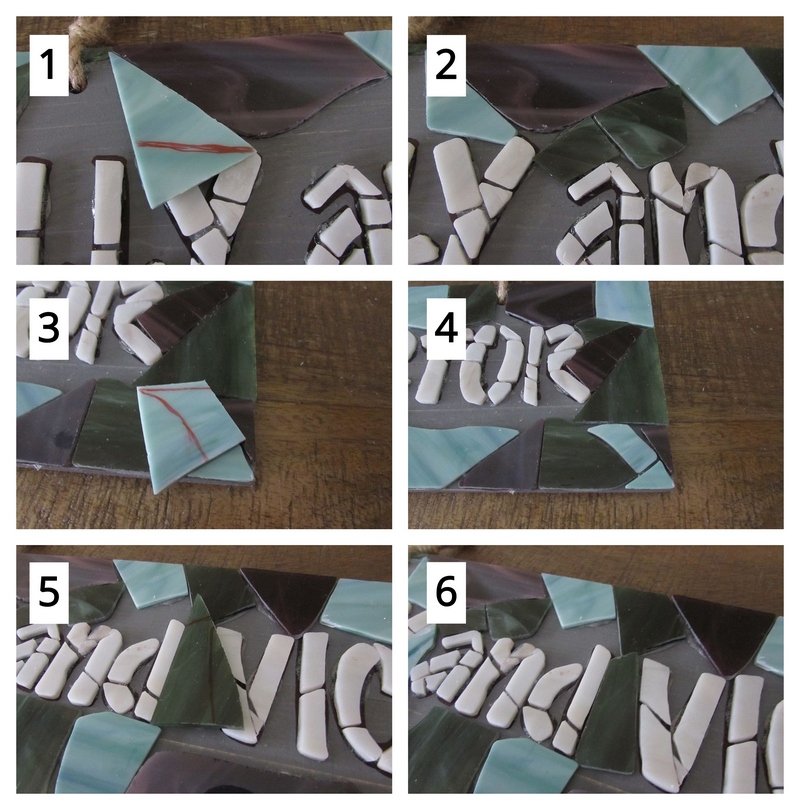
Continue to mark, cut and glue on interior pieces. Mark the piece for the center of the V. Score it with your glass cutter and break it out with your running pliers. Smooth the edges with your glass grinder and glue the piece on.

Continue gluing on small pieces to fill the spaces absent of glass until complete mosaic coverage is achieved.

Now, Time to Grout!
You’re almost done! You’re just going to need to prepare your grout mixture, apply it to the surface of your house sign and then clean the excess grout off.
If you have never grouted before, check out my post on how to grout your DIY mosaics here.
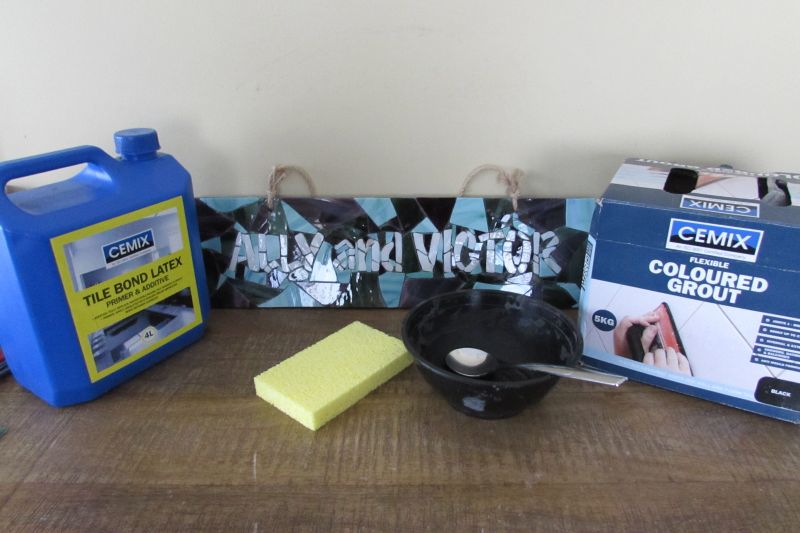
Step 5: Gather Your Grouting Materials
To grout, all you’ll need is your dry grout, latex additive, mixing bowl, spoon, garden gloves, old cloths or towels and water.
I recommend covering the surface that you’ll be grouting the sign on with old towels or newspaper to prevent from staining the surface that you’re grouting on.
Step 6: Mix, Apply and Clean off Your Excess Grout
Now you’re ready for the actual grouting process. First, mix enough latex additive into your dry grout so that you achieve the consistency of oily peanut butter. Don’t worry if add too much additive and the mixture is soupy. Simply add more dry grout until you receive the proper consistency.

Remove the rope before covering your piece with grout. Then cover your sign with grout.
Begin cleaning the grout off of your piece with a damp sponge that has been squeezed out.

Continue cleaning with sponge and microfiber cloth until your piece is completely cleaned. Let the piece completely dry for several hours and then reattach your rope for hanging the piece.

This house sign could just as easily been made from wall or floor tiles using the same process. Ceramic tiles can also be shaped on your glass grinder by using a grittier grinding head. Tile can also be cut with either tile nippers or your mosaic cutter.
You could achieve a very stony looking sign by creating this piece with stony floor tile. It would also be interesting to combine glazed wall tile matte finished floor tiles as the contrast of the glossy wall tile with your stony floor tile would be stunning. Plus, there is a difference in thickness between the wall tile and floor tile which would also provide another interesting contrast for your piece.
And yet another option would be to create the sign on a transparent piece of glass creating the mosaic out of stained glass. Then if hung in a window say, light would pass through it. Of course if using a transparent piece of glass for your base you also have the option of having some parts of the sign lit by natural light and other parts opaque by either using translucent and opaque glass within the design or by combining translucent glass and tile. There will also be that thickness difference between the the stained glass and the tile which adds that interesting contrast to your piece. For an example of this check out my post DIY Mosaic Mailbox here.
So happy that you’re interested in mosaics!

Danielle is the mosaic artist and teacher behind Mosaics Mostly. She has been creating mosaics for over 25 years, and has taught hundreds of people to create their very own mosaic DIY projects at home. She has been featured in multiple galleries and magazines, and has even had her own beginner mosaics book published! She loves crafts, and is always working on something new!
