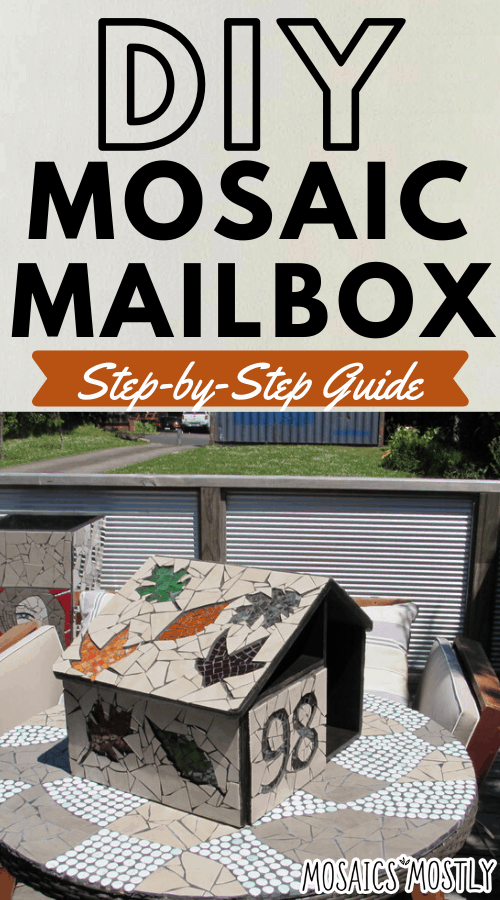
This project is about taking a boring old wooden mailbox and transforming it into something your neighbors will all be gawking at! Now, most pressure treated wooden mailboxes are not really pressure treated, so I suggest you using a metal mailbox. If the wood is not properly pressure treated (marine grade) the wood will contract and expand in different weather causing pieces to eventually fall off…so metal is best.
I thought long and hard before deciding what I wanted to achieve with this piece. I decided that a nature theme was what I was looking for as the box would be nestled in among the trees in the front of my home.
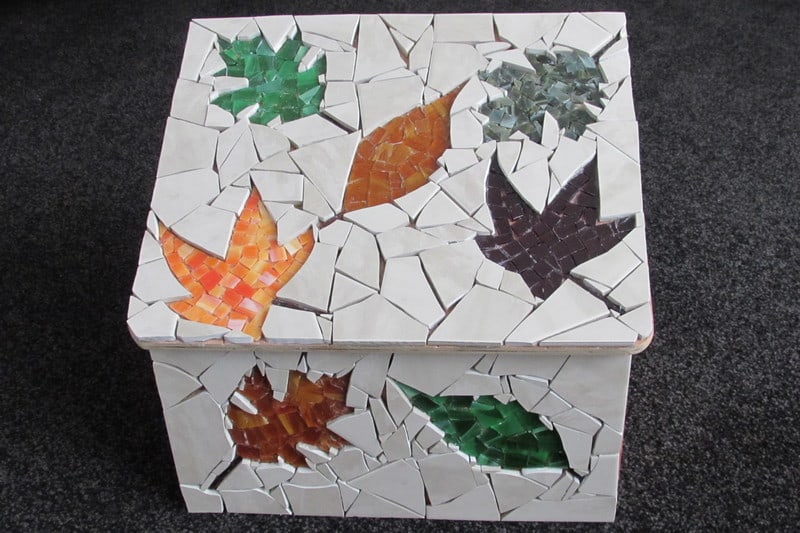
I decided to that I wanted to make the mailbox look like stone. To do that I would use some leftover floor tiles that I had. I then decided that I wanted stained glass floating autumn leaves covering the box. This would create an interesting effect as stained glass is much thinner than flooring tile so the leaves will look “inset” on the stone mailbox.
Materials Need for DIY Mosaic Mailbox
- Pressure treated wooden mailbox-but metal is best as most pressure treated wood will still expand and contract in different weather causing pieces to fall off eventually.
- Beige colored floor tiles or any floor tile that looks like stone
- Scrap stained glass of different colors to create autumn leaves – colors such as amber, orange, plum, red, green, yellow etc.
- Free printable leaf patterns
- Traceable numbers for your house number
- Clear water resistant adhesive
- Marker and scissors
- Glass cutter
- Running pliers
- Mosaic cutters
- Glass grinder
- Black grout
- Latex additive
- Black paint and brush
- Mixing bowl, spoon, sponge and some old rags or towels
- Safety glasses
- Garden gloves
How to Make Your Own DIY Mosaic Mailbox
Below you’ll find my step-by-step instructions on how to create a beautiful mosaic mailbox at home.
Step 1: Gather Your Materials and Tools
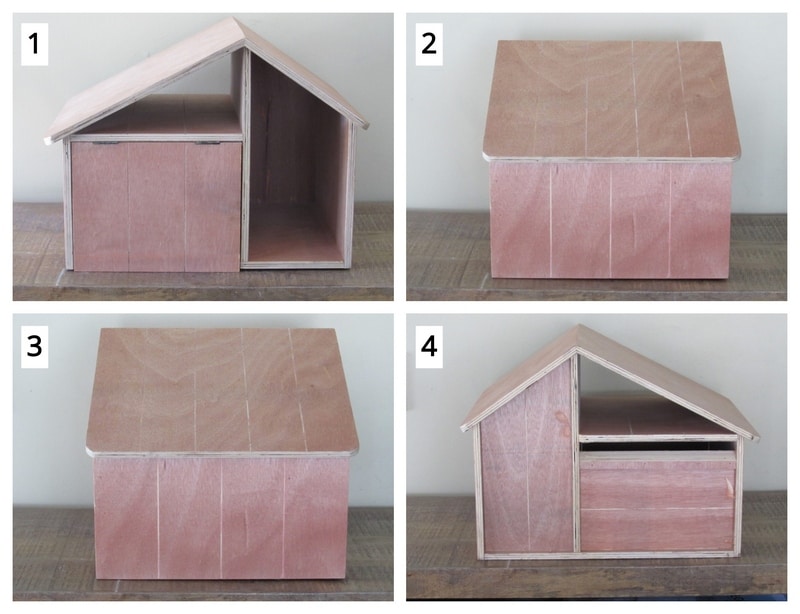
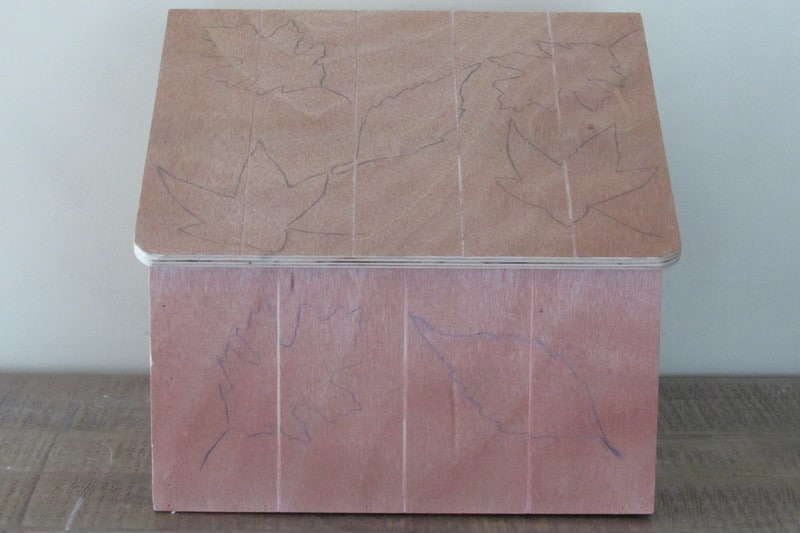
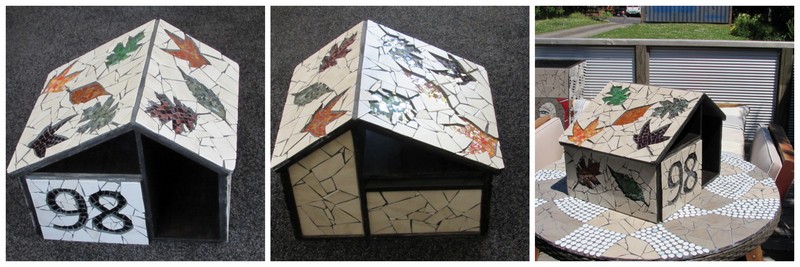
Here’s your plain old wooden mailbox that we’re going to transform into a lovely mosaic masterpiece! Thought I’d show you all 4 sides that we’ll be covering with our glass floating leaves design.
Here is the tile I’ll be using and the stained glass colors I’ve chosen for the leaves.
My glass grinder, running pliers, glass cutter and mosaic cutter.

Step 2: Draw Your Design on Your Mailbox
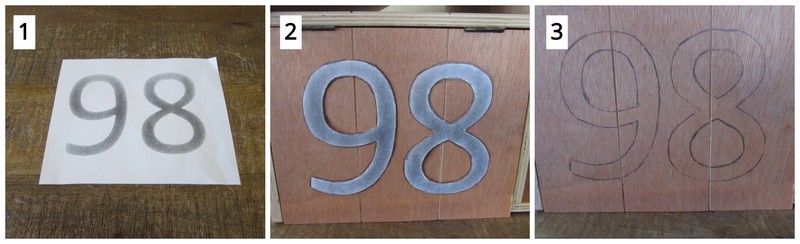
The first thing we need to do is enlarge the number 98, which just happens to be my house number, on a printer to fit the door of the mailbox.
Then we tape or lightly glue the numbers on the door of the mailbox. Trace around the numbers with a pencil or marker and then remove the paper numbers from the door.
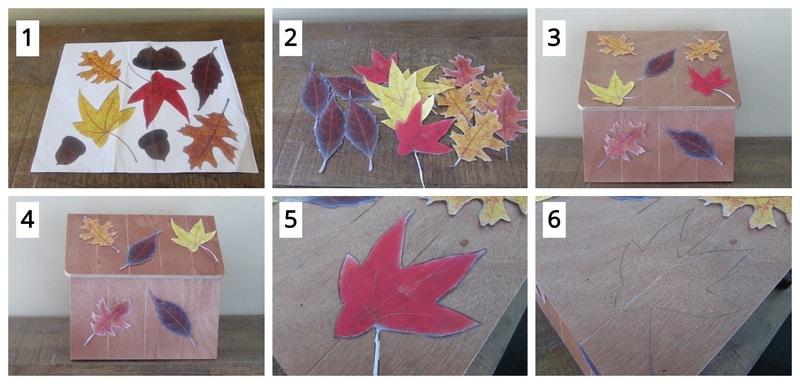
Next, print out some free printable leaf patterns off the internet. Enlarge them so that they are the right size for the design.
Then make a few copies of the enlarged leaves sheet so that you can cut out a few of each pattern for both sides of the mailbox.
Tape or lightly glue the leaves on the roof and side of your mailbox in a random pattern as if they’ve simply fallen off the trees above and landed on your mailbox.
Do the same for the other side of your box.
Now with a marker or pencil trace each leaf with it’s stem. Remove the paper pattern after you’ve traced them all.
You’re now ready to begin creating your stained glass mosaic leaves.
Step 3: Cut Your Glass
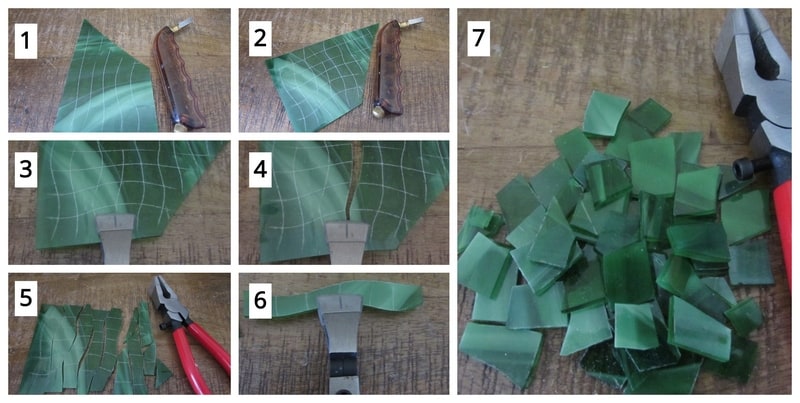
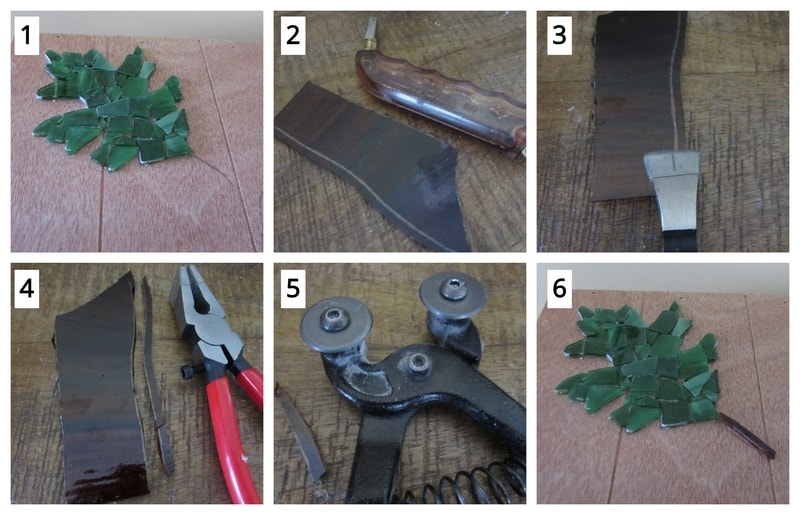
I’ve got some lovely colors of scrap stained glass to create some beautiful autumn leaves for the mailbox. I’ll use the green glass as an example as to how we’ll cut all the different colors of stained glass that we’ll use to create all the mosaic leaves.
Score your green glass in irregular wavy vertical lines with your glass cutter. Remember to always move in one direction with your cutter (no backwards and forwards motions) as this may confuse your glass and make it difficult to break the scores with your running pliers.
Do the same horizontally creating irregularly shaped squares.
Line the center of the tip of your running pliers up with one of the score lines and apply just enough pressure to break the glass.
Break out all your vertical scores and then all your horizontal scores creating a pile of irregular kinda square pieces.
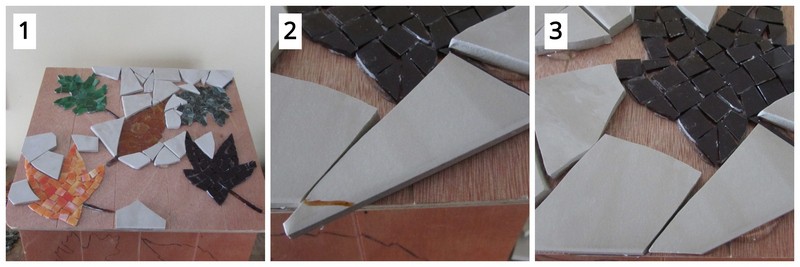
Step 4: Glue Your Glass Leaves on Your Mailbox
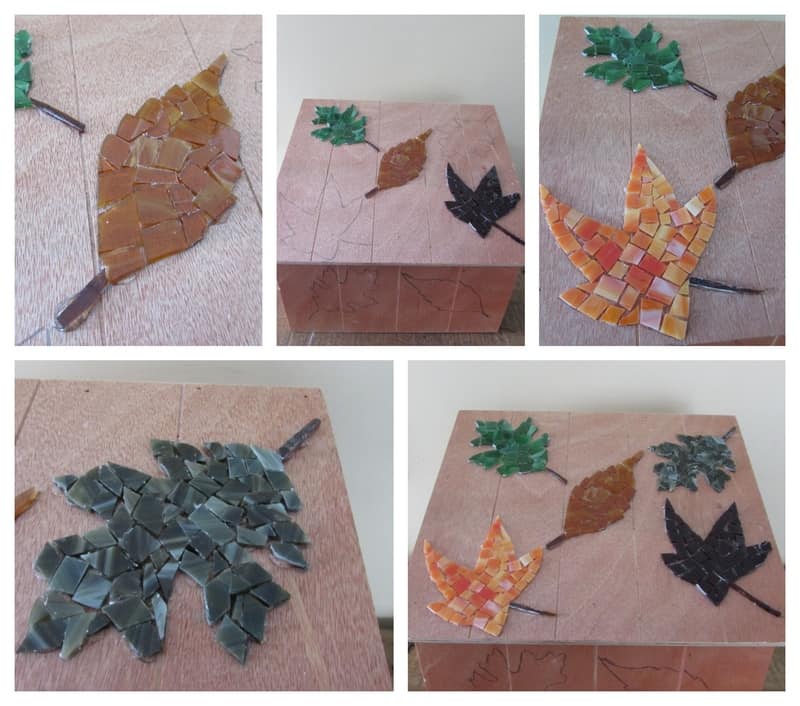
Use your mosaic cutters to cut up the irregular squares producing other irregular pieces to use in creating the outline of your first leaf. Glue each piece in place.
Mark a piece to fit your edge. Cut the piece with your mosaic cutters and glue the piece in place.
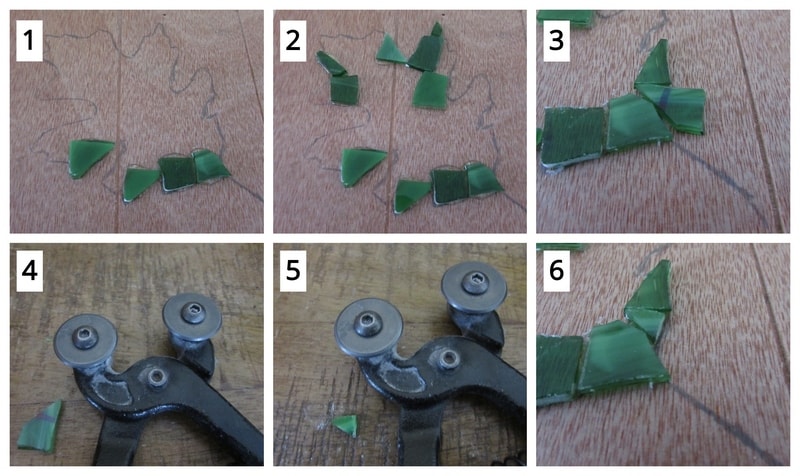
Continue gluing on edge and interior pieces to create your leaf. When a piece doesn’t fit, mark it to fit. Then cut it with your mosaic cutters and grind it smooth on your glass grinder. Glue the piece in place.
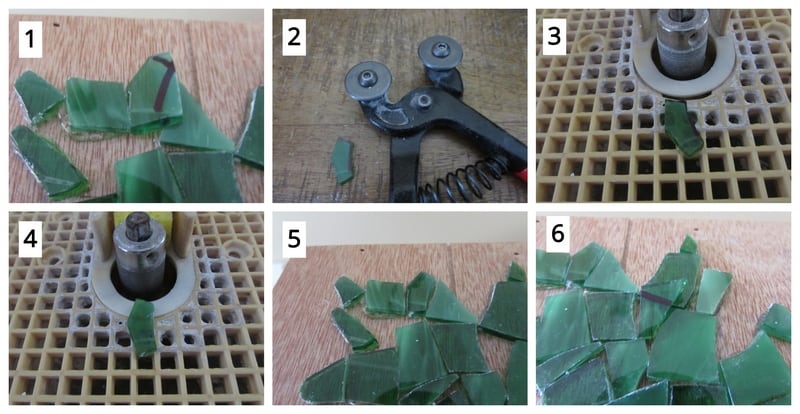
Continue this process until the leaf is complete.
Score a long slender piece of glass to be used as a stem for your leaf.
Break the score with your running pliers. Don’t worry if the glass doesn’t break perfectly as you’re going to be cutting it into smaller pieces anyway. It’s can be difficult to break such a narrow score perfectly, hence the advantages of mosaics!
Glue the piece in place for your stem.
Continue this process to create all the leaves that will float across the roof of your mailbox.
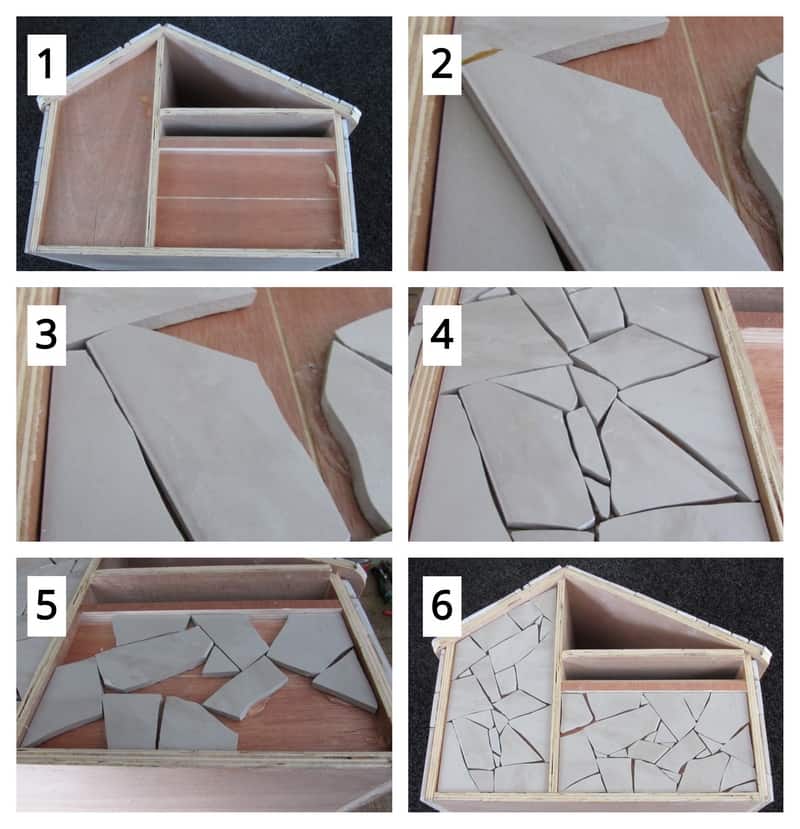
Step 5: Break Up Your Tile
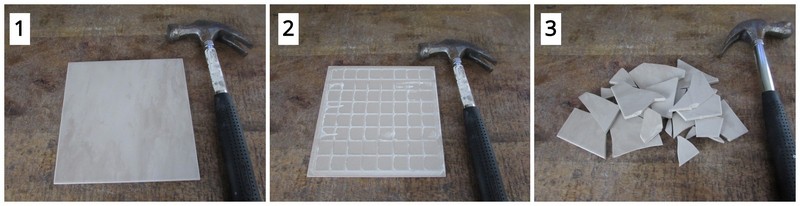
Time to break up your tile that will surround your floating leaves on your mailbox.
Take a hammer to your tile and begin breaking it up. Make sure you turn your tile over and break it on the back side so as not to damage the surface finish.
Also, break the tiles in the center initially and don’t break them into small tiny pieces as you’ll be using some larger pieces in this project. Plus, you can always cut them with your mosaic cutters if the piece is slightly larger.
Step 6: Glue on your tile
Now it’s time to surround your lovely stained glass mosaic leaves with floor tile pieces that resemble stone.
Lots of your broken tile pieces will simply fit, but then there will be those that you need to mark and cut to fit. When this is the case, mark the piece to fit, cut it with your mosaic cutters and then take it to the glass grinder for smoothing. Finally, glue the piece in place.
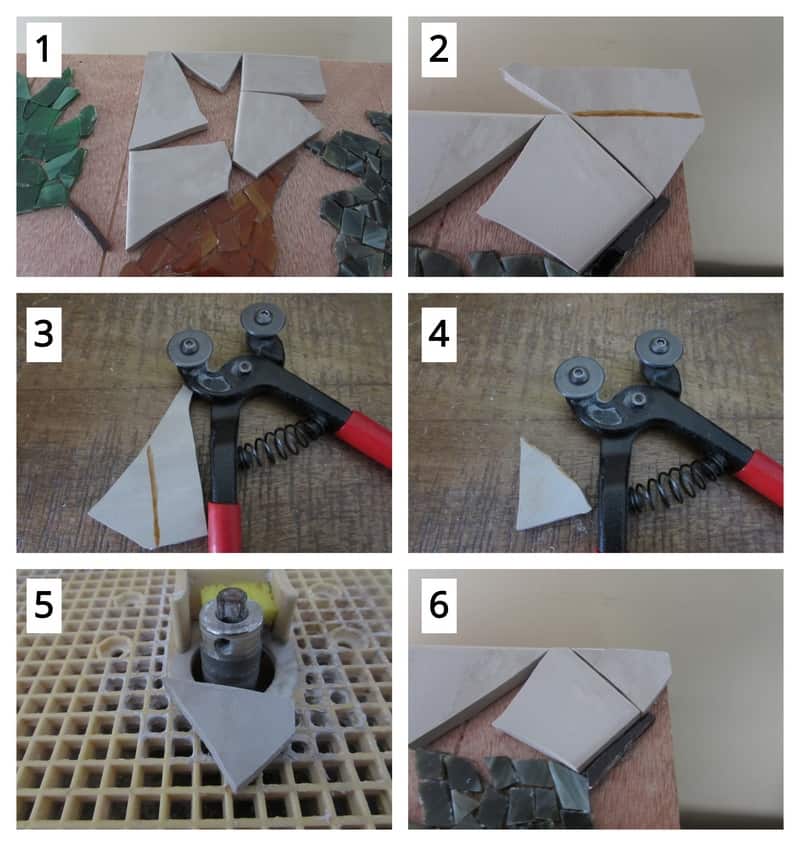
Continue gluing on tile pieces. Mark pieces to fit when necessary and cut them with mosaic cutters, grind them when necessary and then glue them in place.
Continue this process until the entire first surface of your roof is completely covered.
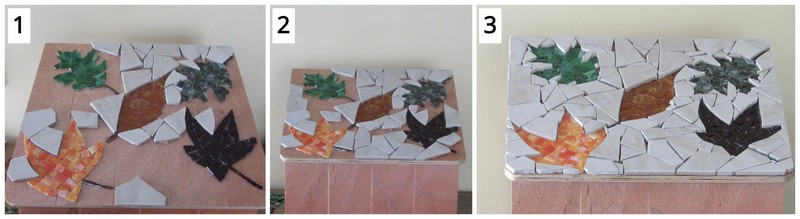
Then continue the process for the side of your mailbox. Your first side is complete! Roof and side! You can repeat this process on the other side of your mailbox.
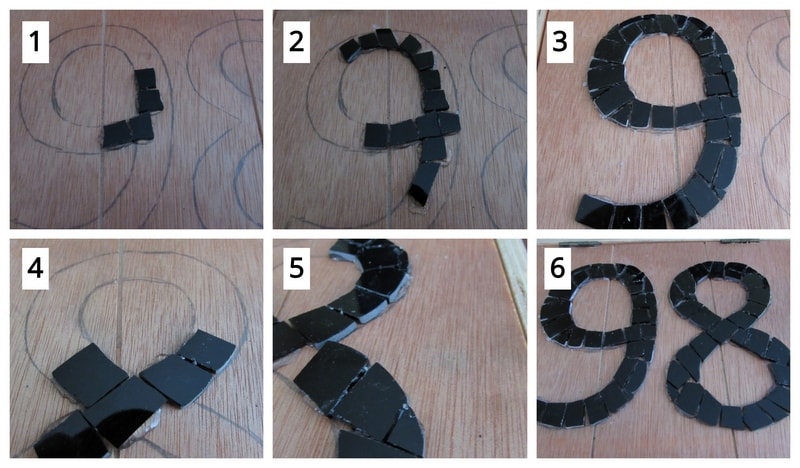
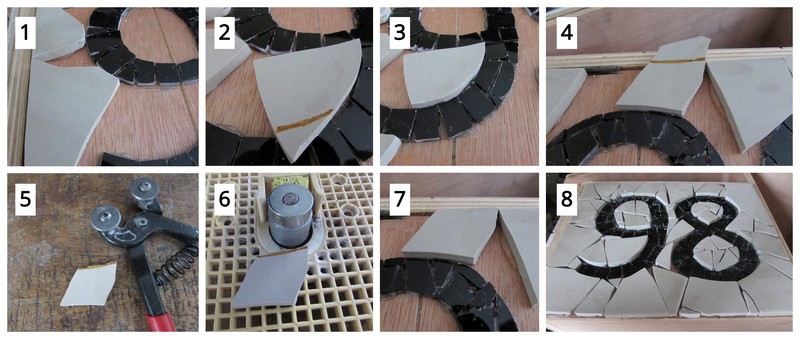
Step 6: Glue on the Glass for Your House Numbers
You’ll be using the same technique to cut the glass for your house numbers that you did for your glass leaves only you won’t be vertically and horizontally scoring your glass and creating irregular squares. You’re going to cut your pieces out of long slender strips. You need smaller pieces of black glass to create your stained glass mosaic numbers. You have more control to cut these smaller pieces with your mosaic cutters from thin strips of stained glass.
Just as with shaping the pieces of glass to fit within the outline of your glass leaves, mark your pieces when necessary to fit, cut them with your mosaic cutters and grind them on the glass grinder prior to gluing them on.

Step 7: Glue Your Tile Pieces on Around Your Numbers
To finish the door of your mailbox, you need to surround your black stained glass numbers with your broken tile pieces.
When necessary, mark a piece to fit and cut it with your mosaic cutters. If the edges need smoothing, take it to your glass grinder. Finally, glue the piece in place.
Step 8: Complete the Back of Your Mailbox
The back of your mailbox is the simplest and quickest part of this project as we’re merely covering the back with broken tiles. Mark pieces to fit and cut them with your mosaic cutters. Glue each in piece in place.
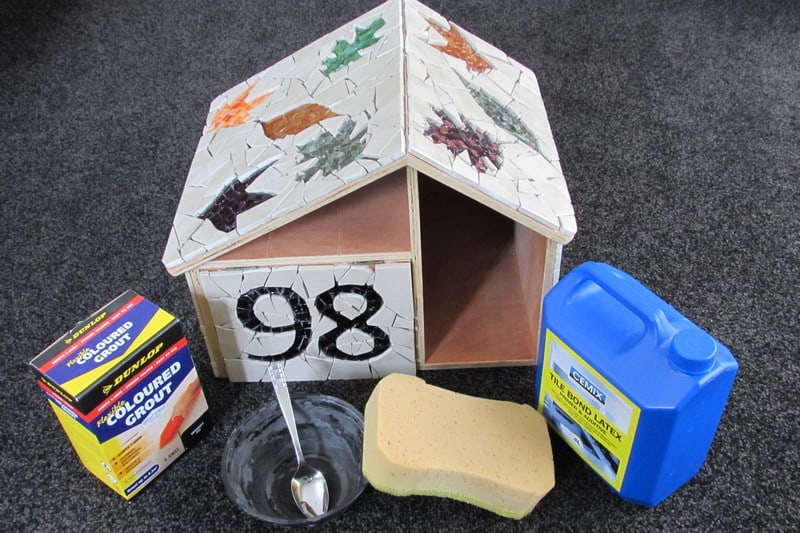
Time to Grout!
You’ve achieved complete mosaic coverage of your mailbox’s surface. Good job!!!!! Now to pull it all together by grouting your piece creating the look of a stone mailbox. We’re going to prepare our grouting mixture, apply to all the surfaces of the mailbox you just covered and clean it thoroughly.
If you’ve never grouted before, check out my post on how to grout your DIY mosaics here.
Step 9: Gather Your Grouting Materials
To grout, you will need your dry grout, latex additive, mixing bowl, spoon, sponge, garden gloves, old towels or rags and water. I recommend covering the surface that you’ll be grouting your mailbox on with old newspaper or old towels to prevent any staining from occurring.
Step 10: Mix, Apply and Clean Off Your Excess Grout
You’re ready for the actual grouting process. The first thing we’ll do is create our grout mixture to apply all over your mosaic surfaces.
Mix your latex additive with your dry grout until you achieve a mixture that resembles oily peanut butter. Don’t worry if you’ve made your mixture too runny, simply add more dry grout to correct it.

Time to cover the surfaces of your mailbox with the mixture. Cover one surface at a time allowing you to clean it properly with your moistened sponge as the grout will dry quickly.

All surfaces grouted and cleaned!
Step 11: Paint All Other Surfaces Not Covered with Tile and Glass
To finish your love mailbox we’re going to paint all the surfaces of the wood that are not covered by lovely mosaic tile and glass with back paint. Black paint works best as that matches the grout joints all over your mailbox, It will pull everything together to make it look finished and professional!
Use black exterior paint as the piece will be exposed to the elements.

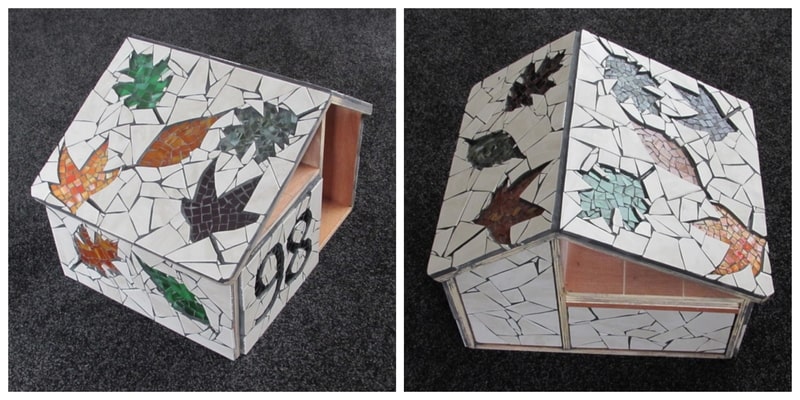
A mailbox that will be the envy of all of your neighbors! Trust me!


Danielle is the mosaic artist and teacher behind Mosaics Mostly. She has been creating mosaics for over 25 years, and has taught hundreds of people to create their very own mosaic DIY projects at home. She has been featured in multiple galleries and magazines, and has even had her own beginner mosaics book published! She loves crafts, and is always working on something new!
