We all love to find a special frame to surround an image of someone or some place that is of special importance to us. Why not take an everyday $10 frame and transform it into a stained glass mosaic little masterpiece.
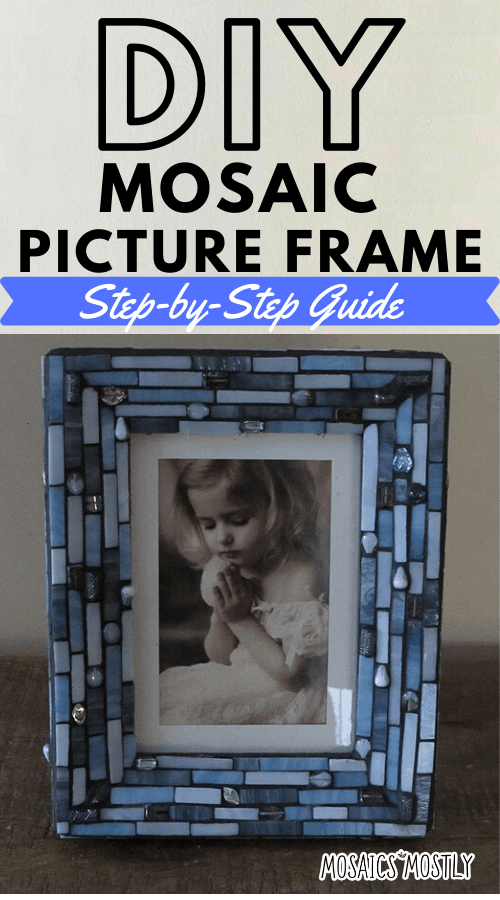
My chosen color scheme for this project is light blue and gray. I’m going to use 4 different colors of glass with some really lovely glass beads to create a visually stunning contemporary piece to display anywhere in your home that needs that little bit of pizzazz!
Materials Needed for DIY Mosaic Picture Frame
- 1 wooden picture frame
- 4 different colors of scrap stained glass
- Assortment of glass and acrylic beads
- Glass cutter
- Mosaic cutters
- Running pliers
- Glass grinder (optional)
- Clear water resistant adhesive
- Black grout
- Latex additive
- Mixing bowl, spoon, sponge and some old rags
- Safety Glasses
*Tip: All stained glass shops sell scrap glass by the pound usually. That’s a terrific source for any and all of your mosaic projects. Most craft stores also sell scrap glass in packages. If you’re working on a larger base that requires larger pieces of glass, you can also purchase sheets of stained glass at any stained glass shop. Your tools such as mosaic cutters and, running pliers, glass cutters and glass grinders can also be purchased there.
Your home improvement stores are where you can can source your grout and latex additive.
How to Make Your Very Own Mosaic Picture Frame
Below you’ll find the step-by-step instructions on how to make your own gorgeous mosaic picture frame at home.
Step 1: Gather Your Materials and Tools
Before we get started, it’s a good idea to make sure we have everything we need to complete this project within hands reach,
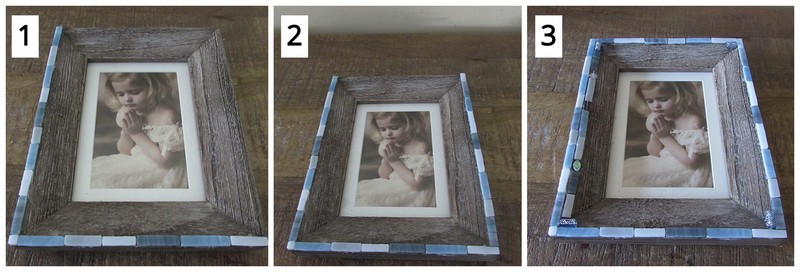
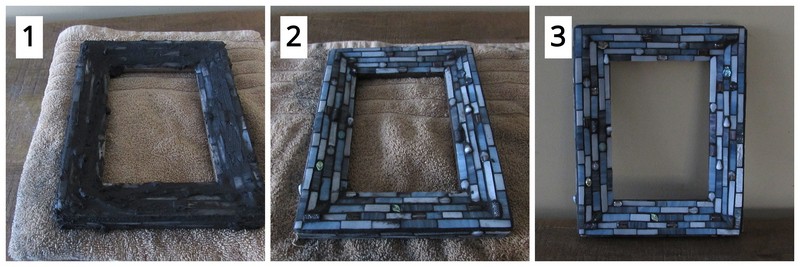
I chose this particular frame because it was fairly wide and the surface was flat making it easy to glue on my stained glass pieces and my glass beads. I also liked the thick edge of the frame so that I could continue mosaic coverage along those edges.
I tried to color coordinate my stained glass with my glass beads to compliment each other. I’ve selected grays, blue and white glass for this project and selected beads to match.
*Tip: I decided to lay my rectangular glass pieces both vertically and horizontally for this project, but you could easily achieve a different look for this frame by laying all the pieces vertically or all of them horizontally. Heck! You could lay them all diagonally if you so choose, it’s simply up to you. You can also leave the glass beads out if they don’t appeal to you.

Step 2: Cut Your Glass
In this project, where going to cut thin strips of glass and then cut those thin strips into small rectangular pieces. We’ll intermix the 4 different colors of glass and insert a glass bead here and there. There’s no need to outline or trace a pattern on to your frame as this will be an abstract design.
If you’re new to creating mosaics and need to learn how to cut glass properly, check out my post on how to cut stained glass here.
Score your dark gray glass vertically with your glass cutter. Line the center of the tip of your running pliers up with your score line and apply just enough pressure to break the glass. Sometimes with thin strips they don’t break perfectly, but don’t worry, we’re creating a mosaic and will be cutting them into pieces anyway. Repeat these steps with your other three colors of stained glass.
*Tip: When scoring your glass with your glass cutter, you only want to move your glass cutter in one direction across the glass. No backwards and forwards motions as this will “confuse” the glass. What this means is that when you attempt to break out the scored line you’ve just created with your glass cutter, your running pliers may not be able to break the glass as you intended. It’s very important to understand that you only move that glass cutter in one direction across any piece of glass you are using in any project if you want it to break properly.
A pistol grip glass cutter is by far more comfortable to use when scoring glass than your cheaper glass cutters. It is to be filled with glass cutting fluid which provides lubrication for ease of scoring. If you select a less expensive glass cutter, the tip of the cutter can be dipped in the glass cutting fluid prior to scoring.
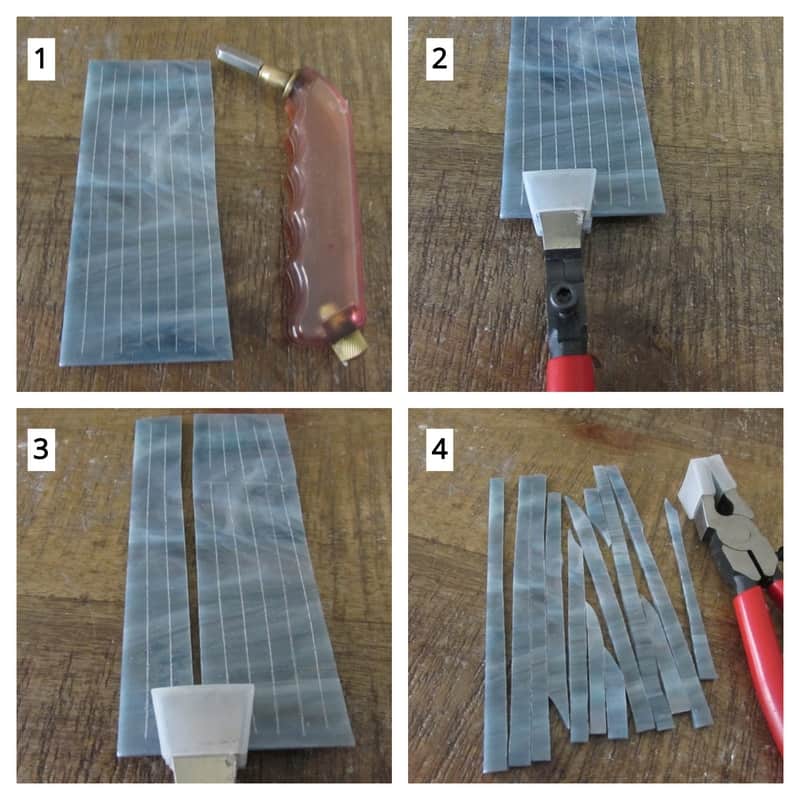
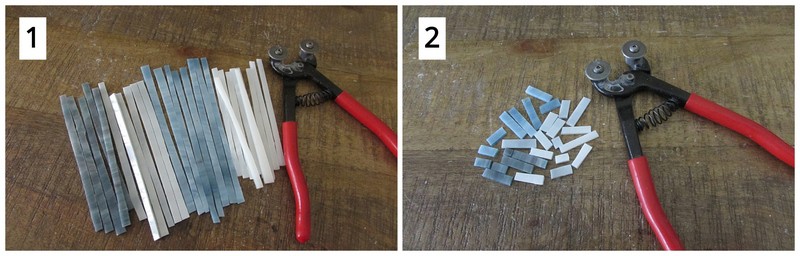
Gather your strips together and nip them into smaller pieces with your mosaic cutter.
Step 3: Glue Your Glass and Beads Onto Your Base
Now we’re going to begin gluing on the pieces of our different colored glass that we just cut into smaller pieces. Let’s start by gluing on pieces of glass around the first edge of the frame. If a piece has an edge that isn’t quite straight, take it to the glass grinder and smooth the edge out. This is optional, just depends on how finished and professional you’d like the piece to look. Once the edge is smoothed, glue the piece in place.
Mark a piece to be cut to fit the corner of your frame. Cut the piece with your mosaic cutters and then glue the piece in place.
*Tip: When creating a mosaic with thin rectangular pieces it’s important to always keep in mind that you’re seeking out uniformity amongst irregularity. That’s part of the fun of doing a project like this! You have to…just as if you were working a jigsaw puzzle…make the pieces fit. At least, with creating mosaics, you can make the piece fit! You’re creating the jigsaw puzzle pieces! So yeah…enjoy the control!
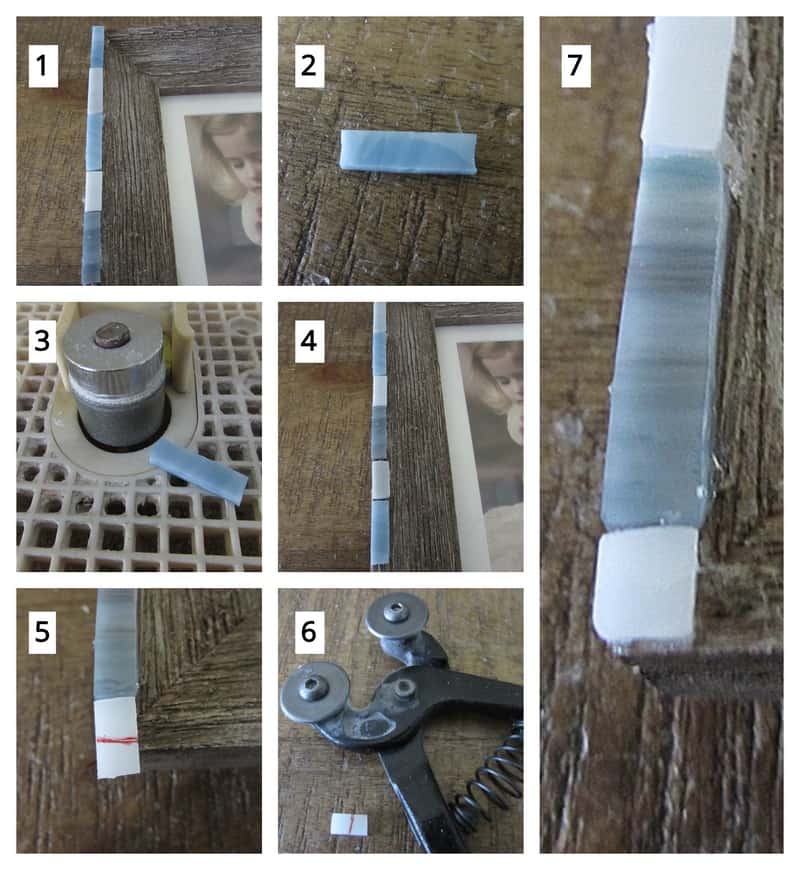
Continue gluing glass pieces around the edges of the frame until all four sides are completed. Begin your second row of glass around your frame and begin incorporating glass beads within the design.
Mark a piece of light blue glass to fit your corner with a glass bead in place. Cut the piece with your mosaic cutters. Glue the piece in place.

Continue gluing on glass pieces and beads until you cover the entire front surface of your picture frame. Measure, mark and cut pieces with your mosaic cutters when necessary and take them to the grinder for smoothing and shaping if need be. Have fun intermixing the four different colors of glass with a variety of glass beads.

This same process will be used to cover the outer sides of your picture frame.
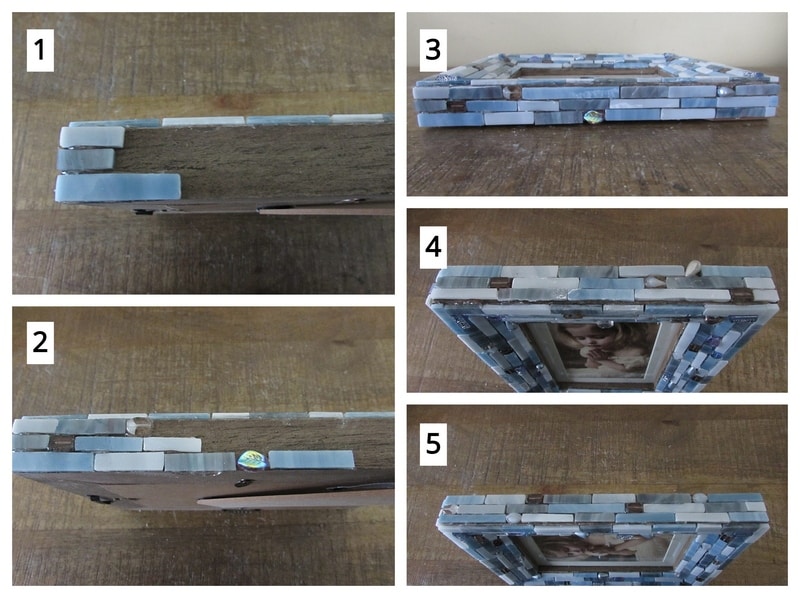
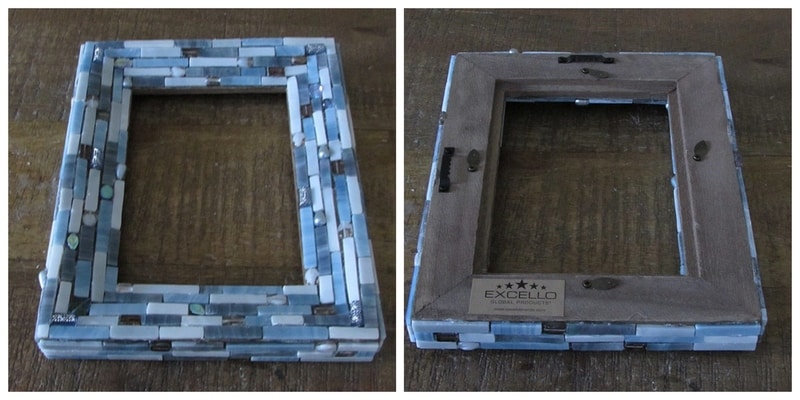
Complete mosaic coverage of your frame.
Step 4: Gather Your Grouting Materials
You’ll need your black grout, latex additive, mixing bowl, spoon, sponge, old towels or rags and water. Always line the area that you’re going to be grouting on with old newspaper or old towels as you don’t want to stain the surface. You’ll also want to remove the glass and matting and back of your picture frame before you grout. You’ll replace it once you’ve grouted and completely cleaned your frame.

Step 5: Mix, Apply and Clean Off Excess Grout
Time to Grout! Mix the latex additive with your dry grout to achieve the consistency of oily peanut butter. Don’t worry if you put too much additive in and it’s too soupy. Simply add more dry grout. You’ll eventually reach the proper consistency.
Once you’ve achieve the consistency you need, cover the front and the outer edges of your frame with the grout mixture. Begin removing the excess grout with a dampened sponge. Clean the surfaces with dry clothes after the majority of grout has been removed with the sponge.
*Tip: The grout mixture can harden up quickly at times. Don’t worry, just add more latex additive to achieve the consistency you need. Also, the grout will dry on your picture frame rather quickly too. It’s a bear to remove once it completely dries so set aside a time to grout your project when you’re certain of not having any interruptions during the process.
Also, make sure you’re near a water source as you’ll be washing out your sponge frequently. For a small project like this frame, you could also simply fill a bucket and rinse your sponge out in it. That way after you’ve completely cleaned your piece you could empty the bucket outside.
The least amount of grout residue that goes down your drain the better. Also, any left over grout mixture in your mixing bowl should be scooped out and put into the garbage and not down your drain. Just an environmentally conscience thing to do.

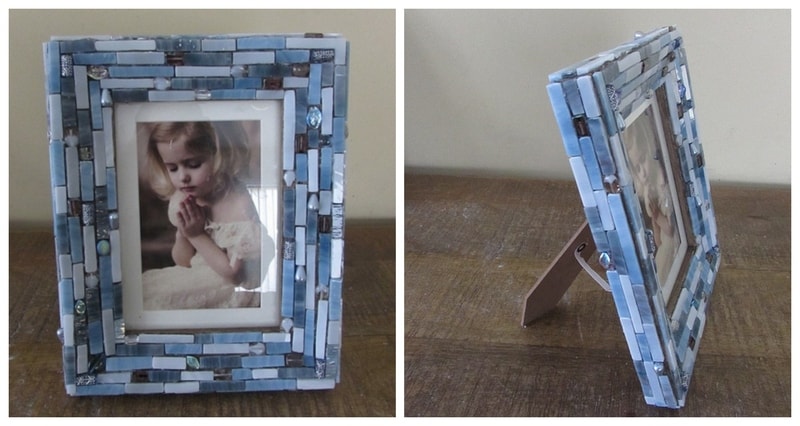
Reinsert your glass, matting and your most precious photo.
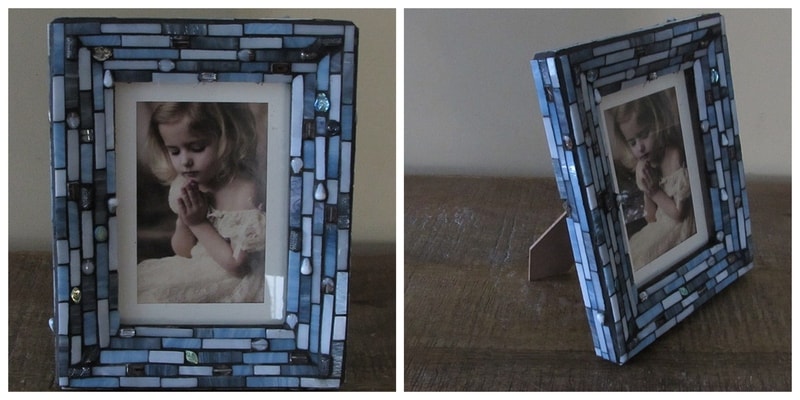
A remarkable transformation!
Now let’s think about this
How many different bases could you resurface like this and create something completely amazing? Just think about it, as the possibilities are endless! This was a small picture frame, but you don’t have to limit yourself to just that. You could select a much larger base to work on such as a mirror, a large mirror, and create the exact same mosaic with larger rectangular pieces of course and larger glass beads or pieces.
Maybe you would like to transform a piece of furniture like a dresser or an armoire. You can use this process to resurface pieces like this and achieve the same look.

Danielle is the mosaic artist and teacher behind Mosaics Mostly. She has been creating mosaics for over 25 years, and has taught hundreds of people to create their very own mosaic DIY projects at home. She has been featured in multiple galleries and magazines, and has even had her own beginner mosaics book published! She loves crafts, and is always working on something new!
