I love decorating for Halloween! Living in New Zealand doesn’t afford me the availability of large pumpkins to carve at any time during the year. As a result, I decided to create my own jack o’ lantern out of stained glass that I can light up every year here to celebrate with all of you back in the states!

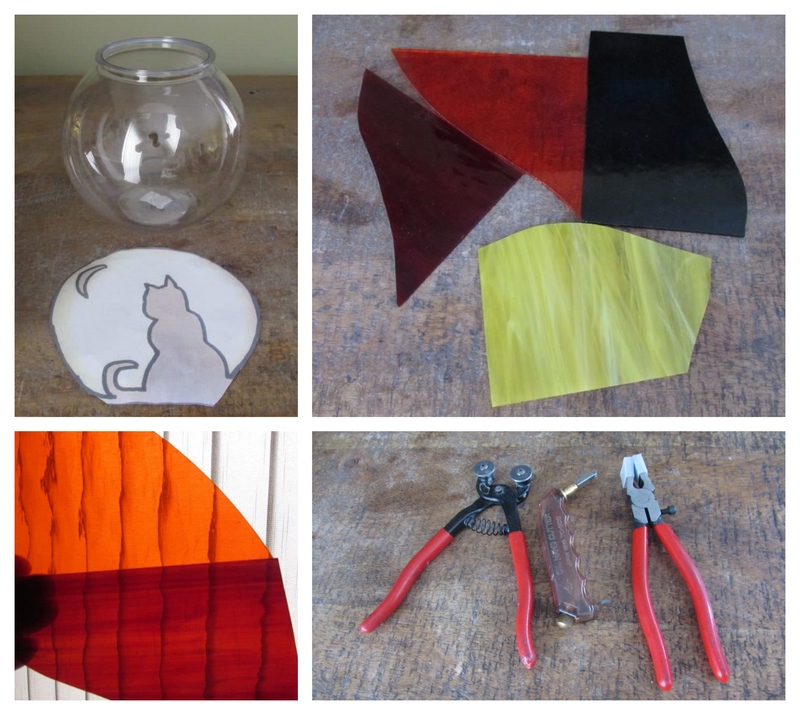
I thought to myself “What should I use as a base for the jack o’ lantern?” I searched around on Amazon and found this 2 gallon extra strong plastic fish bowl for $11 and away we go!
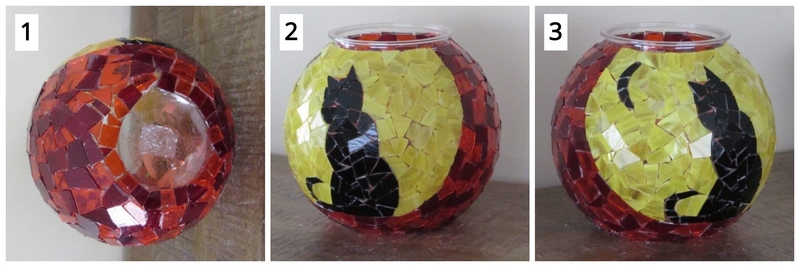
I found this adorable cat gazing at the moon free printable and decided that was the design I wanted. I’m a big animal lover:)
I decided on black for the cat’s body and for the moon. I thought I’d use a brilliant yellow to represent the glow of light within the jack o’ lantern and two different shades of orange for the shell of the pumpkin.
Materials Needed for DIY Mosaic Jack O’ Lantern
- 2 gallon fish bowl either glass or heavy duty plastic
- Scrap stained glass in colors black, semi-transparent yellow and two different shades of transparent orange
- Mosaic cutter
- Glass cutter
- Running pliers
- Clear water resistant adhesive
- Marker and scissors
- Black grout
- Latex additive
- Mixing bowl, spoon, sponge and old rags
- Safety glasses
- Garden gloves
How to Make Your Very Own DIY Mosaic Jack O’ Lantern
Below you’ll find my step-by-step instructions on how to create your own mosaic jack o’ lantern. Let’s get started!
Step 1: Gather Your Materials and Tools
Before you get started, make sure that you have everything that you’re going to need for your project within arms reach.
I’m using this hard plastic fish bowl as the base from my jack o’ lantern but you can choose any spherical clear glass or plastic base you’d like.
*Tip: Before getting started, always take a look at your glass with light passing through it to ensure it’s the colors that you’re wanting to use for your project.
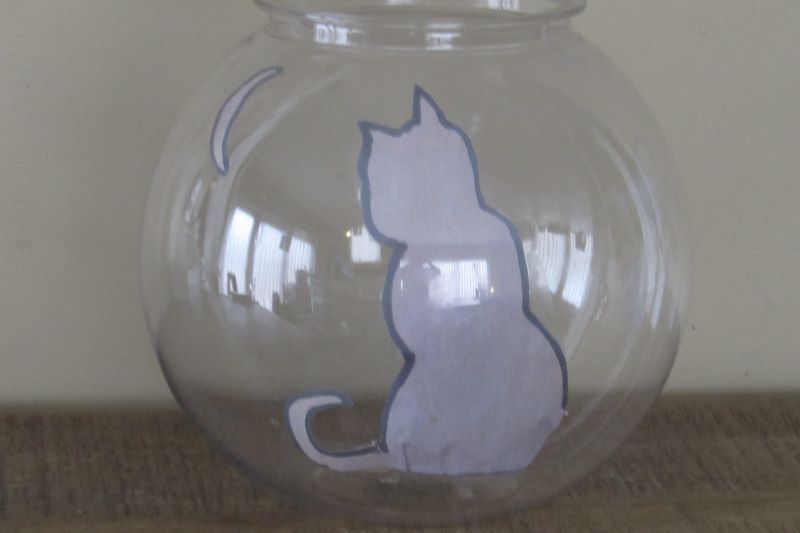
Step 2: Glue in Your Cat and Moon Templates
Print out the free printable image and cut the shape of the cat and moon out with your scissors. Glue them in place in your bowl.
Step 3: Cut the Glass for Your Kitty Cat
Time to score and break out your pieces for your black cat and moon.
Score the piece of black glass with your glass cutter in a random pattern.
Create some curves as you’ll need curved pieces for the outline of the cat and moon.
Break the pieces out with your running pliers by lining up the center of the tip of the pliers with the score line.
Apply just enough pressure to break the piece out.

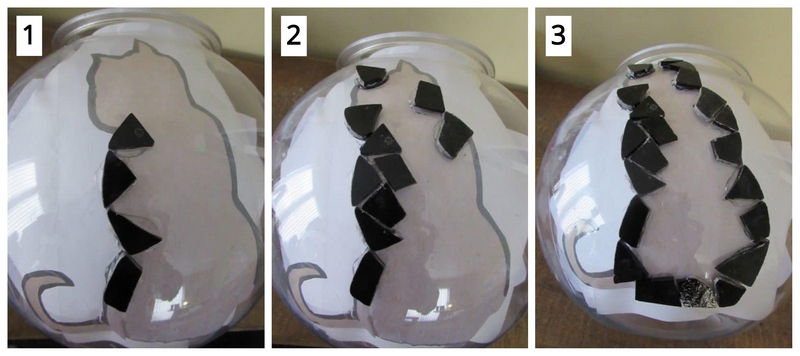
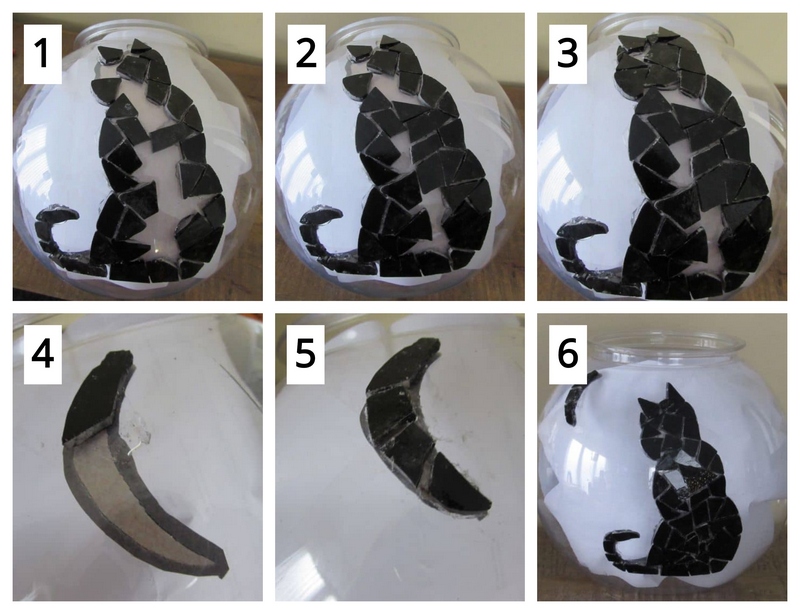
Step 4: Create Your Mosaic Cat and Moon
I’ve placed some white paper in the bowl so that you could better see the pieces being glued in place.
Cut smaller pieces with your mosaic cutters and begin gluing on pieces to create the outline of the cat.
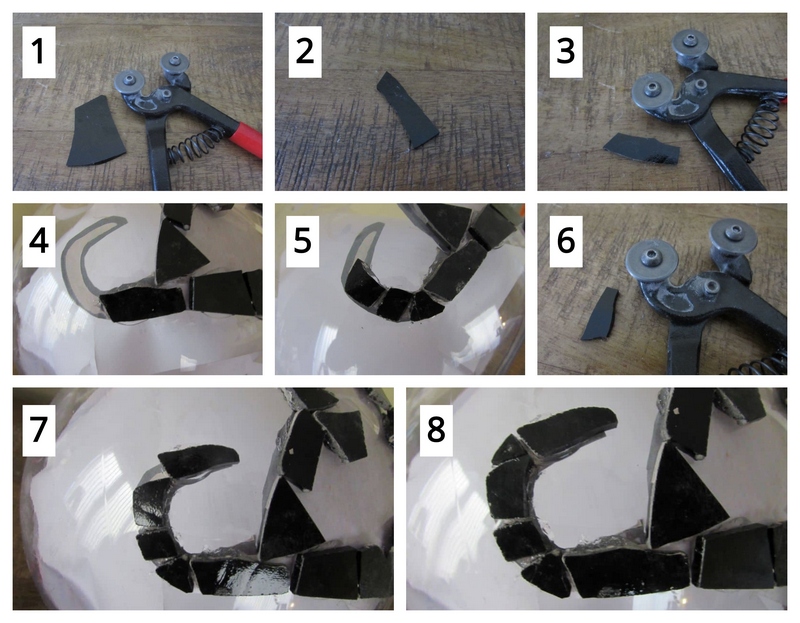
Cut a piece for the beginning of your tale.
Use your mosaic cutters to shape the piece to fit and glue the piece in place.
Do the same for another piece to fit for your tail.
Cut another for the tip of your tail. Glue it on and your tail is complete.
Continue cutting, fitting and gluing on pieces to complete the body of your cat.
Once the body of your cat is completed, move on the your moon.
Use the same process of finding cut pieces that create the shape of the moon and glue them in place.
Cat and Moon figures complete.
Step 5: Create the Circle of Light Around the Cat and Moon
Draw a circle around the cat and moon to represent what you would have after carving out this portion of the pumpkin.
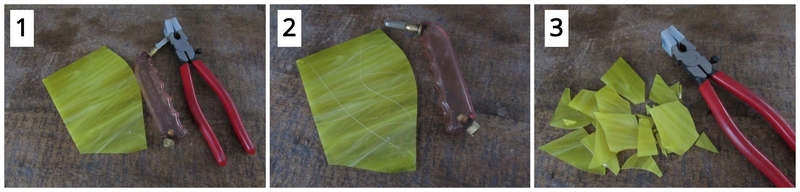
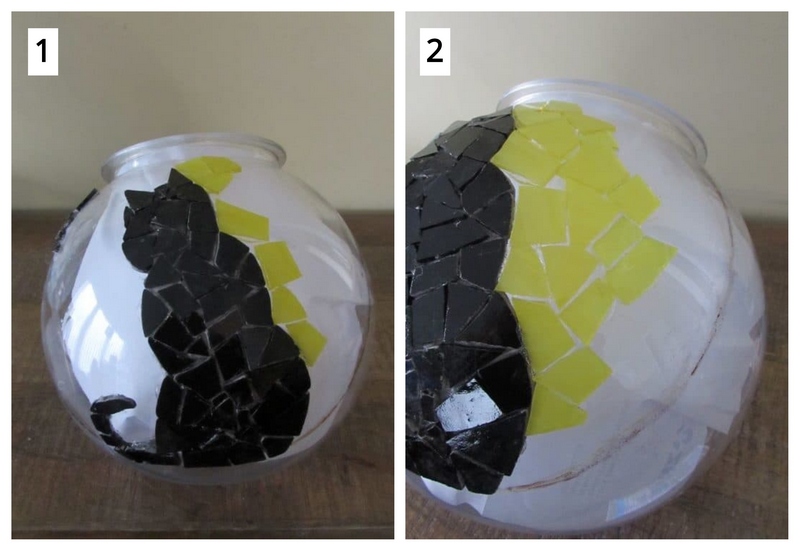
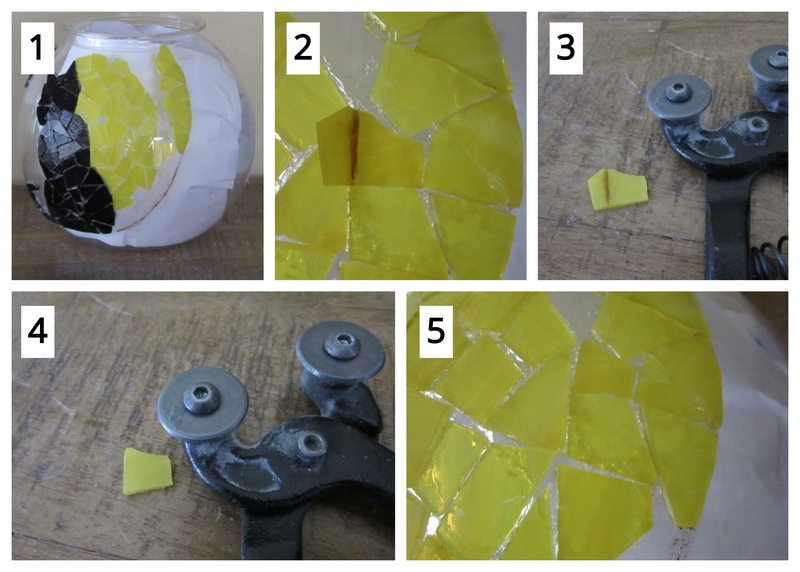
Step 6: Cut and Glue on Your Yellow Glass
Now to cut a bunch of yellow semi-translucent glass to create the glow of candlelight in your jack o’ lantern.
Score the glass irregularly with your glass cutter.
Break out the scored pieces with your running pliers.
Use your mosaic cutters to cut smaller pieces of your yellow glass.
Begin gluing on your yellow pieces of glass outlining your cat and then glue on more interior pieces.
Mark another piece to fit.
Score the glass with your glass cutter and break the score with your running pliers.
Glue the piece in place.

Begin gluing on pieces to create the edge of your circle.
Mark an interior piece to fit
Cut the piece with your mosaic cutters.
Glue the piece in place.
Continue marking, cutting and gluing on until your yellow circular section is completed around your cat and moon.

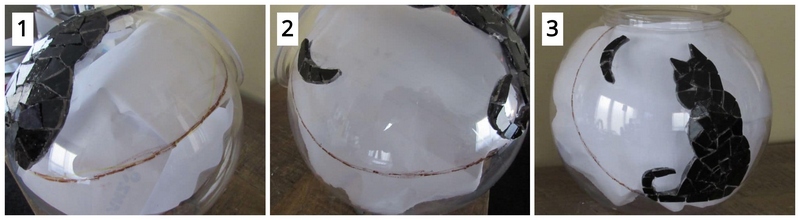
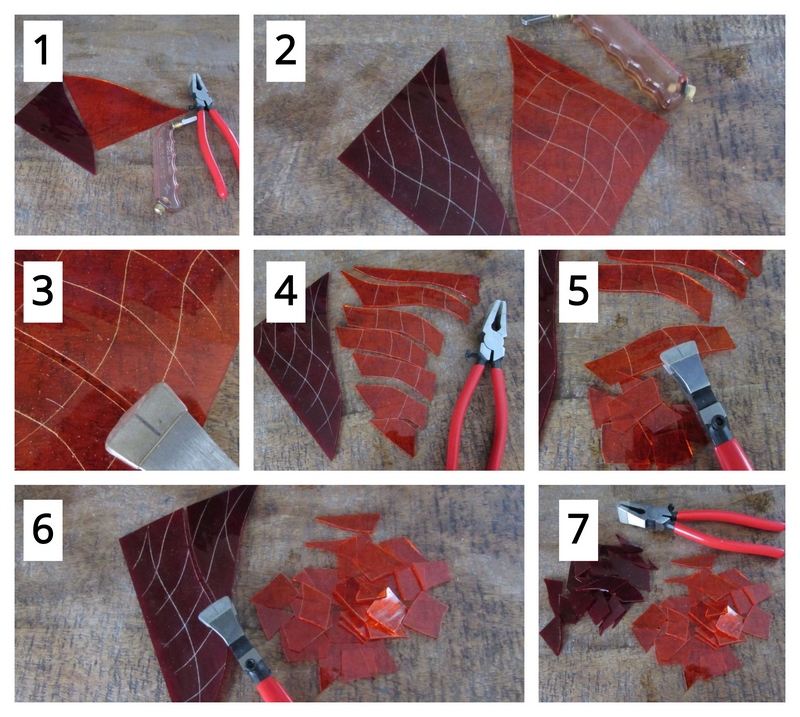
Step 7: Cut your Orange Glass for the Rest of Your Jack O’ Lantern
Now for the pumpkin shell mosaic!
Score your two different shades of orange/orange red glass with your glass cutter.
Break the horizontal scores with your running pliers and then break the vertical scores.
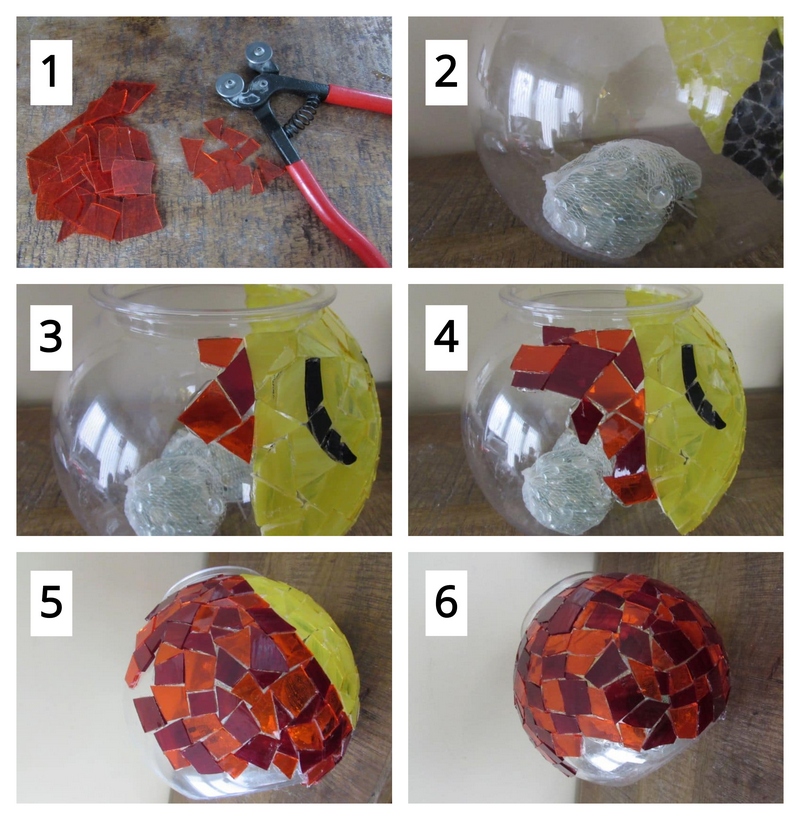
Step 8: Cut Orange Pieces to Fit and Glue Them in Place
Using your mosaic cutters, cut smaller pieces of glass to glue in place. Remember, the glass pieces need to lay flush on the bowls surface.
Place something in the bowl to weight it down. I’ve used bags of glass half marbles as they roll around the bowl as I turn it to work the design.
The reason this is necessary is simply because the one side of the bowl that you’ve been working on is now heavier with the pieces of glass that have been glued on to create the front of your jack o’ lantern.
Begin gluing on pieces of your orange glass. Intermix the two different colors within your design as you cover the rest of your bowl.
When needed, mark a piece to fit.
Score the piece with your glass cutter and break the score with your running pliers.
Glue the piece in place.
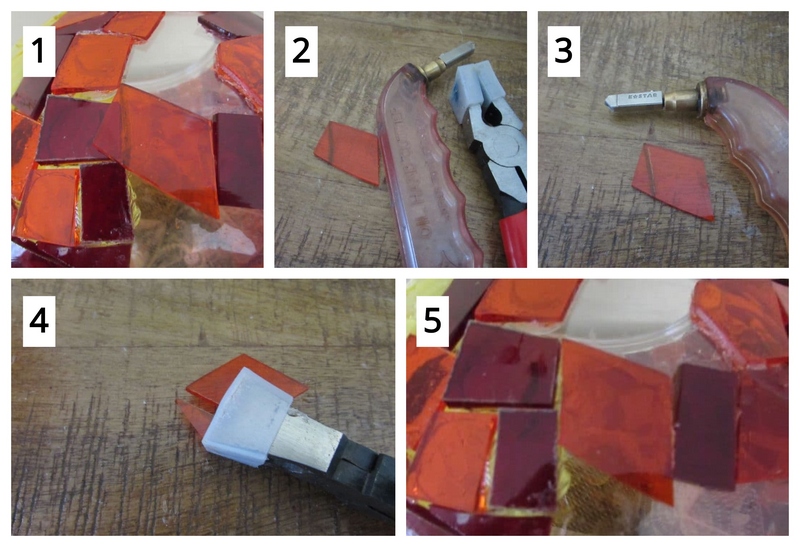
Continue marking, cutting and gluing on pieces to fit until your bowl is completely covered.
Now, Time to Grout!
You’ve completely covered your bowl with glass. You’re now ready to finish your project by grouting your mosaic.
You’ll need to prepare your grout mixture, apply the grout all over your mosaic and then clean it thoroughly.
If you’ve never grouted before, check out my post on how to grout your DIY mosaics here.
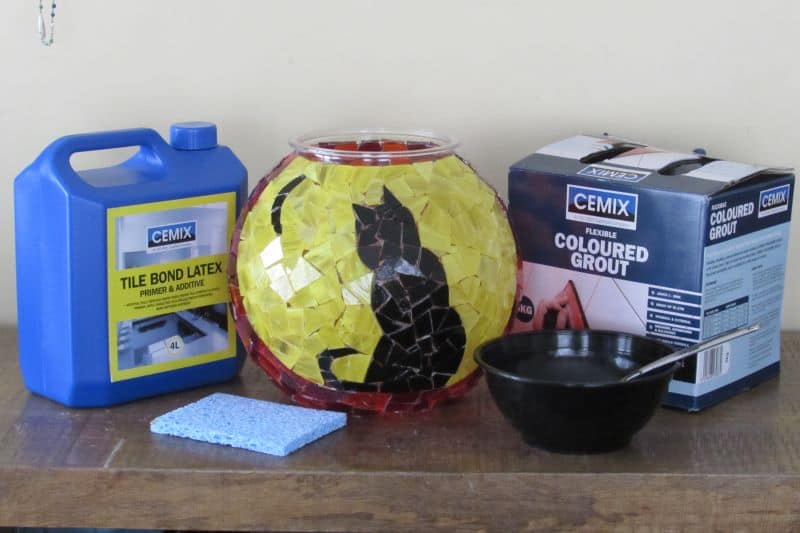
Step 9: Gather Your Grouting Materials
To grout, all you’ll need is your dry grout, latex additive, mixing bowl, spoon, sponge, old cloths or towels, garden gloves and water.
I recommend covering the surface that you’ll be grouting on with either newspaper or old towels to prevent any of the grout from staining your surface.
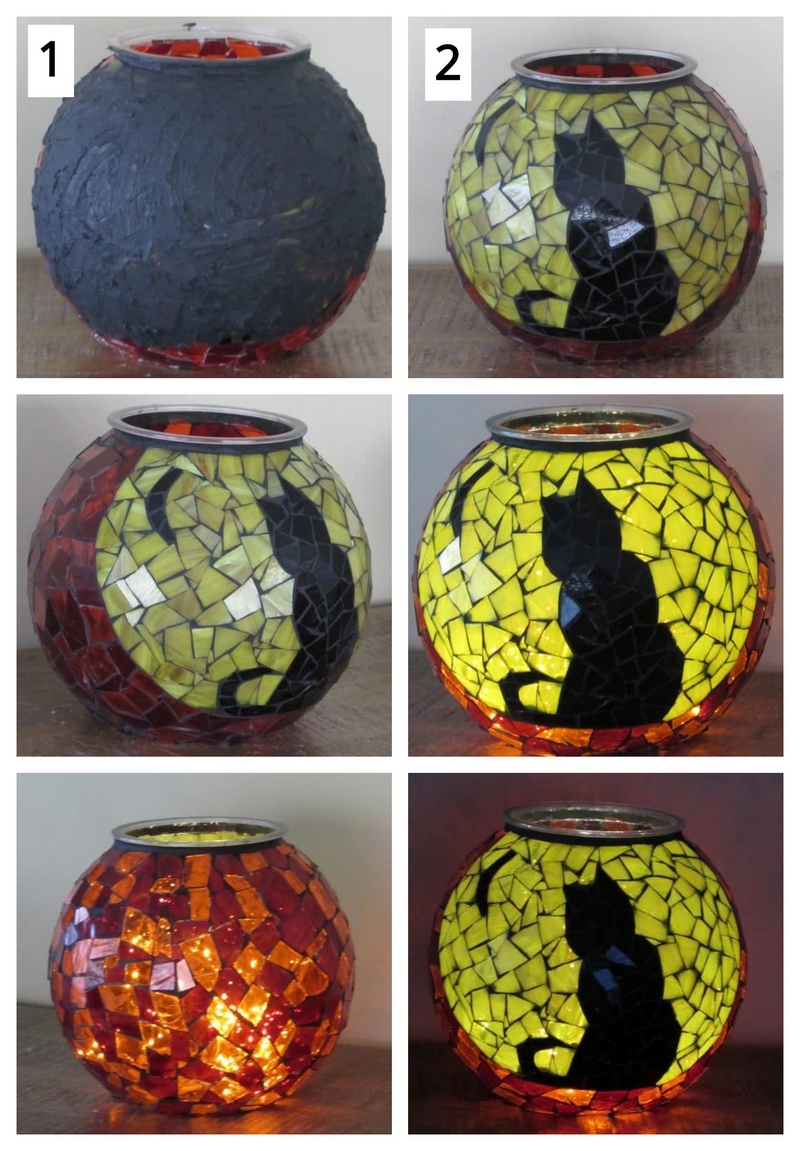
Step 10: Mix, Apply and Clean Off Your Excess Grout
Now you’re ready for the actual grouting process.
Put some dry grout in your mixing bowl and pour in some of the latex additive. Pour enough of the additive in to achieve the consistency of oily peanut butter. Don’t worry if you make your mixture too soupy. Just add more dry grout until the proper consistency is achieved.

Cover the entire bowl with the grout mixture.
Clean the bowl completely with a moistened sponge and finish wiping with your cloths.
Light it up with a strand of battery operated fairy lights!
*Few tips:
- Make certain to completely cover each piece of glass with your clear water resistant glue to avoid any seepage of grout underneath the glass.
- Clean the excess glue as you go. Allow the glue to dry slightly and then remove with a pair of tweezers as the glue dries to a rubbery consistency.
- Before grouting, remove as much of the dried excess glue between each piece of glass as possible.
- After grouting, light the jack o’ lantern up and search for areas where excess glue was missed. Remove the glue with the tweezers and replace with grout.
- Smooth grout with your fingertip along the top edge of your bowl to create a clean finished grout border at the top.
After finishing this project, I thought about other options for covering this $11 large bowl. Imagine instead of transforming it into a jack o’ lantern you transform it into an actual fish bowl! You could use beautiful aqua blue glass for the water and have fish swimming around with coral and seaweed etc! Sound cool??
How about transforming it into a Globe of the Earth! You could again use beautiful aqua blue glass for the water and then create all the land masses in light tan glass and the arctic and antarctic in white. Are you seeing it???!!
Another option is to cover it in glass beads and stained glass in a lovely pattern and use it as a vase or large centerpiece for your dining room table. You could also transform it into a cookie jar as creating a lid for it would be fairly easy by cutting out a circle of cork to fit the top and attaching a handle or knob to it.
Then my brain moved in the direction of sports! The bowl could be transformed into a soccer ball, baseball or basket ball and lit. Great father’s day present yes?
This piece is also completely weather resistant and can be displayed outside as long as you light it with a solar powered light or a water resistant outdoor battery operated light.
By mixing your dry grout with latex additive instead of water you create grout joints that won’t crack due to weather conditions. The latex additive makes the grout more elastic which also allows it to bond with the plastic or glass base used. Illuminated garden balls for your garden!
The possibilities are endless! Also keep in mind that the amount of free printable designs is tremendous. All you need is a copier to reduce or enlarge your design to suit your needs.
I hope that this project inspires you to create a lovely stained glass mosaic piece for your home.

Danielle is the mosaic artist and teacher behind Mosaics Mostly. She has been creating mosaics for over 25 years, and has taught hundreds of people to create their very own mosaic DIY projects at home. She has been featured in multiple galleries and magazines, and has even had her own beginner mosaics book published! She loves crafts, and is always working on something new!
