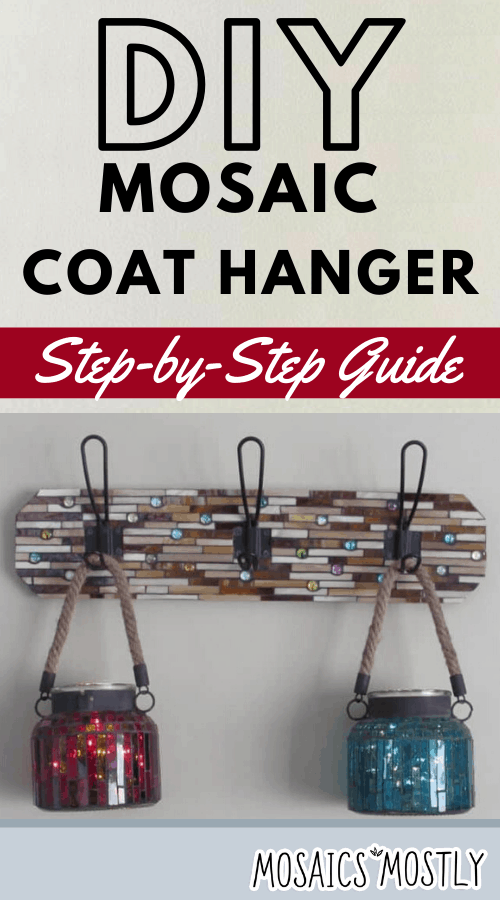
I found this coat hanger at my local craft shop and thought it would be a great base to cover with mosaic. I also thought that it could be used to hang things other than coats!
I have these sweet little glass discs called cabochons that I’m going to incorporate into the design. Each one contains a picture of a tree of life, so I’ve decided to use different shades of brown stained glass to make the mosaic look a bit woody or at least symbolize a woody feel.
This is a very simple mosaic project but requires your attention to create straight lines within your design using irregularly shaped pieces. Therefore, this project requires the use of a glass grinder in order to shape these pieces properly to achieve the desired effect. Plus these cabochons are circular bits within your design so you’ll have to shape these straight pieces around them. It’s easy trust me:) Brick masons have been doing it for centuries! So think of each piece of stained glass you’re going to work with as an individual brick.
Materials Needed for DIY Mosaic Coat Hanger
- A wood based coat hanger
- Three different shades of brown scrap stained glass
- Couple dozen cabochons displaying the tree of life or any nature scene
- Glass cutter
- Running pliers
- Mosaic cutter
- Glass grinder
- Clear water resistant adhesive
- Black grout
- Latex additive
- Mixing bowl, spoon, sponge, rags and marker
- Garden glove
- Safety glasses
How to Make Your Very Own DIY Mosaic Coat Hanger
Below you’ll find my step-by-step instruction on how to create your very own mosaic coat hanger at home. Let’s get started!
Step 1: Gather Your Materials and Tools
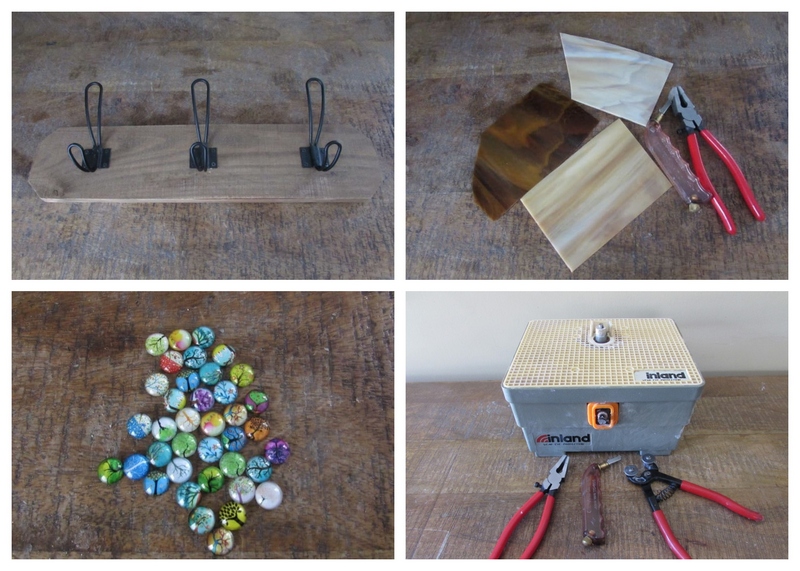
Before you get started, make sure that you have everything you need close by.
My wooden coat hanger will work perfectly as my base but feel free to use other bases such as key holders for your project base if you’d prefer.
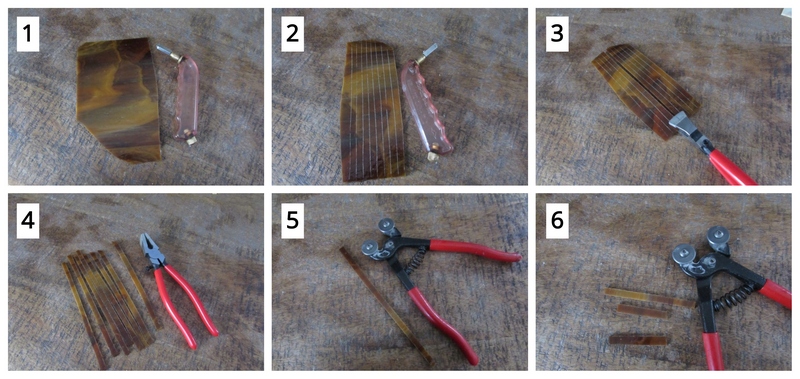
Step 2: Cut Your Glass
Gather your three different shades of glass together with your glass cutter and running pliers.
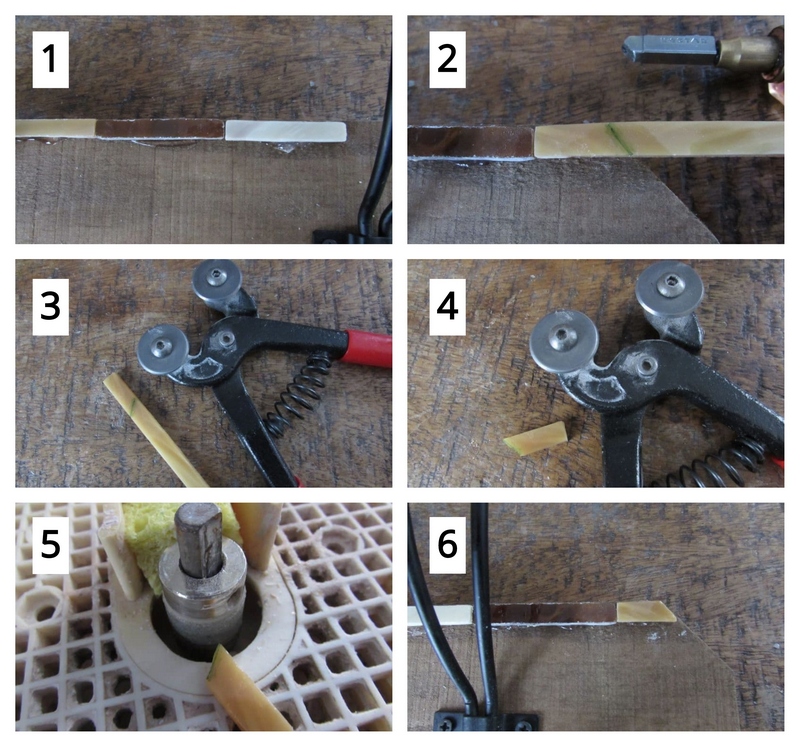
Using your glass cutter, score your tan piece of glass vertically creating strips. Try and keep your lines as straight as possible and remember to move the glass cutter across the surface of your glass in only one direction never losing contact with the glass.
Take your running pliers and line the center of the tip up with one of your score line and apply just enough pressure to break the score.
Repeat this process until all your long strips are broken out.
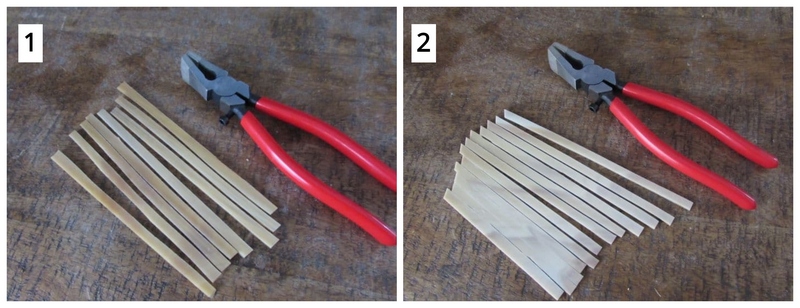
Take your mosaic cutter and begin cutting the strips up into different size smaller pieces. These pieces will be the bricks you’re going to work with.
Repeat this process for the other two shades of tan glass.
Step 3: Shape Your Glass on Your Grinder
The stained glass “bricks” need to be as straight on every side as possible. If one of the edges is slightly angled, take it to your glass grinder and gently grind the edge to make it straight.
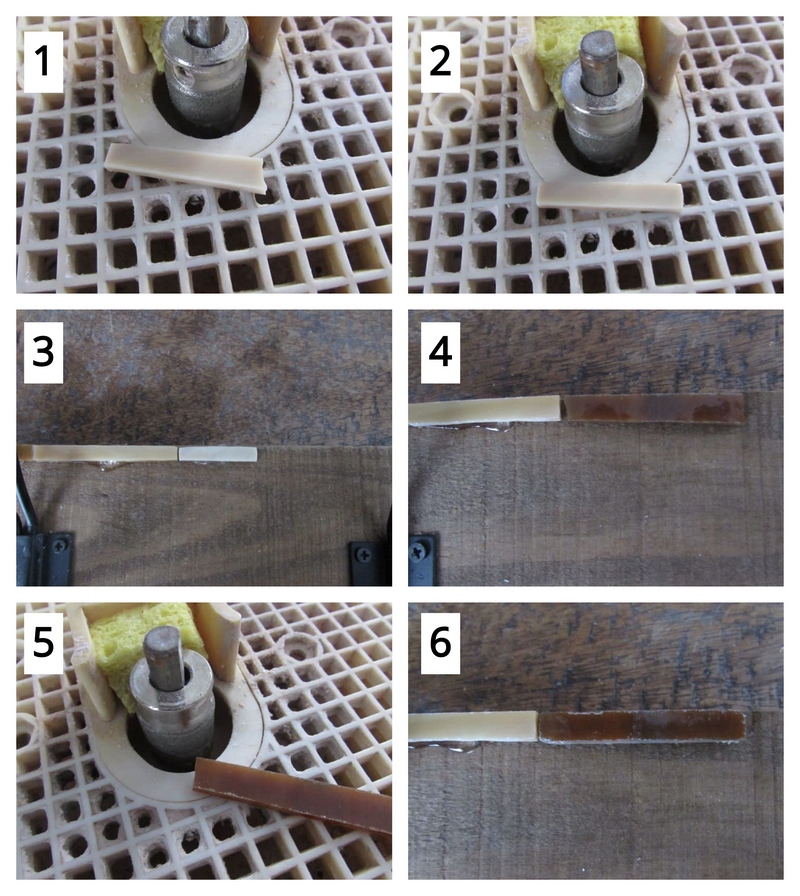
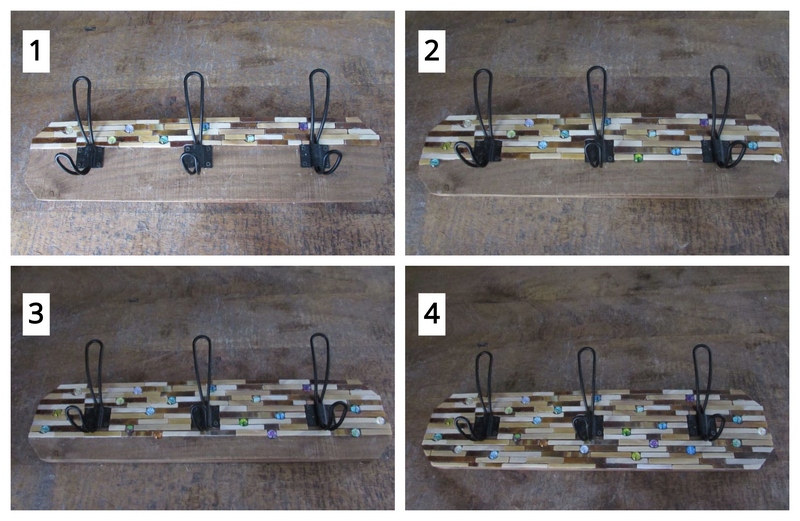
Step 4: Cut, Shape and Glue on Your Pieces
Begin gluing your bricks in place across the hanger horizontally.
Your edge pieces will have to be marked, cut, shaped on the grinder and glued in place.
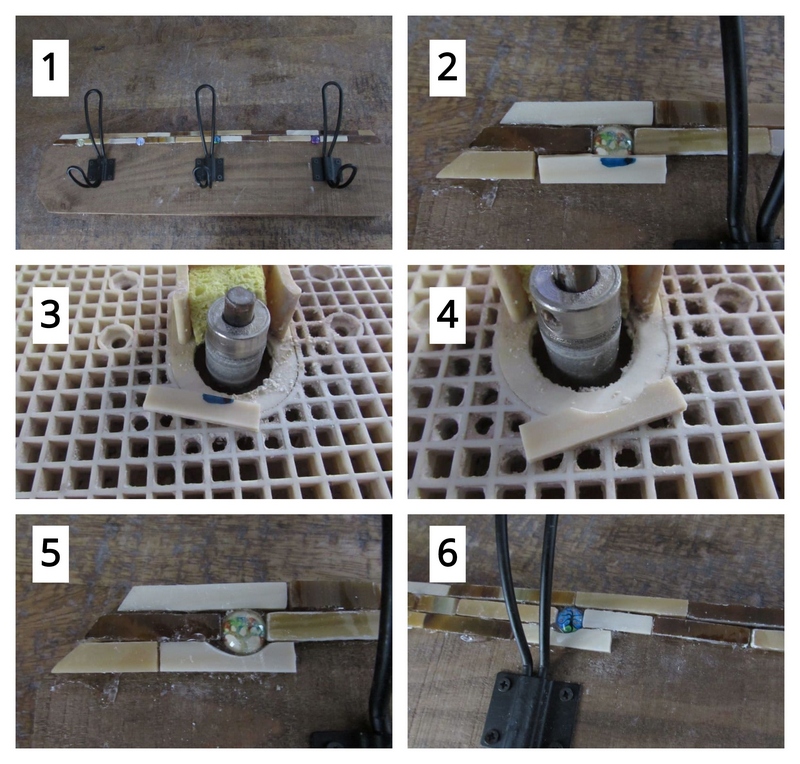
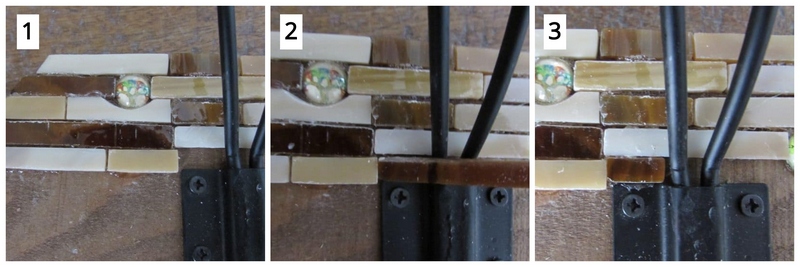
Begin your second row where you will now introduce your cabochons into the design.
So cabochons are domed shaped gems. These cabochons have pictures inserted of different trees of life.
We’re simply going to disperse them throughout the design. Glue your first one in place.
Mark a piece to fit around your cabochon.
Take the piece to your glass grinder and create a gully in the center of the piece by pushing the marked area against the head of the grinder until the gully is created.
Glue the piece in place.
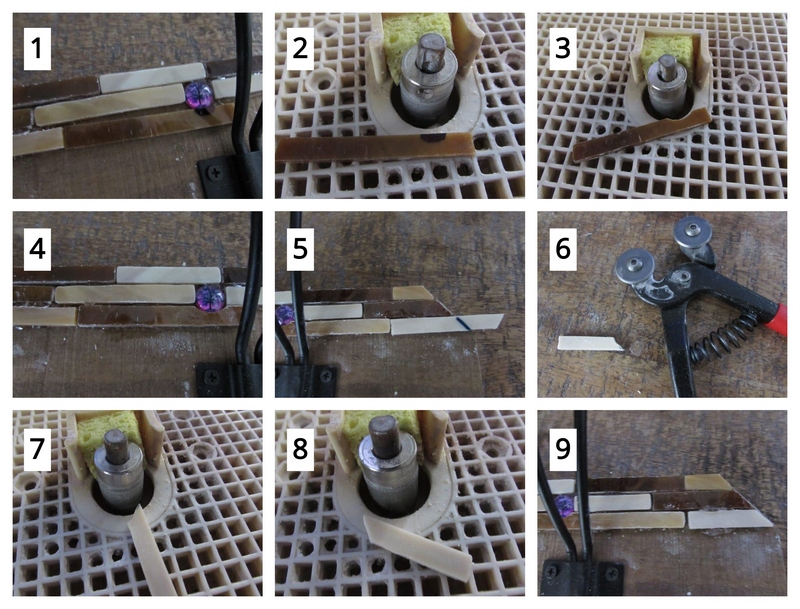
Do the same for your next cabochon. Mark the area of the glass that needs to be removed, take your “brick” to the glass grinder and push that area against the grinding head until a gully is created.
Glue the piece in place.
Repeat this process for your next piece to fit around your cabochon.
Mark a piece to fit your edge and cut it with our mosaic cutter.
Smooth the cut edge out on your glass grinder and glue the piece in place.
Mark an edge piece to fit.
Cut it with your mosaic cutter and smooth it on your glass grinder.
Glue the piece in place.
Repeat this process to complete all the other rows to cover your coat hanger.
Your will have to work around your wrought iron hanger parts too by marking and cutting to fit.
Mark a piece to fit in the narrow section around the hook.
Cut the piece with your mosaic cutters and glue the piece in place.
Repeat all these processes to complete row after row until full mosaic coverage is achieved!
Now, Time to Grout!
You’ve covered your entire wooden coat hanger base with gorgeous pieces of stained glass and cabochons. The last part of this project is grouting your piece.
You’ll need to prepare your grout mixture, apply it all over the base of your coat hanger and clean it thoroughly.
If you’ve never grouted before, check out my post on how to grout your DIY mosaics here.
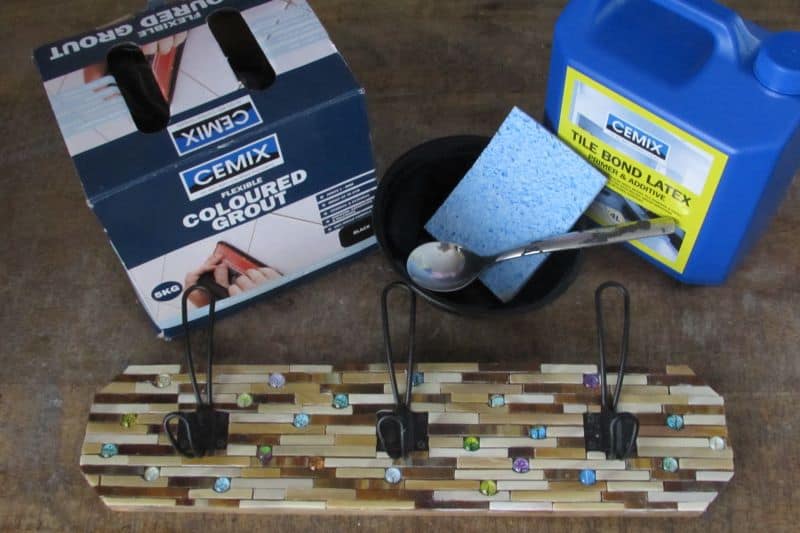
Step 5: Gather Your Grouting Materials
To grout, all you’ll need is your dry grout, latex additive, mixing bowl, spoon, sponge, old towel and rags, garden gloves and of course water.
I would recommend covering the surface that you’ll be grouting on with newspaper or old towels to prevent any of the grout from staining your surface.
Step 6: Mix, Apply and Clean Off Your Excess Grout
Now you’re ready for the actual grouting process.
First, place some dry grout in your mixing bowl and add some of the liquid latex additive to it to achieve the consistency of oily peanut butter.
Don’t worry if your mixture is too soupy. Just add more dry grout to achieve the proper consistency.

Cover the face of your hanger with the grout mixture. Clean off the grout with a moistened sponge. Make sure you’re near a water source as you’ll need to rinse out the sponge repeatedly. Finally, wipe the surface clean with some old cloths.
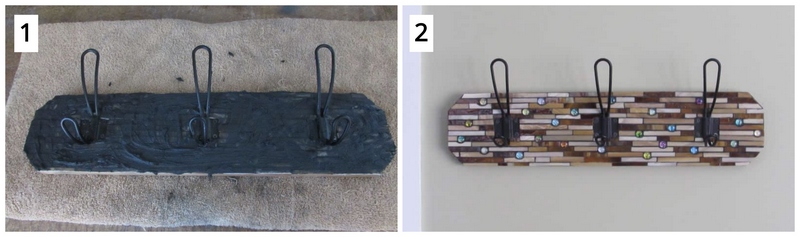
Hang your piece to show off to your friends and family.
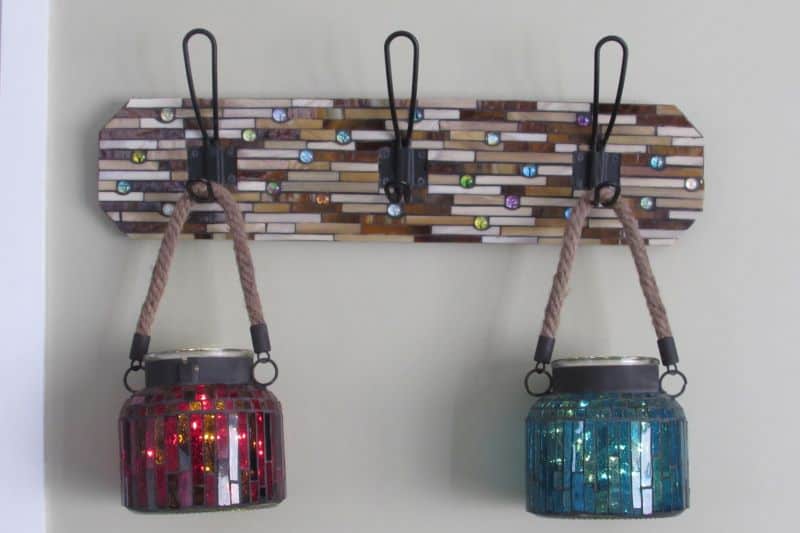
As I mentioned before, this lovely hanger doesn’t have to be used to hang coats.This same process of creating “bricks” and shaping the “bricks” to fit was used to create the two stained glass mosaic candle holders shown here only these bricks were laid vertically.
This stained glass mosaic picture frame was also completed using the same technique.
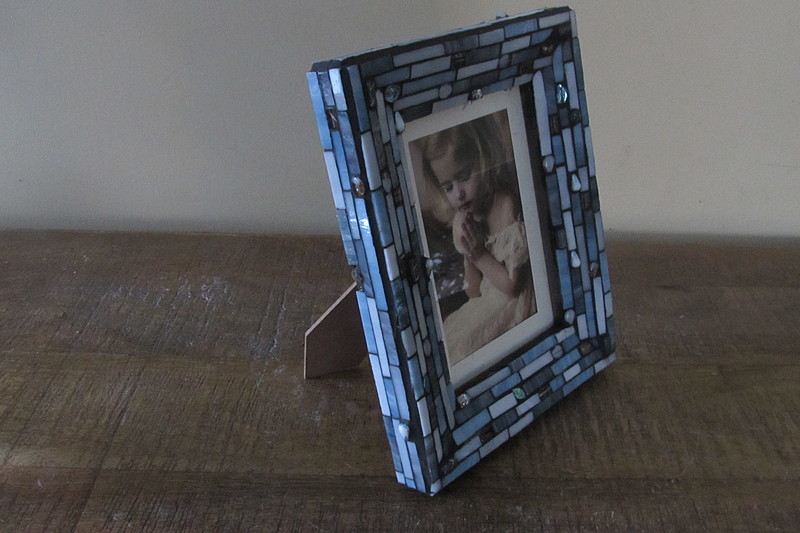
The possibilities are endless!

Danielle is the mosaic artist and teacher behind Mosaics Mostly. She has been creating mosaics for over 25 years, and has taught hundreds of people to create their very own mosaic DIY projects at home. She has been featured in multiple galleries and magazines, and has even had her own beginner mosaics book published! She loves crafts, and is always working on something new!
