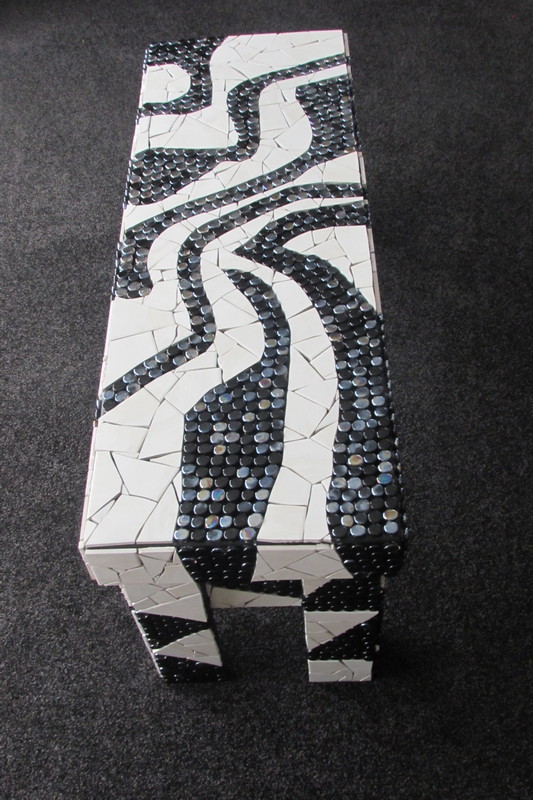
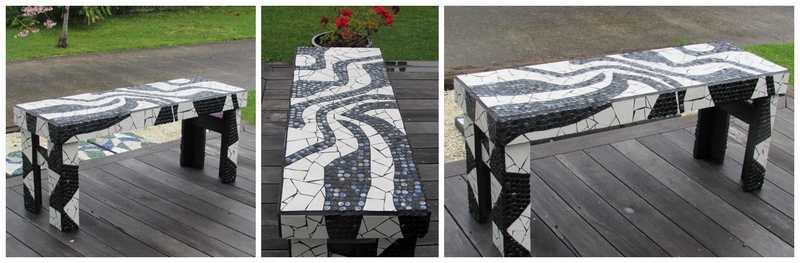
What’s more beautiful in a garden than an inviting beautiful bench to rest on while soaking up some rays and enjoying your surroundings. This bench is a well made, sturdy outdoor bench that I purchased from a local garden center here in New Zealand. Someone slapped some black paint on the pressure treated wood and this bench sold for twice as much as the unpainted version. No telling the value that we’re about to add by covering this bench in a contemporary glass and tile mosaic design!
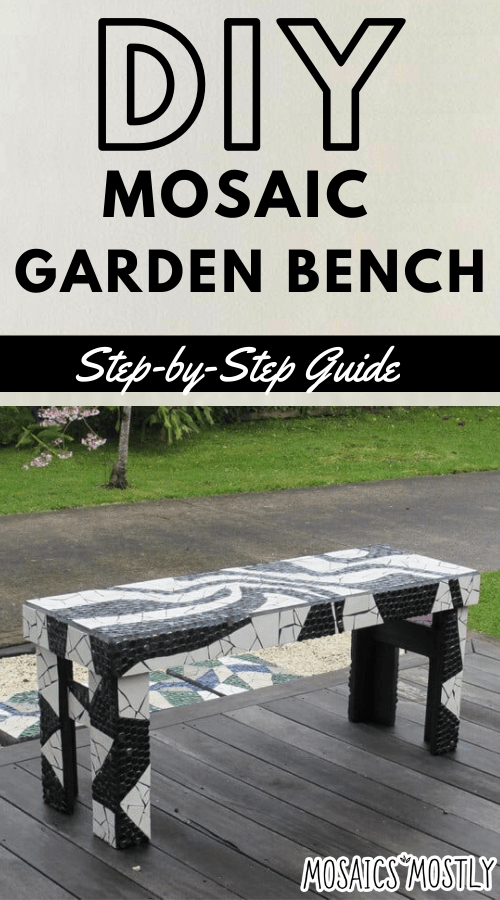
I decided on a black and white theme and to use white matte finished floor tiles in combination with black glass half marbles. A long time ago, when I had my gallery in Richmond Virginia, I made a very unique discovery! When playing around with different resurfacing materials, I realized that the glass half marbles were exactly the same thickness as floor tile if you glued them on to the surface flat side up! I worked with these two materials together to create dining room tables, patios, tub surrounds and even glass block walls. But for this project, I’m going to resurface a garden bench.
Materials Needed for DIY Mosaic Garden Bench
- A garden bench made out of pressure treated wood
- White matte finished floor tile and glass black half marbles.
- Black Grout
- Latex Additive
- Clear water resistant adhesive
- Black outdoor paint if your bench is not painted black
- Glass grinder
- Mosaic cutters
- Hammer
- White permanent marker and a red non permanent marker
- Mixing bowl, sponges, rags
- Safety glasses
- Garden gloves
How to Make Your Very Own DIY Mosaic Garden Bench
Below you’ll find my step-by-step instructions on how to make your own lovely mosaic garden bench at home. Let’s make something beautiful for your garden!
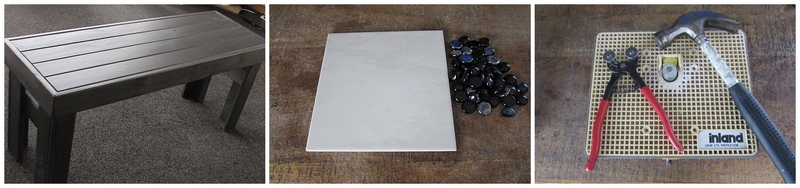
Step 1: Gather Your Materials and Tools
Before you get started, make sure that everything you’ll need to create your lovely mosaic bench is within arms reach.
For this project I’m using a pressure treated wood garden bench that I bought at my local home improvement store but you can use a cement bench if so choose. Just make sure that if you use a wooden bench that it is pressure treated as you wouldn’t want the wood to warp due to either wet weather conditions or because of covering it with a wet grout mixture. Pressure treated would is resistant to absorbing liquid.
I’ve also decided to cover it with black glass half marbles and stony matte finished white flooring tile pieces.
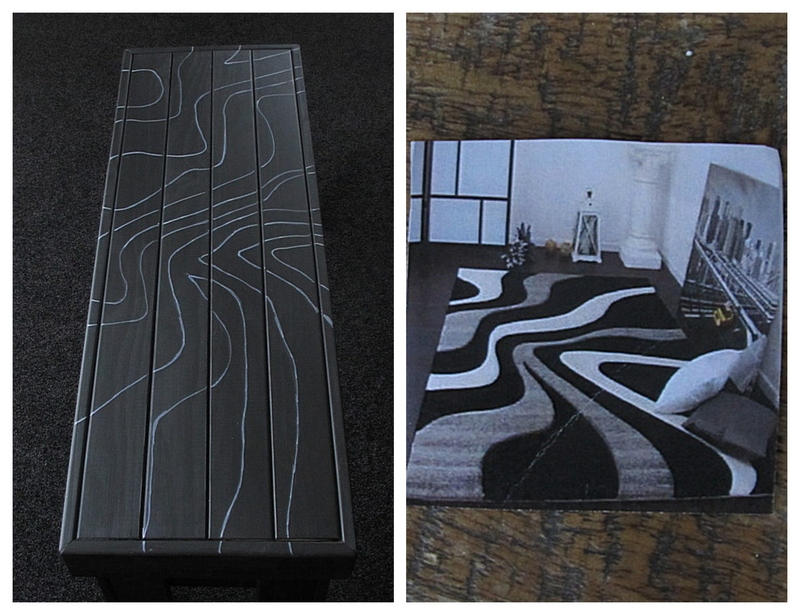
Step 2: Draw Your Design on Your Bench
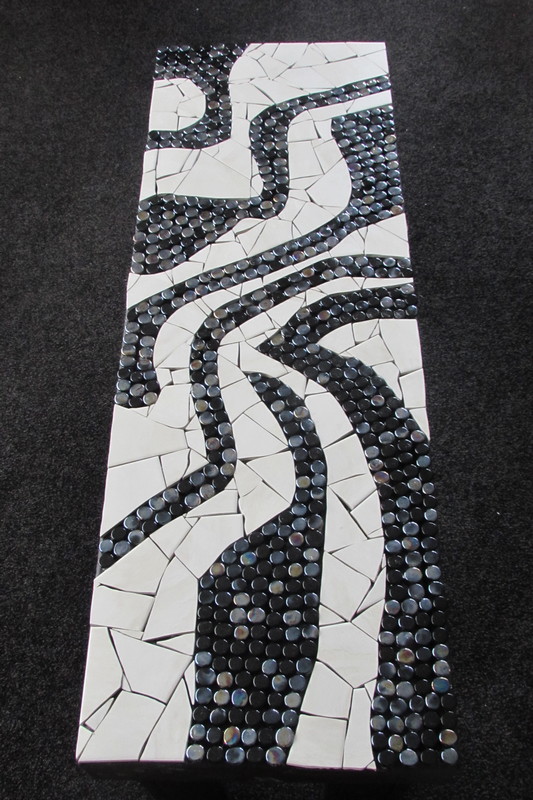
Draw your flowing random design on the top of your garden bench with your white permanent marker. I got the idea for my design from a rug pattern that I liked. I wanted the design to drip over the edge of the bench and down the legs.
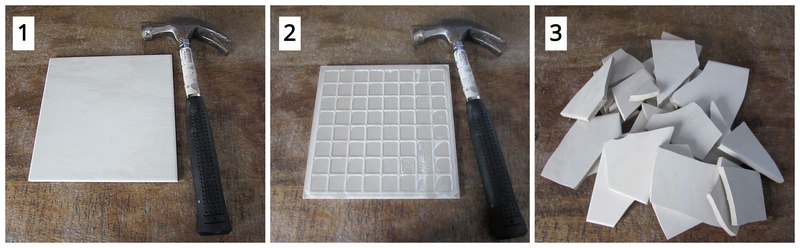
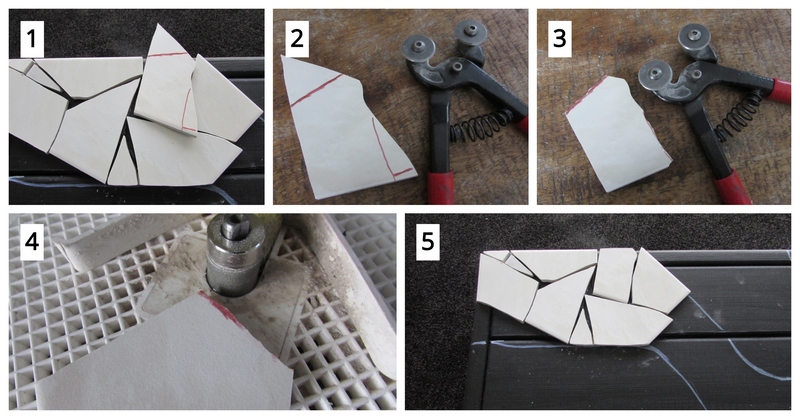
Step 3: Break Up Your Tiles
Break up your tiles with a hammer. Make sure to turn the tiles over and break them on their back side so as not to damage the finish.
Step 4: Glue Your Pieces on the Top of Your Table
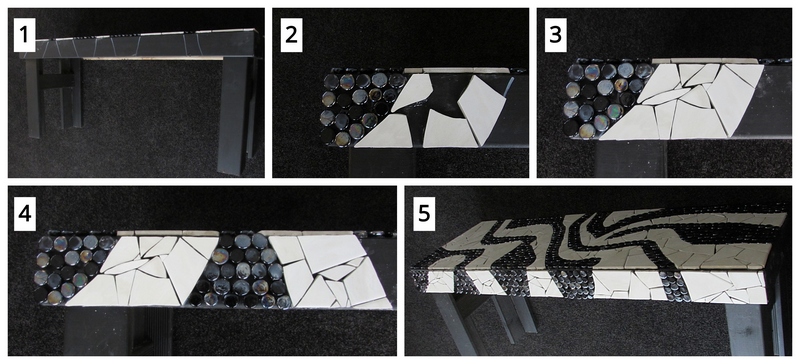
Begin by taking random bits of tile and filing the first portion of the design.
Mark a piece of tile to be cut to fill the top edge space. Cut out the piece needed with your mosaic cutters.
Take the piece to the glass grinder and smooth it to fit. Glue the piece in place.

Mark another piece to fit. Cut the piece with your mosaic cutters, smooth the piece out on your glass grinder and glue it in place.
Some pieces will need more than one cut to fit in place and will have more than one edge to smooth on the glass grinder.
As you continue marking, cuttting and gluing on tile pieces, begin gluing on some of your glass half marbles flat side up in the section below this first section of tile.
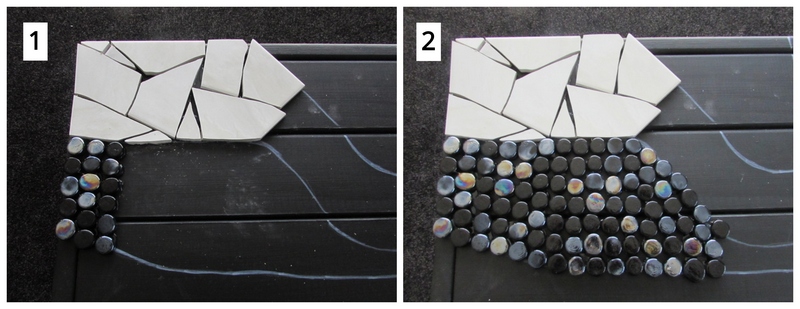
By working both sections together, it helps you control the line of your design while using the two different materials.
It also provides you with more flexibility while creating the design.
Continue this process to complete the top of your bench.

The top of your bench now has complete mosaic coverage!
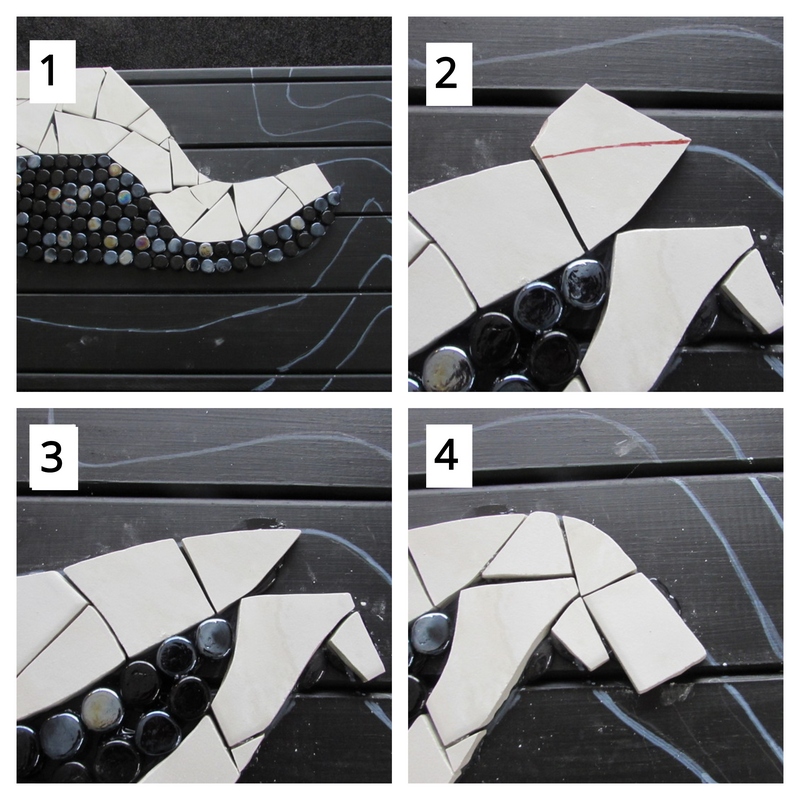
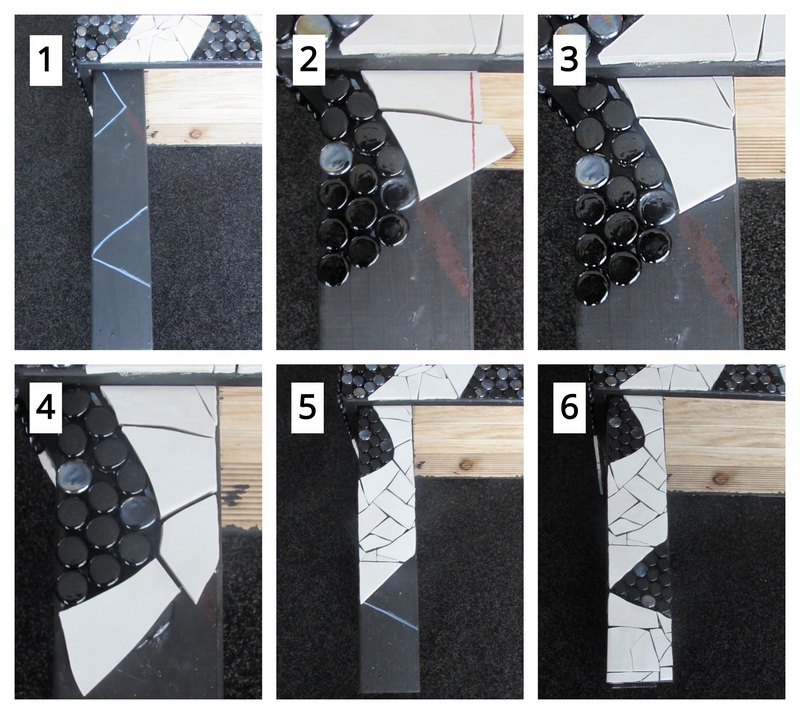
Step 5: Glue the Pieces on the Sides of Your Table
Now it’s time to carry your design down the sides of your table.
Draw your continued design on the first side of the table. Let the design drip over the edge following the designated sections of both tile and glass.
Repeat the process that you used to cover the top of your table for your sides.
For your tile, mark each piece to fit, cut the pieces with your mosaic cutter, smooth and shape the pieces with your glass grinder when necessary and glue the pieces in place.
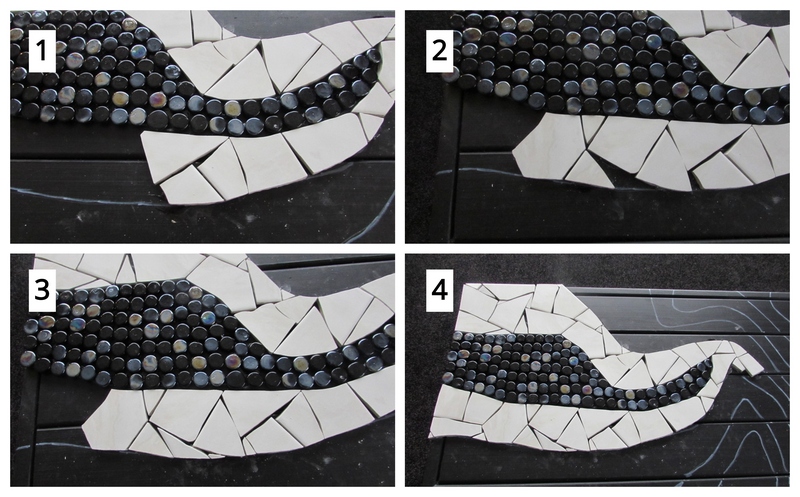
Draw your design on the second side of the bench allowing the sections of glass and tile on the top of the bench to drip down the side yet again.
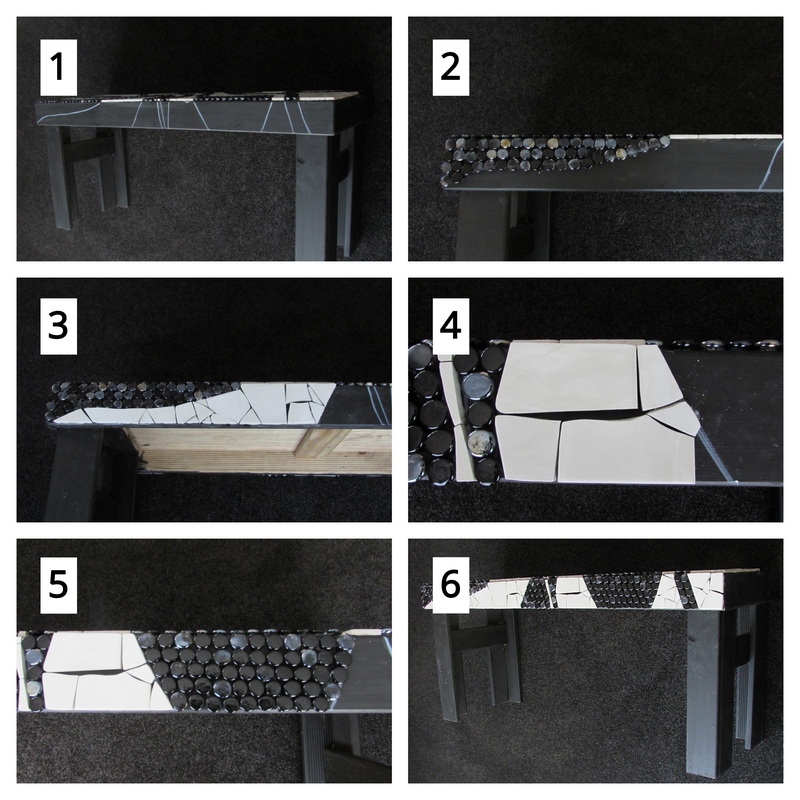
Work the other two sides of the bench in the same way.
You’ll need to stand the bench upright on it’s narrower edge and stand on a step stool in order to glue the pieces on as trying to work the mosaic in any other way won’t do as your piece would slide off as you attempted to glue them on.
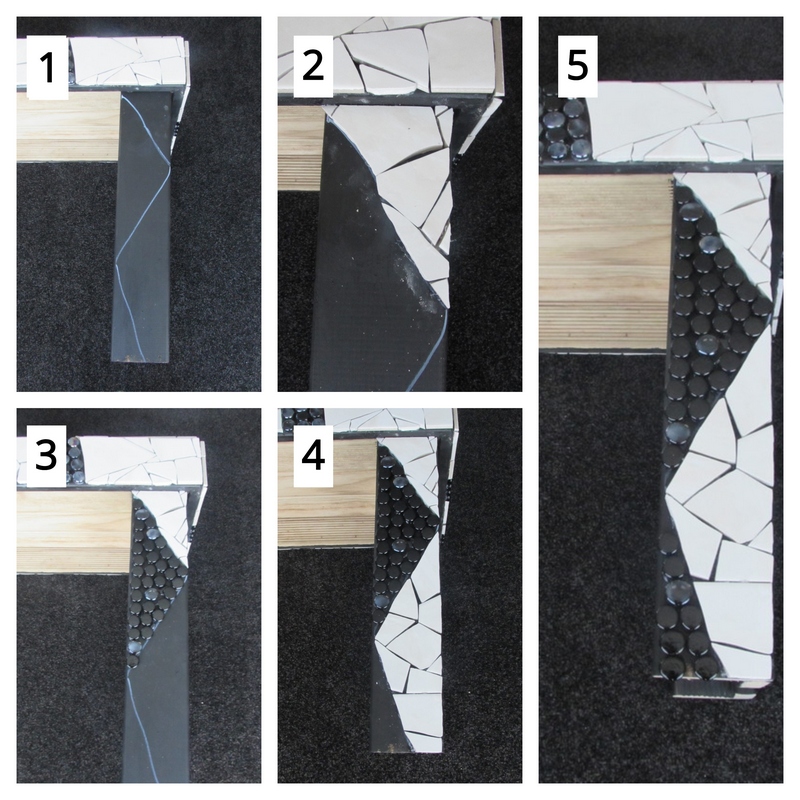
Step 6: Glue Pieces on All Four Legs
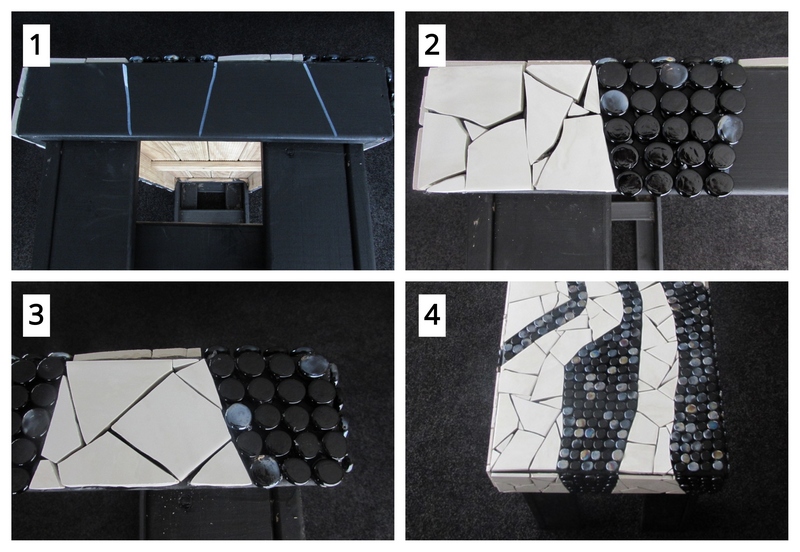
The last bit of mosaic coverage needed is on the leg portion of your garden bench.
Each leg has two sides so there are eight sides to cover. Draw your design on the leg sides allowing the design to drip down the legs as you did the sides.
The same process continues with gluing on your black half marbles in alternating sections with your tile pieces.
For your tile, mark each piece to fit, cut the pieces with your mosaic cutter, smooth and shape the pieces with your glass grinder when necessary and glue the pieces in place.
And the next leg.
First two leg sides completed! Only 6 more sides to go!
Remember to allow the design to flow down each leg. This creates a lovely visual effect.
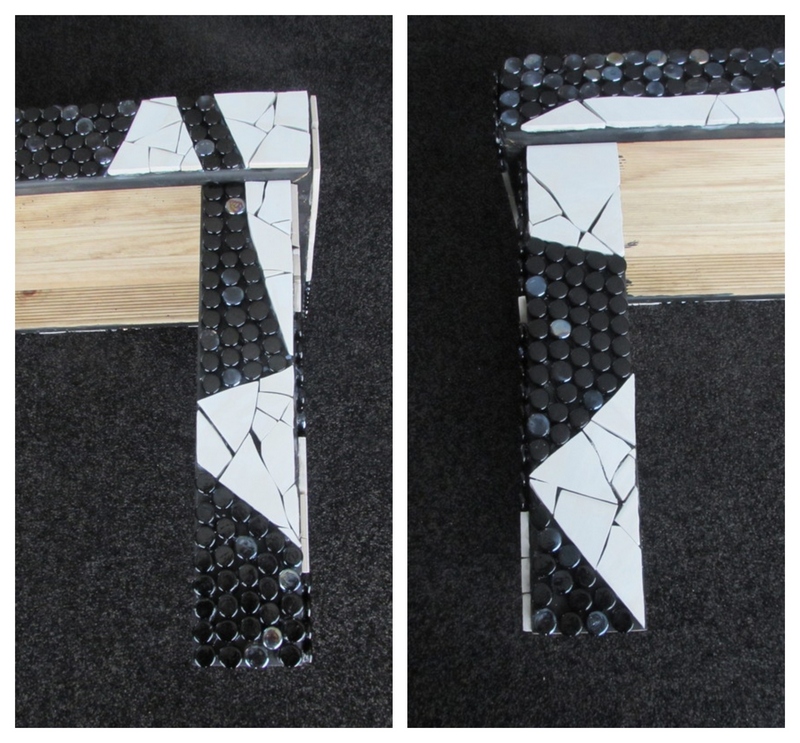
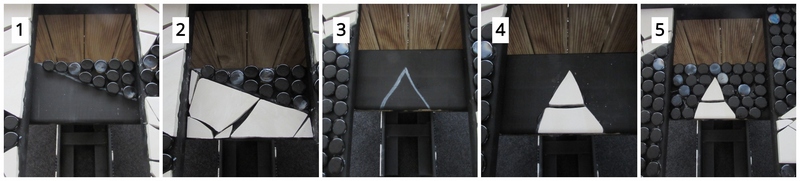
Finally, complete the design by finishing the two leg bracing pieces with both tile and glass half marbles.
Your bench has total mosaic coverage! Time to grout!
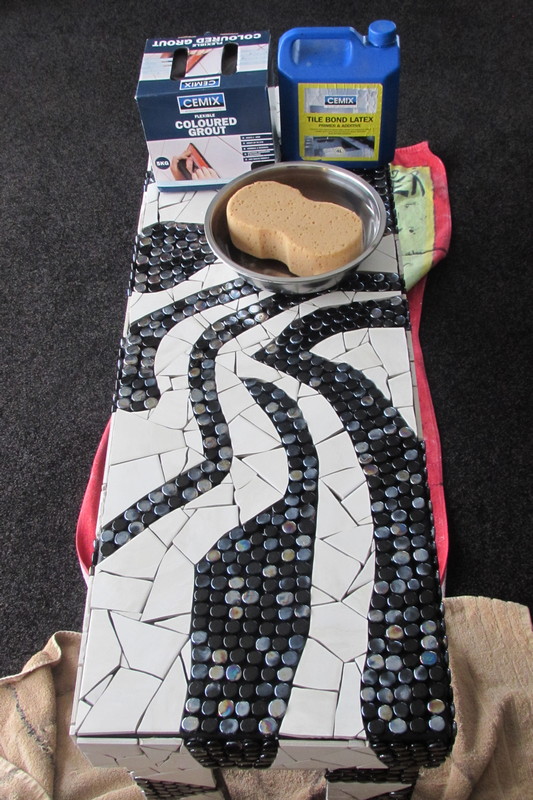
Step 7: Gather Your Grouting Materials
To grout, all you’ll need is your dry grout, latex additive, masking tape, mixing bowl, spoon, sponge, old cloths or towels, garden gloves and water.
I recommend covering the surface that you’ll be grouting the bench on with old towels to prevent any of the grout from staining your surface.
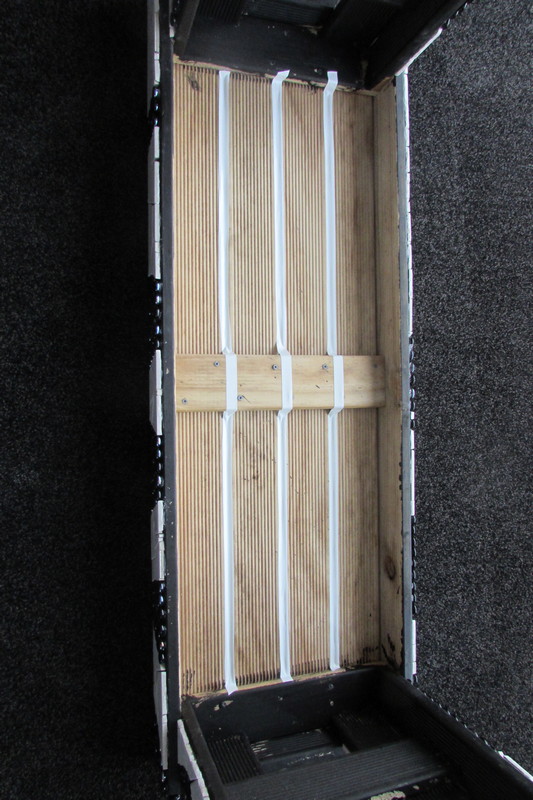
Step 8: Prepare Your Bench to be Grouted
Turn the bench over prior to grouting and place strips of masking tape over the spaces between each plank so that grout does not seep through.
Obviously if you’re using a cement base for your project or a solid wooden bench this step is completely unnecessary.
Step 9: Mix, Apply and Clean Off Your Excess Grout
You’re now ready for the actual grouting process!
First, you want to mix enough latex additive into your dry grout to achieve the consistency of oily peanut butter. Don’t worry if you add to much additive and your mixture is soupy. Simply add more dry grout to correct this and achieve the proper consistency.

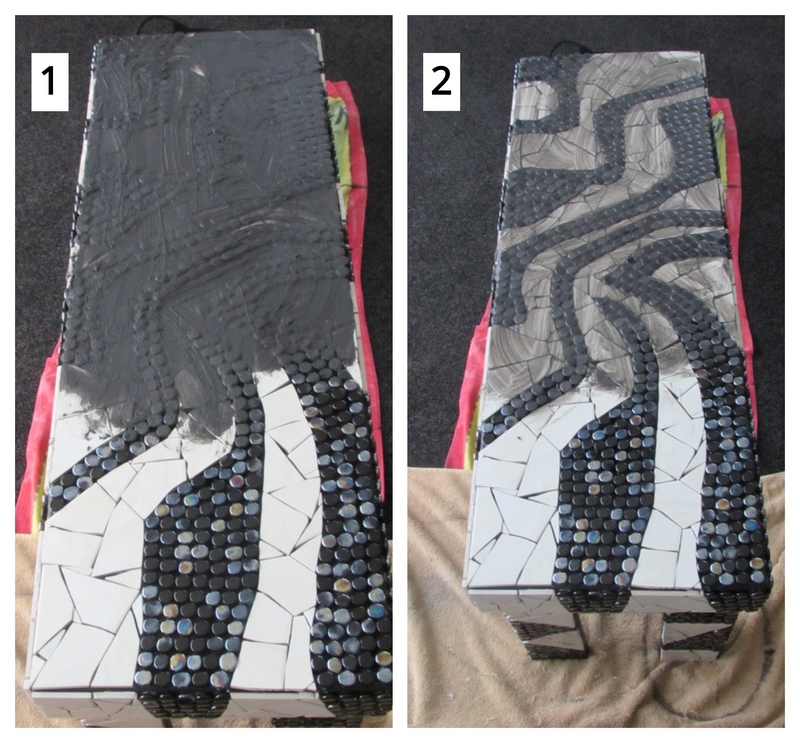
Once your mixture is correct, begin to cover each surface of your bench with it
Cover a portion of the top of your bench with the grout.
Begin cleaning off the grout with a moistened sponge. Make sure you’re near a water source as you will need to rinse off your sponge repeatedly.
Work in sections covering each surface of the bench with grout and then cleaning the surfaces off with a moistened sponge. You will need to take some old rags and wipe across all the surfaces after cleaning with the sponge in order to remove all the grout residue.
This process of combining glass and tile as a mosaic resurfacing product can be used on a variety of surfaces, not just garden benches! And this bench is completely weather proof as we’ve combined the grout with latex additive to make it so. The latex additive added to the already latex fortified grout provides the grout with more elasticity properties so that the grout joints can withstand the elements and dramatic changes in temperature. That combined with using a clear water resistant adhesive makes it waterproof for all intensive purposes. The possibilities are endless!
Here are a few ideas for using this process in other ways:
- Birdbaths
- Outdoor tables
- Outdoor planters
- Stepping stones
- Back splashes
- Patios
- Tub surrounds
- Any floor! Bathroom, kitchen, foyers
- Coffee tables
- Dining room tables
The color combinations are endless also as the glass half marbles come in a variety of colors and sizes. Just remember that in order to achieve a flush surface, the glass half marbles need to be used in coordination with floor tile as wall tile is a different thickness than floor tile.
*Note: It is best to keep all projects made on a wood substrate out of the direct exposure to the elements. With constant rains, some of the glass pieces could become compromised and unattach through water seaping underneath. So keeping this beauty protected is best.
Also, try and keep your grout joints as narrow as possible to avoid any cracking. My larger grout joints needed regrouting on this bench as a result of the joints being a bit too wide.You may also want to cover the top surface of this bench with a thin piece of cement backer board because of the slitted wooden surface prior to laying your mosaic. If using a cement bench, this would be completely unnecessary.

Danielle is the mosaic artist and teacher behind Mosaics Mostly. She has been creating mosaics for over 25 years, and has taught hundreds of people to create their very own mosaic DIY projects at home. She has been featured in multiple galleries and magazines, and has even had her own beginner mosaics book published! She loves crafts, and is always working on something new!

Hey there! This post couldn’t be written any better! Reading through this post reminds me of my
old room mate! He always kept chatting about this. I will
forward this article to him. Fairly certain he will have a good read.
Thank you for sharing!
Awe! Awesome!!!! Enjoy the site!