I’m a big fan of gardening. Beautifying my home with lovely healthy plants has always been a hobby that’s brought me great pleasure. It’s quite rewarding to nurture a plant and watch it grow into a lovely member our environment.
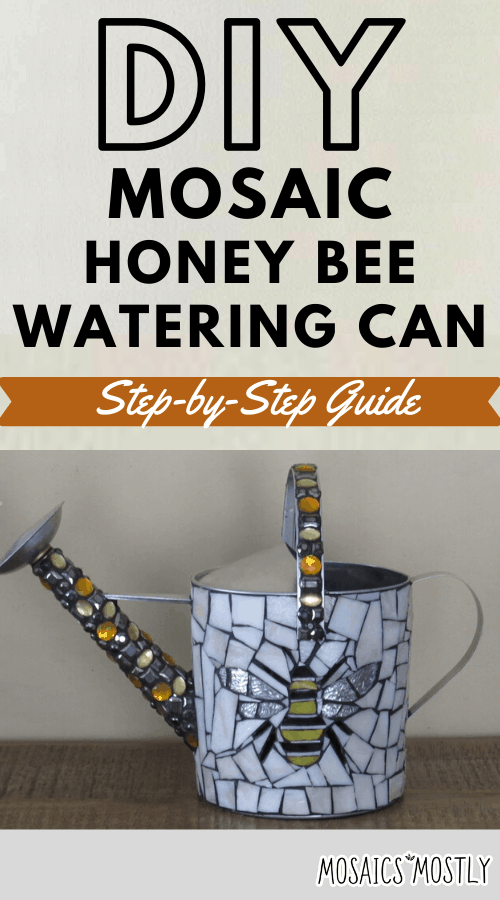
Honey Bees are an important element in the equation of keeping our plants healthy through their pollination process. What better image then for my mosaic watering can project than the honey bee.
Materials Need for DIY Mosaic Honey Bee Watering Can
- One metal watering can
- A stencil image of a honey bee
- Scissors
- One permanent marker
- Stained glass – colors – black, yellow and opalescent for the honey bee and an opaque off-white for the background
- Acrylic beads for the handle and spout
- Clear water resistant adhesive
- Mosaic cutters
- Glass cutter
- Glass grinder
- Running pliers
- Black grout
- Latex additive
- Safety glasses
- Garden gloves
- Mixing bowl, spoon, sponges, old rags, microfiber cloth
How to Make Your Own DIY Mosaic Honey Bee Watering Can
Below you’ll find my step-by-step instructions on how to make your very own mosaic honey bee watering can for your garden. Let’s get started!
Step 1: Gather Your Materials and Tools
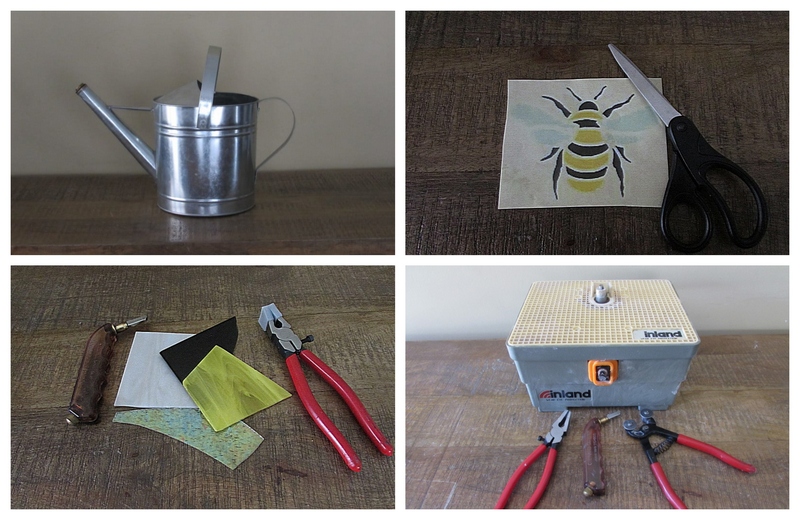
Before you get started, make sure that you have everything that you need within arms reach.
I decided to do the background in white glass emphasizing the yellow and black glass I’ll be using obviously for the honey bee’s body. I did found some really great opalescent scrap glass for the wings!
I downloaded a great honey bee image to create a mosaic out of on some free printables sight! So let’s get started!
Step 2: Trace Your Image on to Your Watering Can
Enlarge or reduce the stencil image to fit the front of your watering can. Cut the individual pieces of the image out. Tape or glue the individual piece on the front of your can.
Trace around the individual stencil pieces with a permanent marker transferring the design on the surface of the can.

Step 3: Cut Your Glass for Your Honey Bee’s body
It’s now time to cut our glass that creates the body of the honey bee.
We’ll start with irregularly scoring the yellow glass with your glass cutter in curved sections as your design dictates. Use your running pliers to break the scored sections out. Line the center of the tip of the running pliers up with the score line and apply just enough pressure to break the score.
Repeat this process for your black glass.


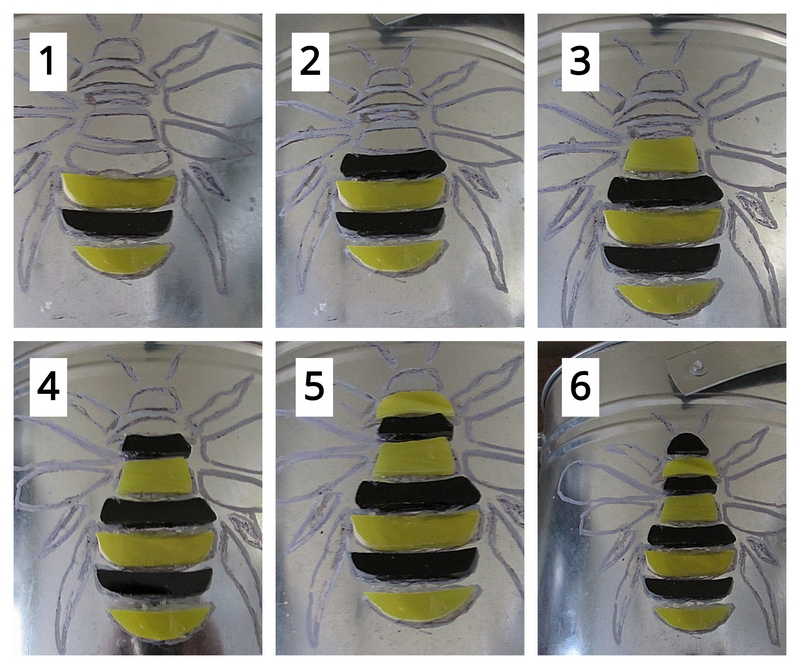
Step 4: Cut, Shape and Glue on Your Honey Bee’s Body Pieces
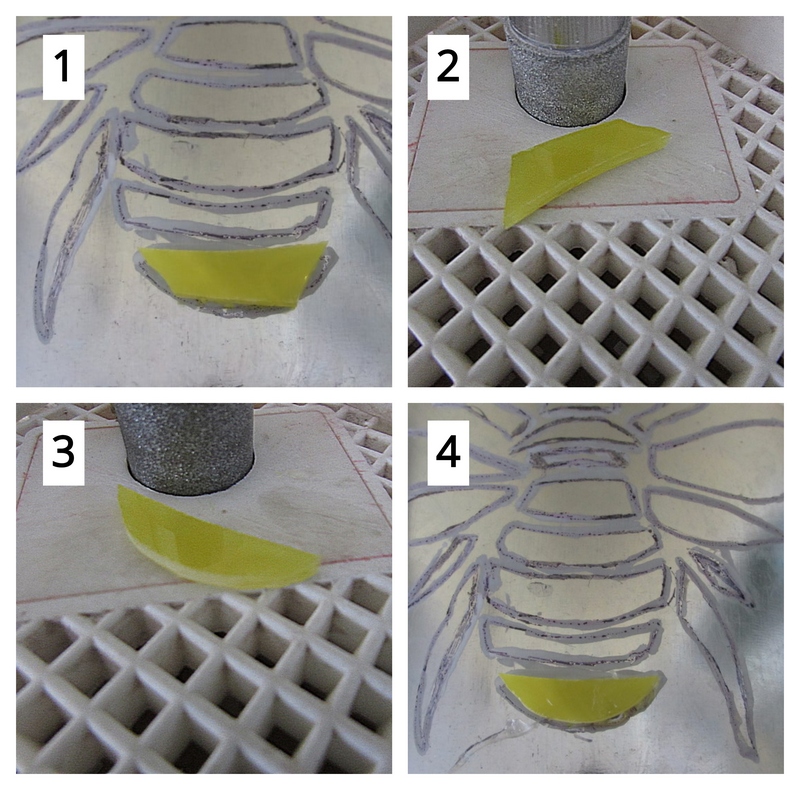
Use your mosaic cutter to nip a piece approximately the size of the first yellow section of the body of the honey bee.
Take the piece to your grinder to shape it properly to fit. Glue the piece in place.
If you’re new to mosaics and have never shaped glass before on a glass grinder, check out my post on how to sculpt glass on a glass grinder here.
Use your mosaic cutter to nip a piece approximately the size of the first black section of the body of the honey bee.
Take the piece to your grinder to shape it properly to fit. Glue the piece in place.
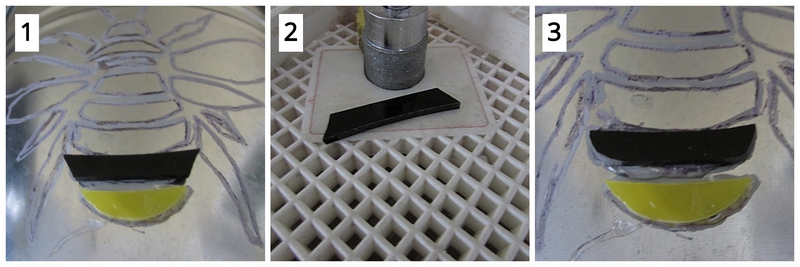
Repeat this process until each section of the body is completed.
When necessary, mark a piece to fit, cut the piece out with your mosaic cutters, shape the piece on the glass grinder and then glue the piece in place.
Step 5: Cut, Shape and Glue on Your Honey Bee’s antennae and Legs
Nip two thin small pieces with your mosaic cutters for your antennae and glue them in place.
Mark a black piece of glass for your first leg. Cut it out with your mosaic cutters and then take it to the glass grinder for shaping. Do the same for the 2nd leg.
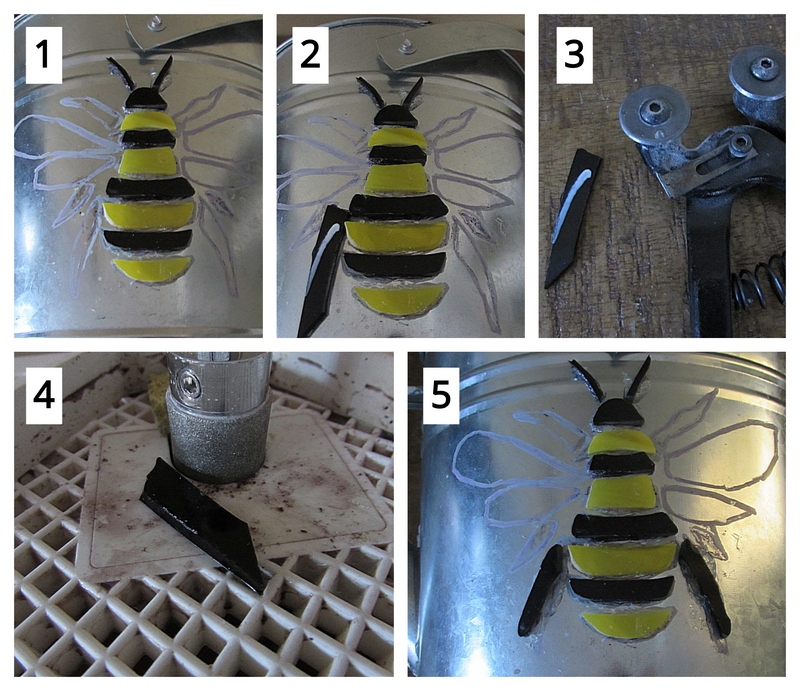
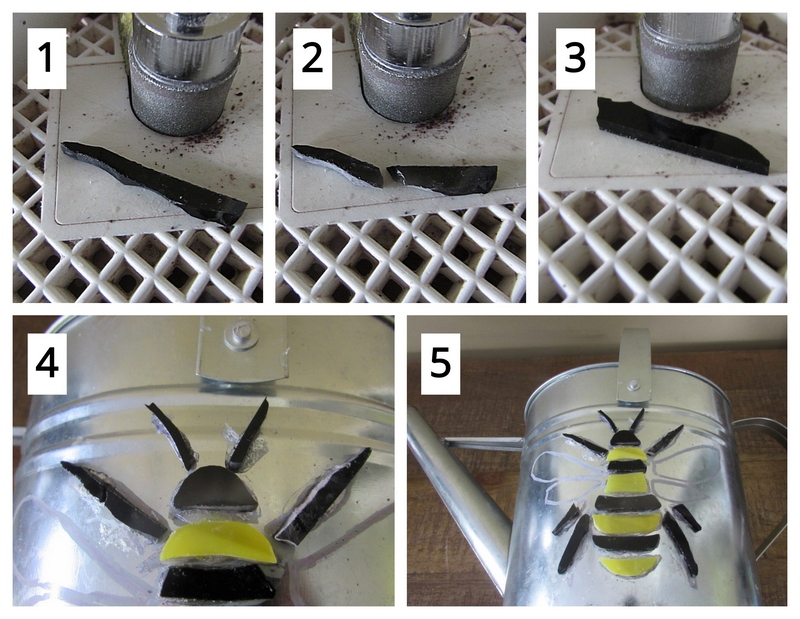
Shape another piece of black glass for the 3rd leg. Cut the piece in half so that both pieces lay flush on the can. Glue the pieces in place. Shape another piece for the 4th leg and glue it in place also.
Repeat the process for the fifth and sixth leg.
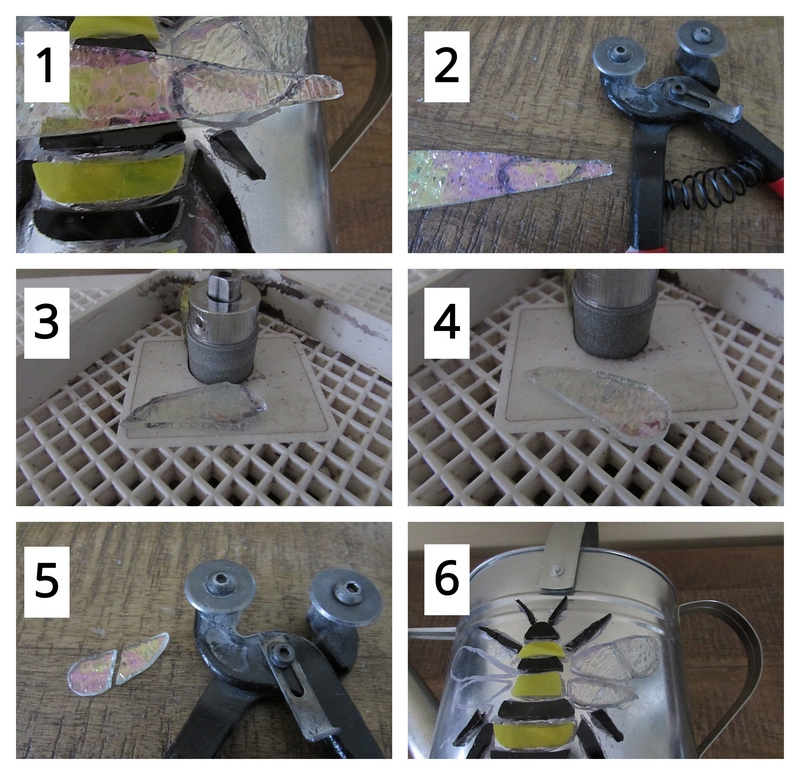
Step 6: Cut, Shape and Glue on Your Honey Bee’s Wings
Take your opalescent glass and trace your first wing on the glass with a marker.
Cut the wing shape out with your mosaic cutters and then take the piece to the grinder for shaping.
If the glass does not lay flush on the can’s surface, cut the piece in half and then glue the two pieces in place. Do the same for the second wing.
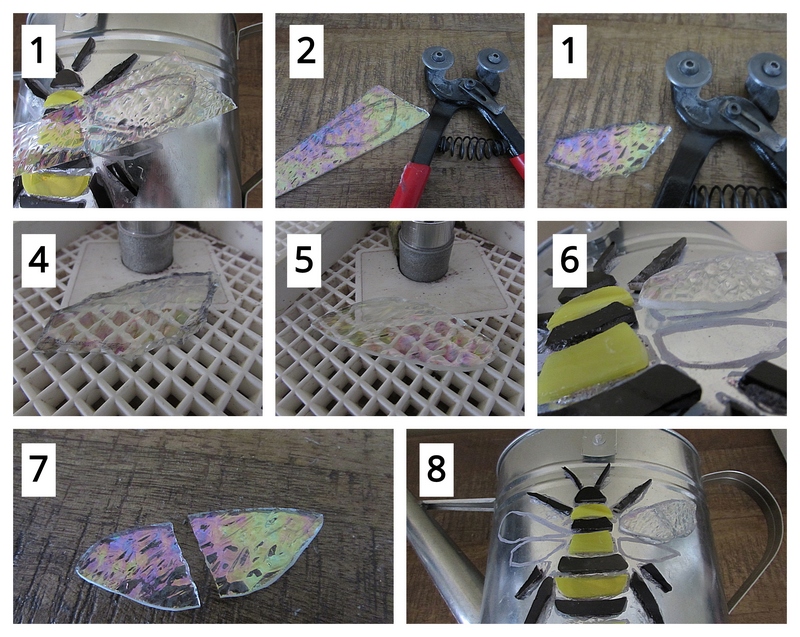
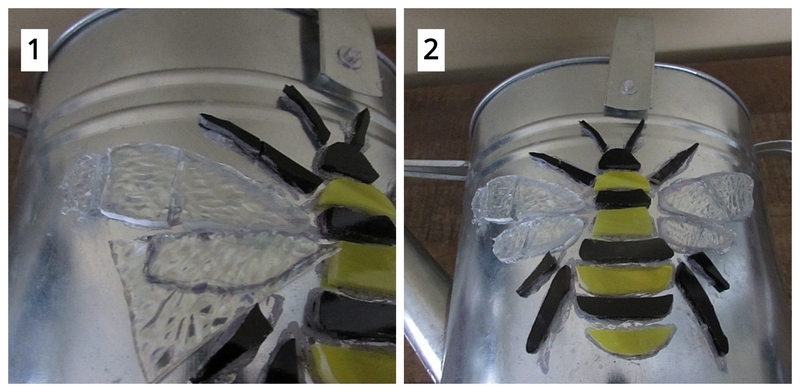
Repeat this process for your second wing.
Let’s finish up by repeating this process again for the third and fourth wings.
Step 7: Cut, Shape and Glue on the White Background Glass
Time to cover the rest of your watering can with glass.
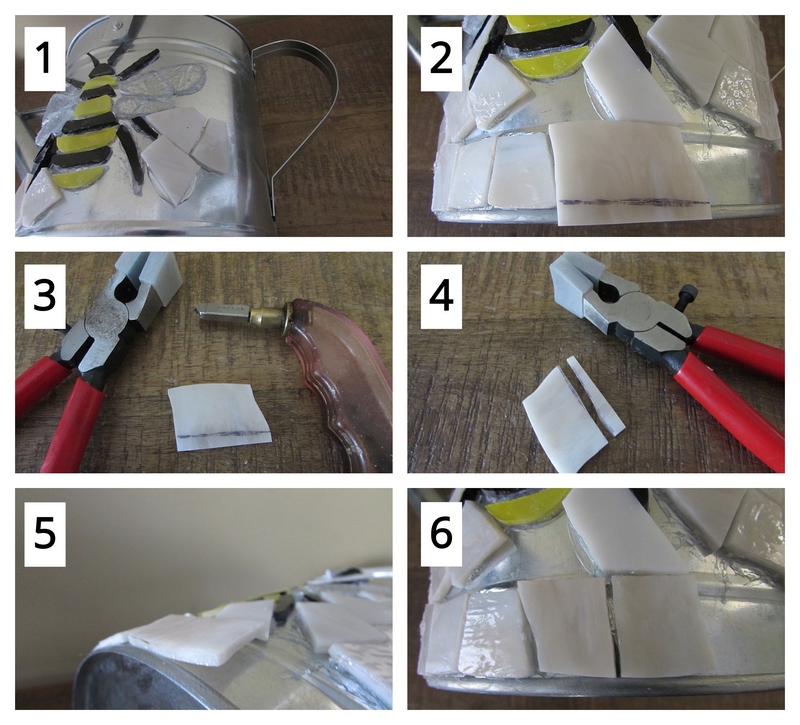
Score the off-white glass irregularly with your glass cutter and break the scored lines with your running pliers.
Take your mosaic cutters and cut the glass strips into irregularly shaped squares.

Begin gluing on the off-white glass around your honey bee.
You’re going to continue the process of marking pieces to fit and cutting them with either your mosaic cutter or glass cutter. If you’ve cut them with your glass cutter, break the score with your running pliers. Then shape them on your glass grinder when necessary and glue the piece in place.
If the piece does not lay flush on your surface, cut it in half so that it will.
Mark a piece needing to be nipped with your mosaic cutters to fit. Glue the piece in place. Continue this process.
Some pieces will need to be marked and then scored with your glass cutter. Use your running pliers to break the score line. If the piece doesn’t lay flush on the surface of the can, cut the piece in half and glue the two pieces in place.
Take your pieces to the glass grinder when necessary to smooth or shape the piece.
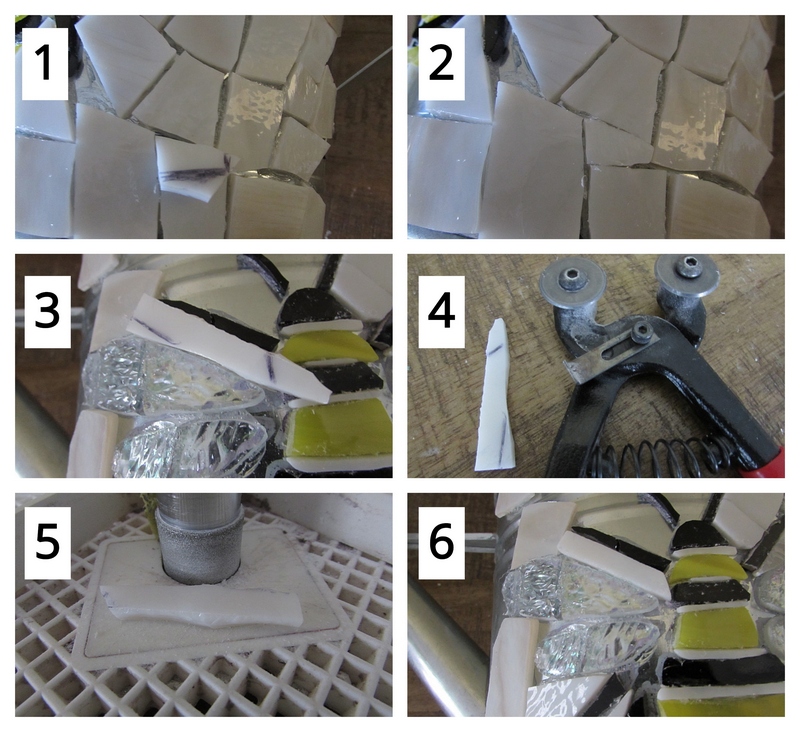
There will be small pieces needing to be glued on in spaces left empty surrounding your honey bee mosaic pieces. It’s important to make sure that small pieces of the off-white glass fit as snugly as possible around your honey bee mosaic. You don’t want black grout filling in those vacant spaces as your design will be distorted. This is key when creating mosaics with a “pictoral” design as opposed to a random abstract design.
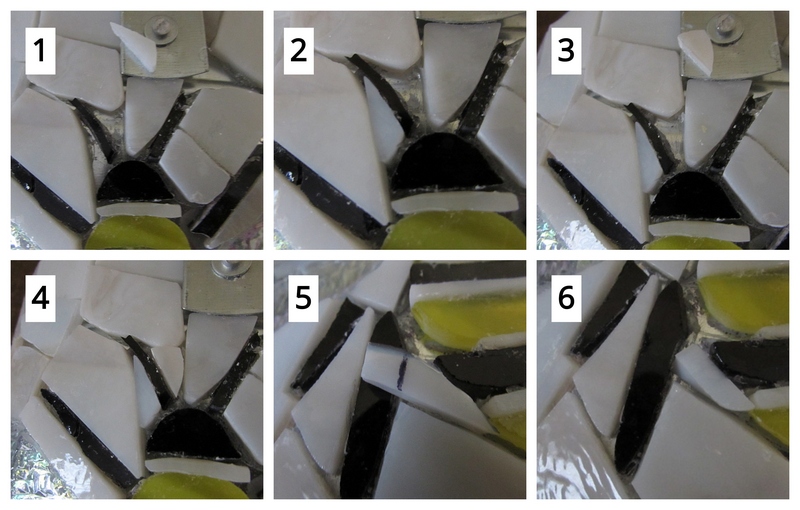
Repeat this process until you’ve completely covered your can.

Step 8: Glue Gems on Your Spout and Handle
Gather your acrylic gems together. Glue the gems in a random pattern covering both the handle and the spout.
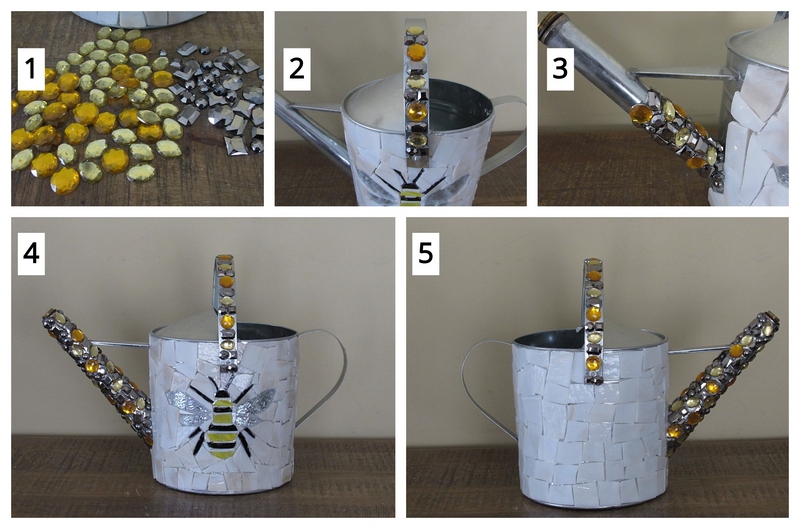
Now, Time to Grout!
You’ve achieved full mosaic coverage of your honey bee watering can and are now ready to grout.
You’ll need to prepare your grout mixture, apply the grout all over the areas covered with your mosaic glass and finally clean it thoroughly.
If you’ve never grouted before, check out my post on how to grout your DIY mosaics here.
*Tip: Prior to grouting, remove any excess glue that has seeped out between your pieces. It’s very easy to remove as it dries to a rubbery consistency and can be pulled out with tweezers.
This will make your grouting process easier as you don’t want to have to stop cleaning to remove glue.
Step 9: Gather Your Grouting Materials
To grout, all you’ll need is your dry grout, latex additive, mixing bowl, spoon, sponge, old towels or cloths, garden gloves and water.
I recommend covering the surface that you’ll be grouting on with newspaper or old towels to prevent any of the grout from staining your surface.
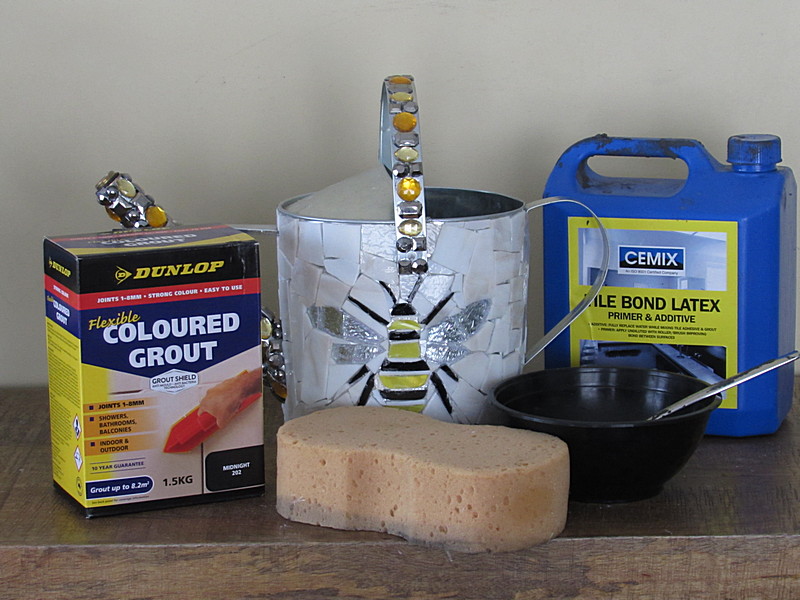
Step 10: Mix, Apply and Clean off Your Excess Grout
You’re now ready for the actual grouting process.
First, add enough liquid latex additive in to the dry grout in your mixing bowl to achieve the consistency of oily peanut butter. Don’t worry if you’re mixture is too soupy because you added too much additive. Simply add some additionally dry grout to your mixture to achieve the proper consistency.

Cover the front of your watering can with the grout.
Begin cleaning the surface with a moistened sponge. Be sure to be near a water source as you will have to rinse out the sponge repeatedly.
Grout the back and clean it also until all the surface grout is removed.
Finally, grout the handle and the spout and clean them thoroughly.
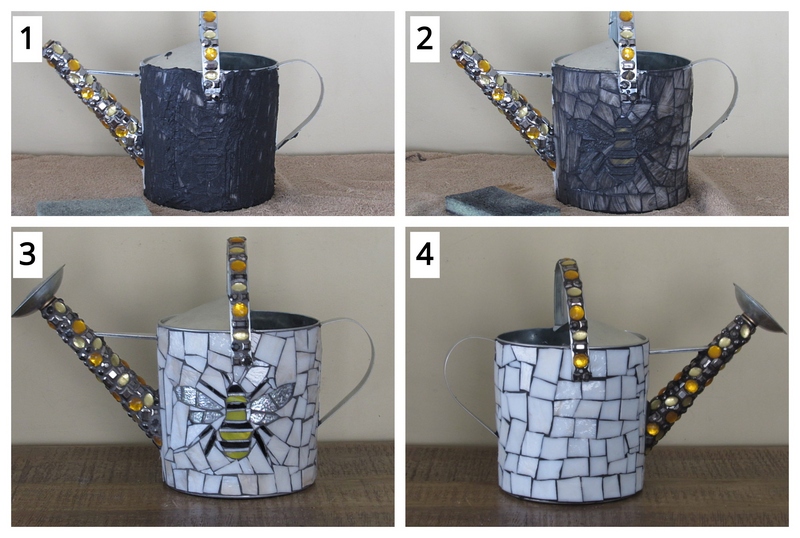
Your lovely honey bee mosaic watering can is now complete and ready to be displayed in your garden!
This type of mosaic resurfacing can be done on most all metal surfaces. Other metal project examples:
- Mailboxes
- Trash cans
- Fencing
- Cabinets
- Appliances
- Beams
- Tables
- Filing cabinets
- Automobiles! Yes I saw a Volkswagon Bug completely covered in glass mosaic in Richmond Virginia:)
I hope you enjoyed this project and that you enjoy seeing your lovely honey bee watering can in your lovely garden setting each and every day.
Just goes to show that even a plain old metal watering can be turned into a thing of beauty with a few tools, some scrap glass and few acrylic gems.
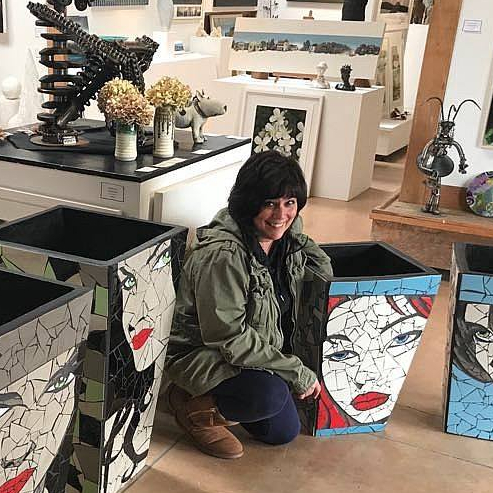
Danielle is the mosaic artist and teacher behind Mosaics Mostly. She has been creating mosaics for over 25 years, and has taught hundreds of people to create their very own mosaic DIY projects at home. She has been featured in multiple galleries and magazines, and has even had her own beginner mosaics book published! She loves crafts, and is always working on something new!

