This is one of my favorite projects because it’s so incredibly inexpensive to make and the design possibilities are completely endless! Now…I know this is a mosaic garden ball set project but keep your mind open to how these dazzling balls can be displayed in so many different ways.
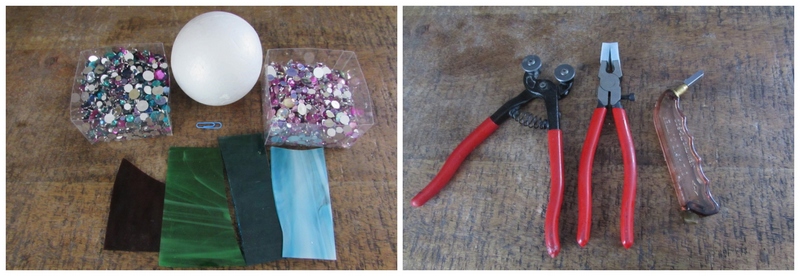
Materials Needed for DIY Mosaic Garden Ball Set
- 3 Styrofoam balls (whatever size you’d like…but i wouldn’t go smaller than a 4 inch or 100mm diameter ball)
- Gems, beads of any color but not too large as they need to be glued onto the Styrofoam ball flat against the Styrofoam base.
- Scrap stained glass pieces of any color. I would steer away from totally transparent glass and use semi transparent as with Styrofoam, there can be some leakage under the glass because of the nature of Styrofoam. I’m using opaque green glass, semi-transparent plum glass, opaque turquoise glass and transparent blue glass with a variety of acrylic gems.
- Clear water resistant glue
- Glass Cutter
- Running Pliers
- Grout ( I use black in the project)
- Latex additive
- Gloves
- Sponge
- Garden gloves
- Safety glasses
- Paper clip
- Floss or some kind of string
How to Make Your Very Own DIY Mosaic Garden Ball Set
Below, you’ll find my step-by-step instructions on how to make your own beautiful mosaic garden balls at home. Let’s do this!
Step 1: Gather Your Materials and Tools
Before you get started, make sure that everything you need is close by. For this first garden ball, I’ve decided to use 4 different colors of scrap stained glass, plum, green, turquoise and light blue, but feel free to use whatever colors you’d like.
Step 1: Insert Your Hanger
Unwind a paper clip and cut in half with nippers. Then twist the 1/2 to make a wire loop to glue and insert into the Styrofoam after coating the tip with a few drops of clear water resistant adhesive. This will assure that it never slips out.
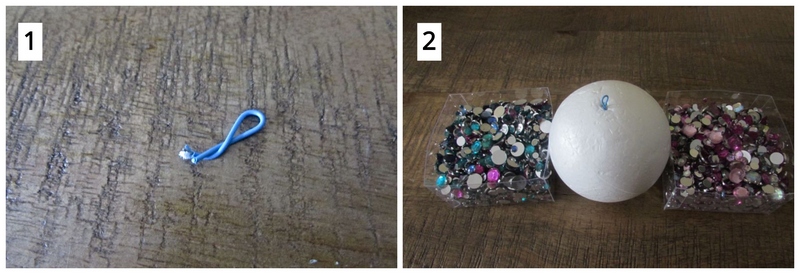
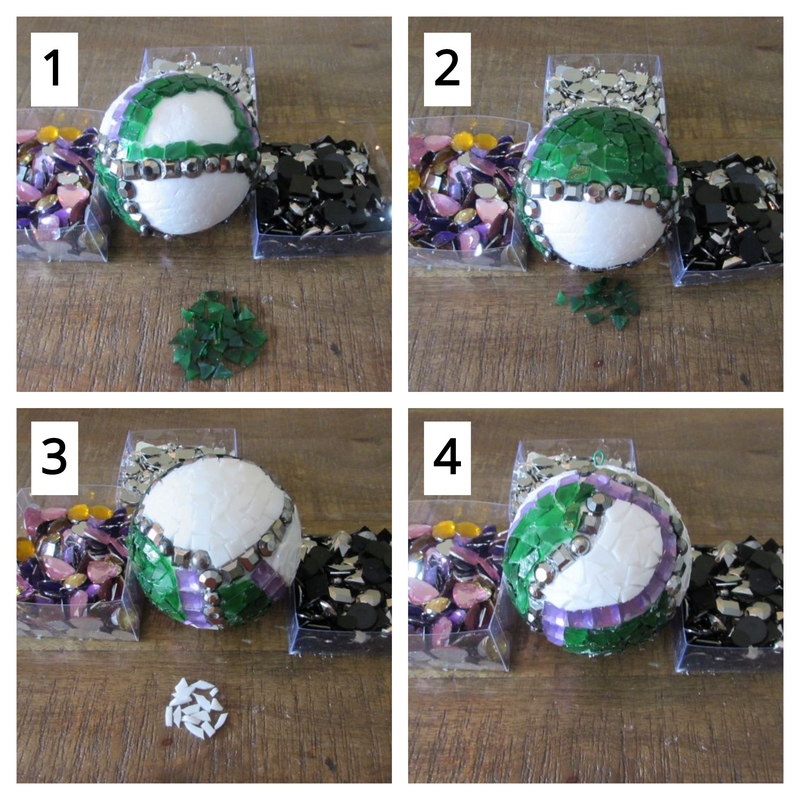
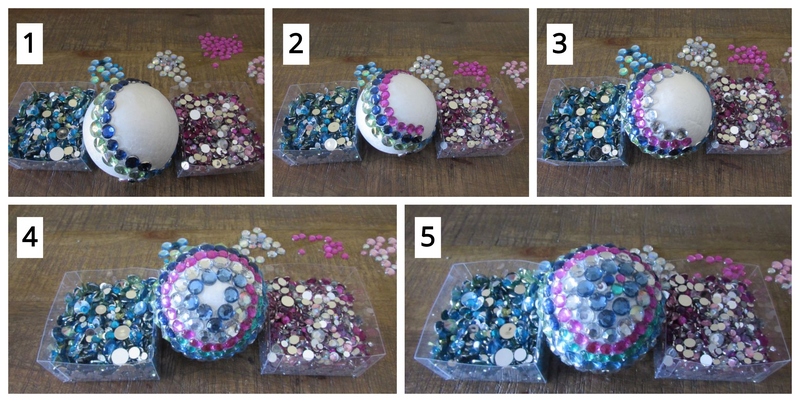
Step 2: Glue Your First Gems On
Glue on the top and first row of gems. Make sure to cover the back side completely but don’t over do it or you’ll have lots of leakage to clean up before and after grouting.
Glue on the second row to create a “t” shape out of the pink glass gems. This provides you with four different sections for each of the four colors of glass I selected to use for this project.

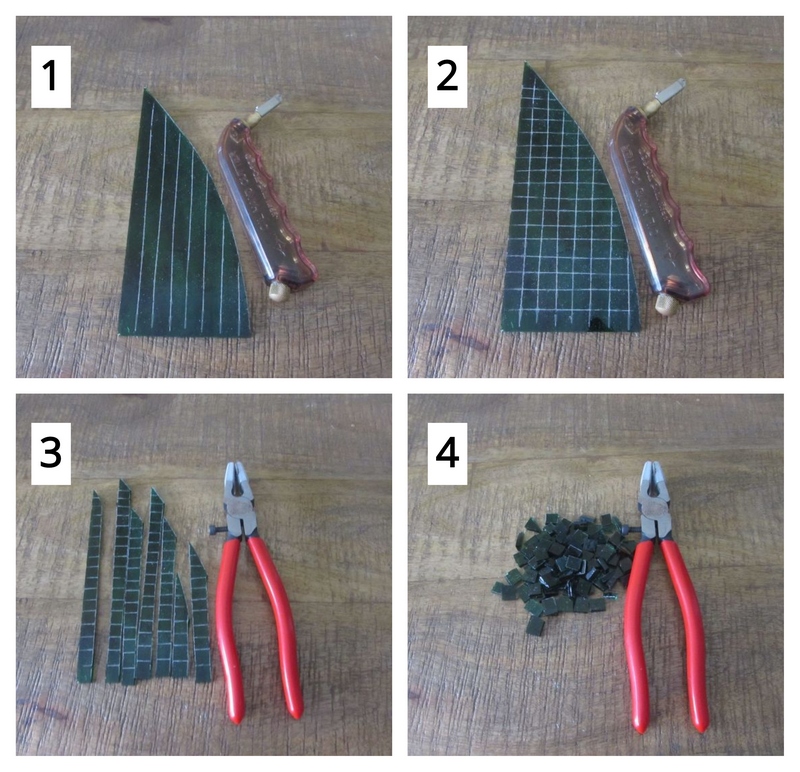
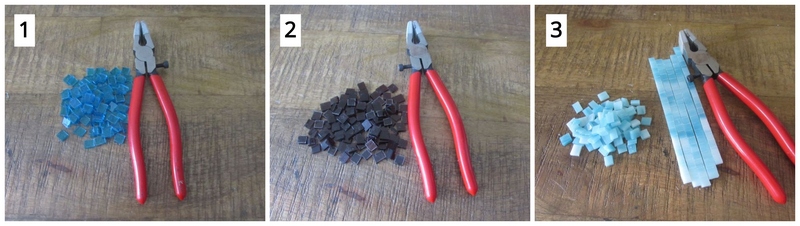
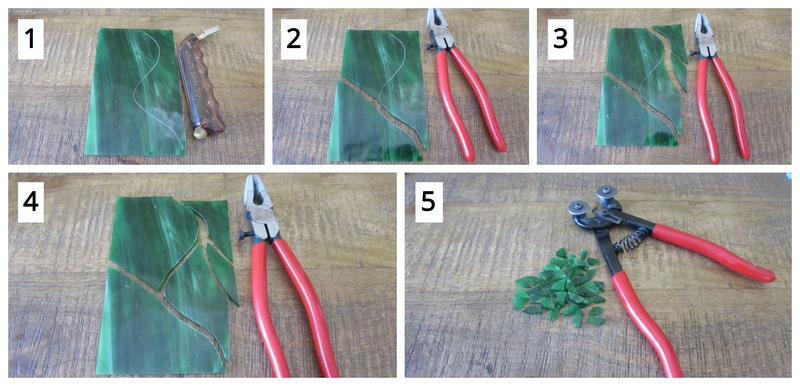
Step 3: Cut Your Glass
Score the green glass with your glass cutter vertically into long strips. Then score again horizontally to create squares.
Using your running pliers, break out the scored strips length wise aligning the center of the running pliers tip with each score line and applying enough pressure to break the score.
After breaking out the vertical scores, break out the horizontal scores creating squares.
If you’re new to creating mosaics and need to learn how to cut glass properly, check out my post on how to cut stained glass here.
Repeat this process with the other three colors of your scrap glass.
Step 4: Glue on Your Glass Squares
Begin to glue on the green squares. Cut squares diagonally in 1/2 with your mosaic cutters to create triangles where needed and complete the green section.
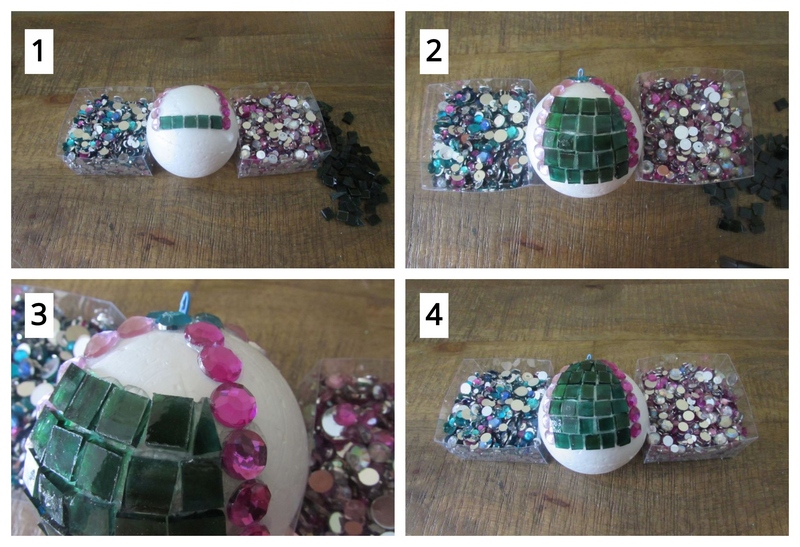
Complete the other 3 sections by repeating this process.

Step 5: Glue Gems on the Bottom of Your Ball
Cover the bottom of your garden ball with gems.
Full mosaic coverage on your garden ball.
Now, Time to Grout!
You’ve completely covered your Styrofoam ball with glass and gems so now you’re ready to grout it.
You’ll need to prepare your grout mixutre, cover your ball with it and then clean it thoroughly.
If you’ve never grouted before, check out my post on how to grout your DIY mosaics here.
Step 6: Gather Your Grouting Materials
All you’ll need to grout is your dry grout, latex additive, mixing bowl, spoon, sponge, garden gloves, old rags and cloths and water.
I recommend covering the surface you’ll be grouting on with newspaper or old towels to prevent any of the grout from staining your surface.
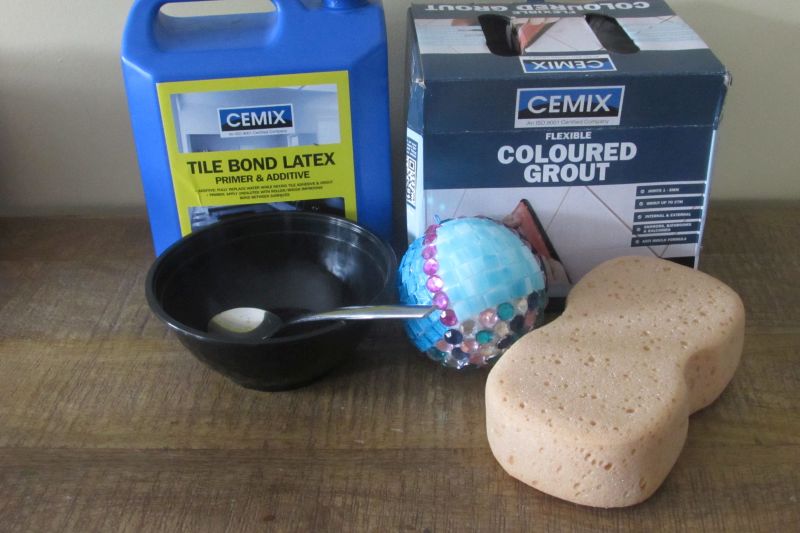
Step 7: Mix, Apply and Clean Off Your Excess Grout
You’re ready for the actual grouting process now. First, put some dry grout in your mixing bowl and add enough of the liquid latex additive to achieve the consistency of oily peanut butter.
Don’t worry if you accidentally add too much additive. Simply add some more dry grout to achieve the proper consistency.

Cover the ball with grout.
Begin to clean the grout covered ball with a wet sponge that has been squeezed out.
Continue cleaning with a sponge and also with a soft microfiber dry cloth. Remove all glue that is not covered by grout and then replace with more grout in the cleared joint. You’ll always have some areas where glue needs to be removed and replaced with grout.
Sometimes after the grout has dried, there will be tiny cracks from shrinkage during drying. Simply mix a tiny bit of grout with latex additive and touch these places up by smoothing grout over the crack and wiping clean.
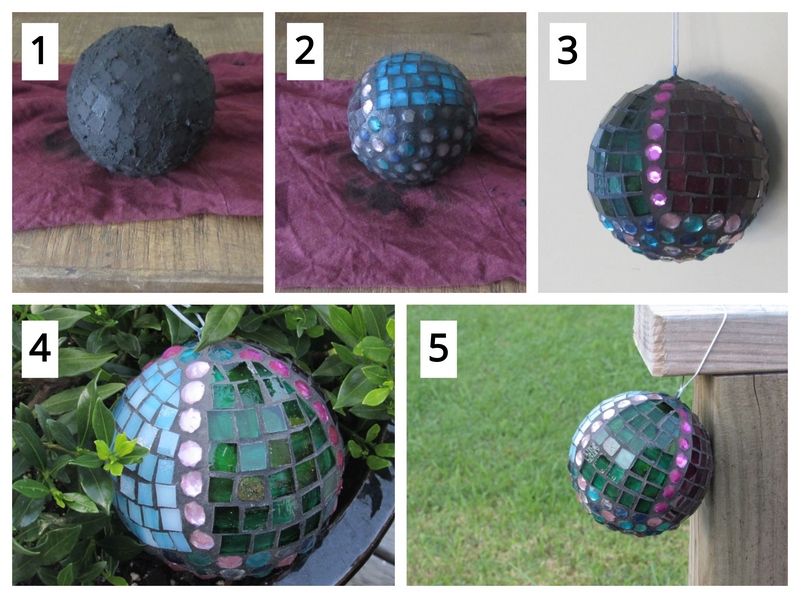
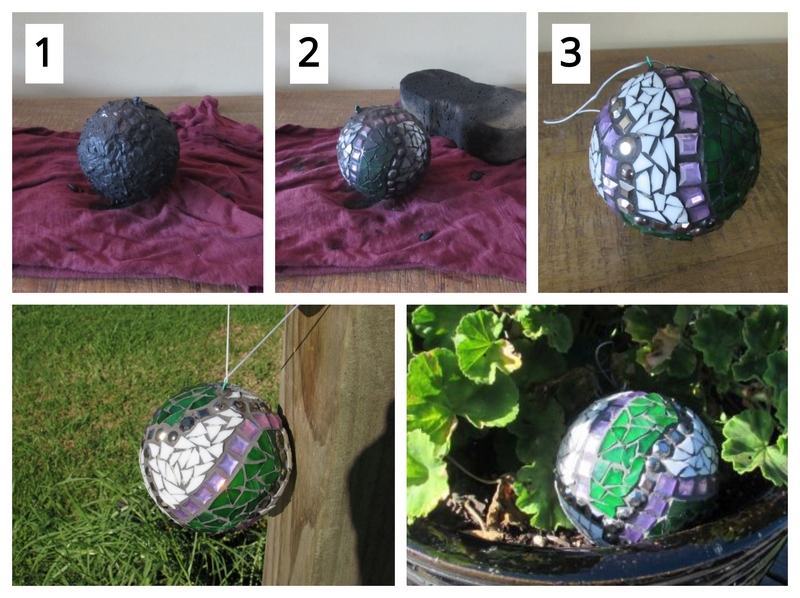
First one completed:) On On On to the next one! Here are the materials I’m using for the second garden ball.
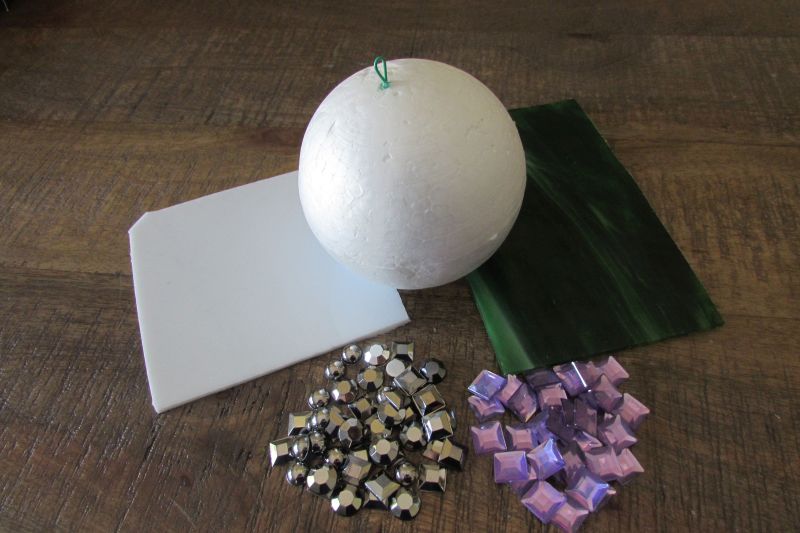
Materials Needed for Your Second DIY Garden Ball
- 4 inch or 100mm Styrofoam ball with paperclip glued in with clear liquid nails water resistant adhesive
- 2 pieces of scrap stained glass – opaque white and semi-translucent green
- Gun metal colored acrylic gems
- Lavender acrylic gems
- Tools, grout etc. used for your first garden ball:)
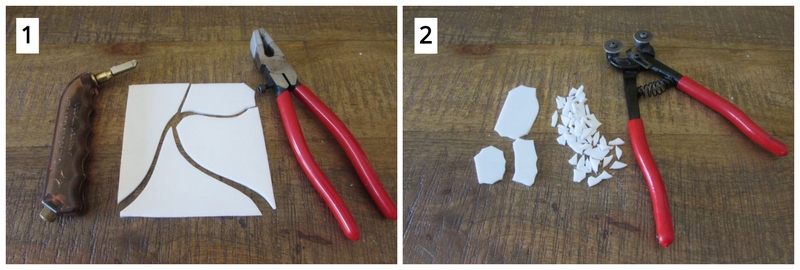
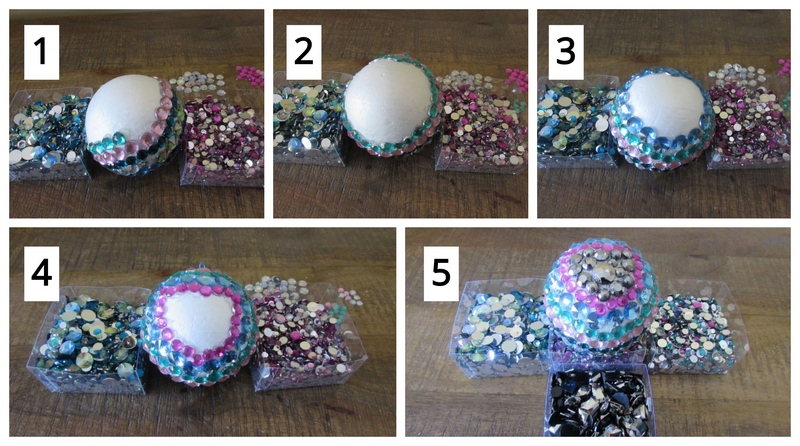
Step 1: Cut Your Glass
I’m going to use irregular pieces of stained glass for this garden ball. The first thing I do is score the green glass in an irregular way.
I then proceed to break the score line with my running pliers. The glass will break in several pieces as you line the tip of the running plier up with the score line and apply enough pressure to break the score. Keep lining up the head of the running plier with the score line and breaking the score. Remember, i’m simply creating some irregular cuts to nip into small pieces with my mosaic cutter, so there’s no need to panic if your glass by chance breaks irregularly. That’s the beauty of mosaics, it’s so forgiving when it comes to your pieces. If you don’t like the shape of one, find another!
Cut irregular pieces of green glass with mosaic cutters. Make sure to cut pieces small enough to lay flush on the Styrofoam ball.
Repeat this same process for your white opaque glass.
Step 2: Glue on Your Glass and Gems
Glue on bits of green glass in any pattern you’d like. My idea with this design is to glue on sections of stained glass and then line those sections with the acrylic gems randomly.
There’s no rhyme or reason to how large you make each section or what shape you make each section. Simply move around the ball gluing on glass pieces and then lining that section with your gems.

Continue this process until you achieve complete mosaic coverage on your garden ball.
Step 3: Mix, Apply and Clean Off Your Excess Grout
Gather your materials for grouting the garden ball.
Mix the grout with the latex additive to achieve the consistency of oily peanut butter. Cover the garden ball with the grout mixture.
Begin cleaning your second garden ball.
Second mosaic garden ball completely cleaned and ready for your garden!
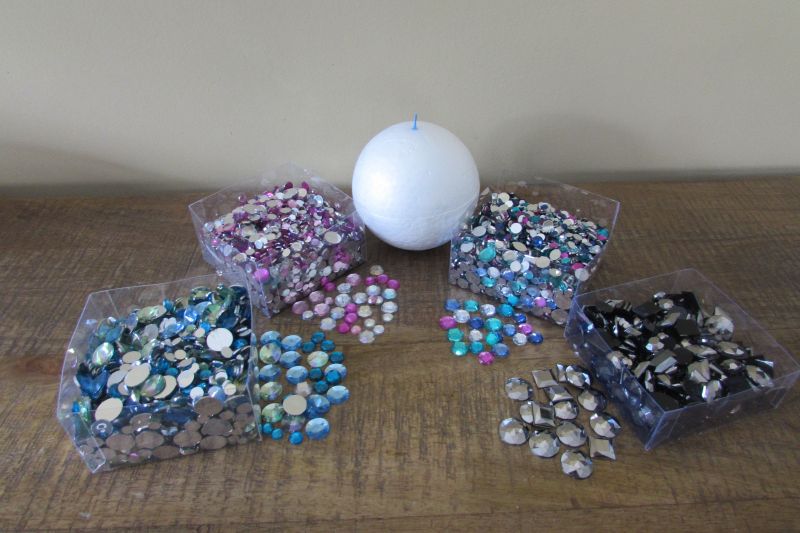
Now time to move on to the 3rd garden ball design.
Materials Needed for Your Third DIY Garden Ball
- 4 inch or 100 mm Styrofoam ball with paperclip glued in with clear liquid nails water resistant adhesive
- A variety of colored gems
- Tools, grout etc. used for your first and second mosaic garden balls:)
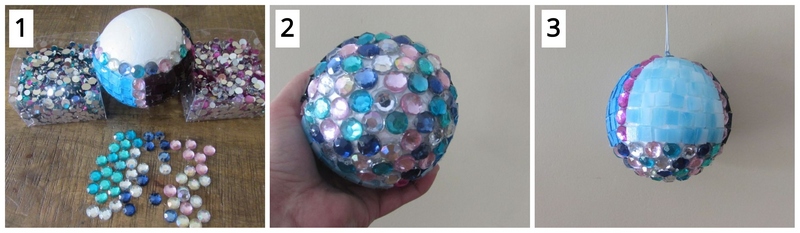
Step 1: Glue on Your Gems
We’ll begin by gluing on the first row of large light blue gems down one side of the ball.
We’ll then glue on four more rows, a row of clear gems, then dark blue, pink and then turquoise.
Turn the ball to work on the other side and continue the line of the first light blue gems with clear gems.
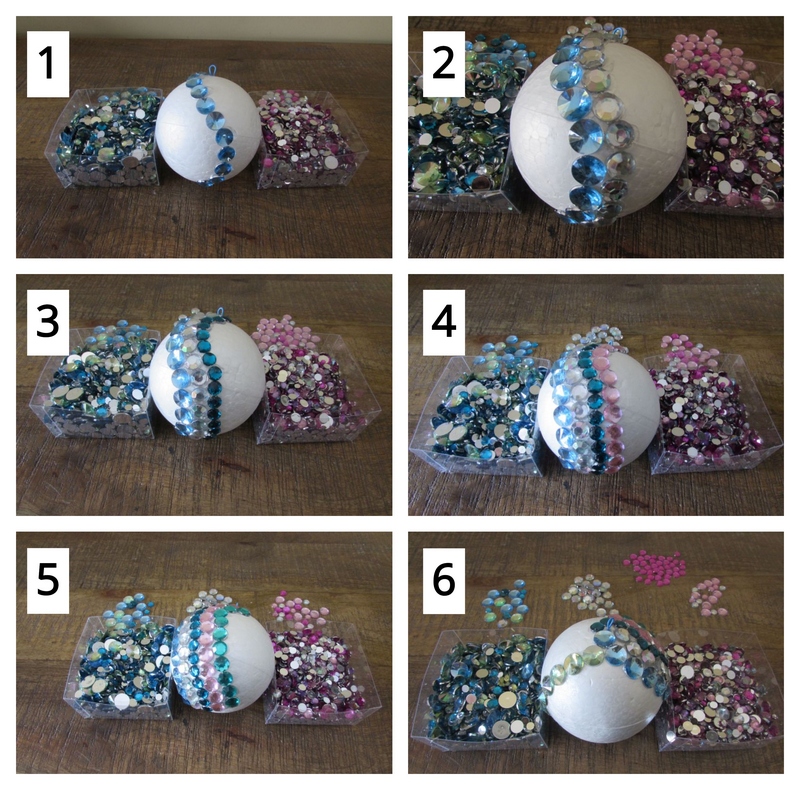
So now we’re working on the other side of the ball.
Glue on a row of dark blue gems, then dark pink followed with a clear gem row.
Glue on a circle of blue gems and finish the side of the ball with random gems.
To finish your ball, glue on a circle of light turquoise gems, then a circle of light blue and then a circle of dark pink.
Finally, finish the bottom of the ball by gluing on gun metal colored gems of different sizes.
Complete coverage is achieved.
Step 2: Mix, Apply and Clean Off Your Excess Grout
Gather your materials for grouting the third garden ball.
Mix the grout with the latex additive to achieve the consistency of oily peanut butter. Cover the garden ball with the grout mixture.
Begin cleaning your garden ball.
3rd ball cleaned and completed.
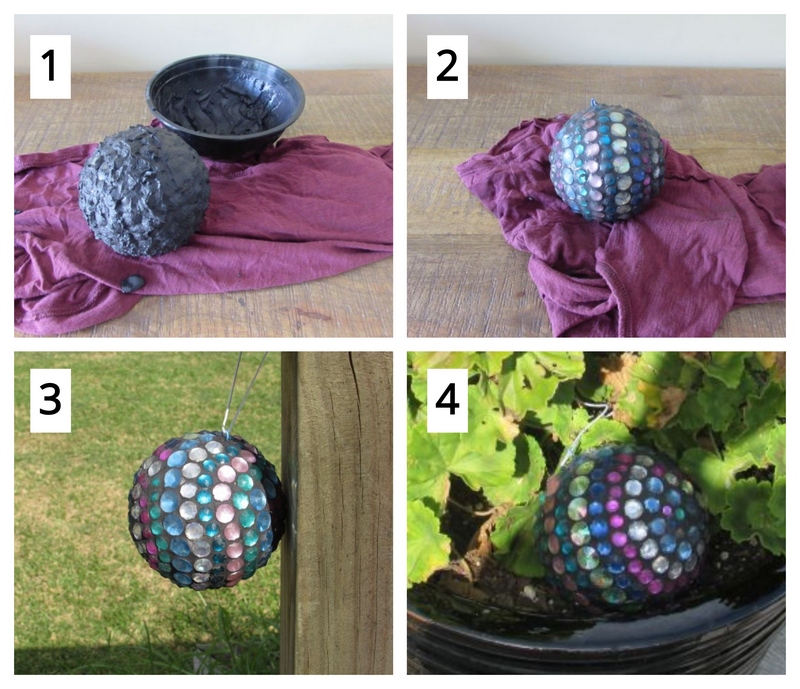
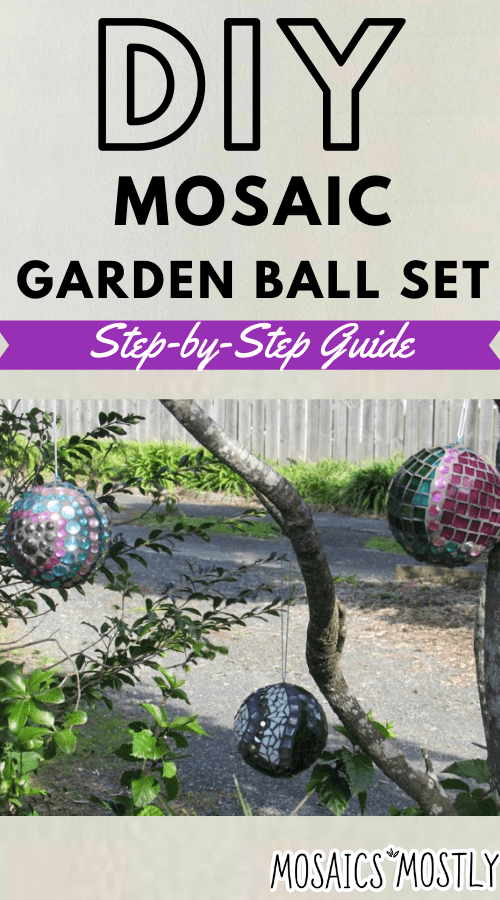
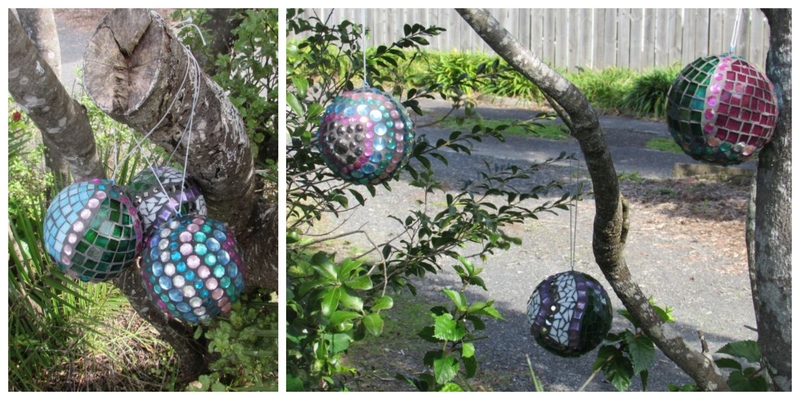
The set is complete and can be hung anywhere you’d like or stashed in planted pots on your patio. Also remember that these lovely balls can be used for interior design as well. They would look lovely as a centerpiece on a table or on the display shelves in your kitchen or hanging off a bed frame! They’re simply lovely pieces to be displayed however it suits you! And as far as a great gift idea…that is personalized….tell me if it gets any better!

Danielle is the mosaic artist and teacher behind Mosaics Mostly. She has been creating mosaics for over 25 years, and has taught hundreds of people to create their very own mosaic DIY projects at home. She has been featured in multiple galleries and magazines, and has even had her own beginner mosaics book published! She loves crafts, and is always working on something new!