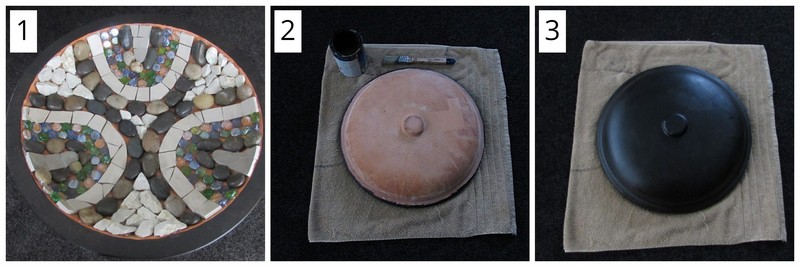
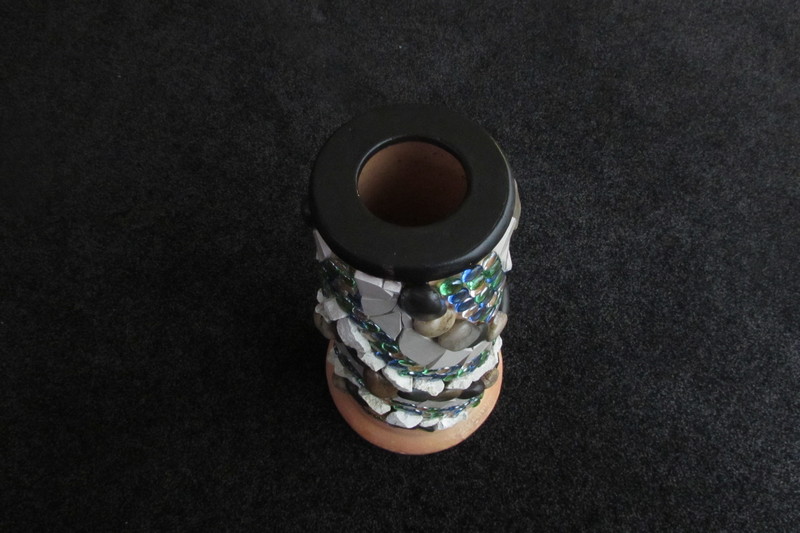
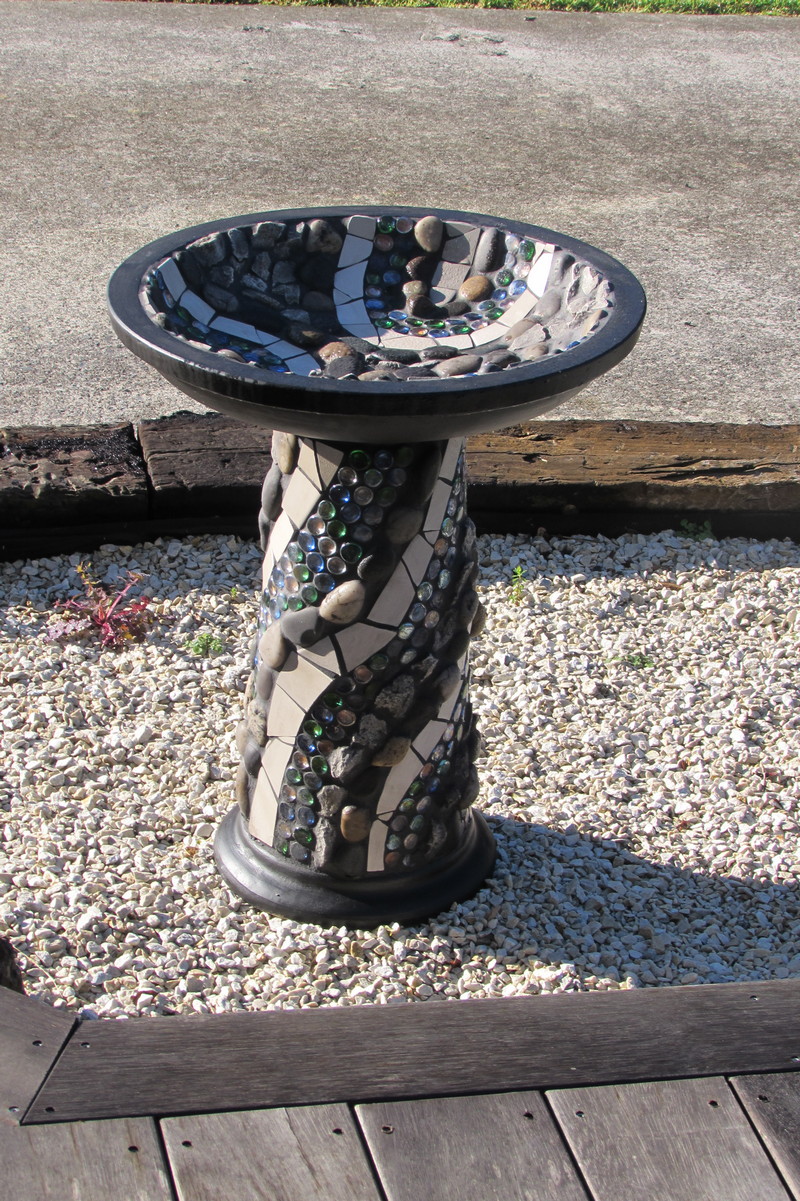
What’s a garden without a birdbath! I decided to take a plain old terracotta bird bath and turn it into a “Zen” mosaic piece by combining stone, rock, glass and ceramic tile.
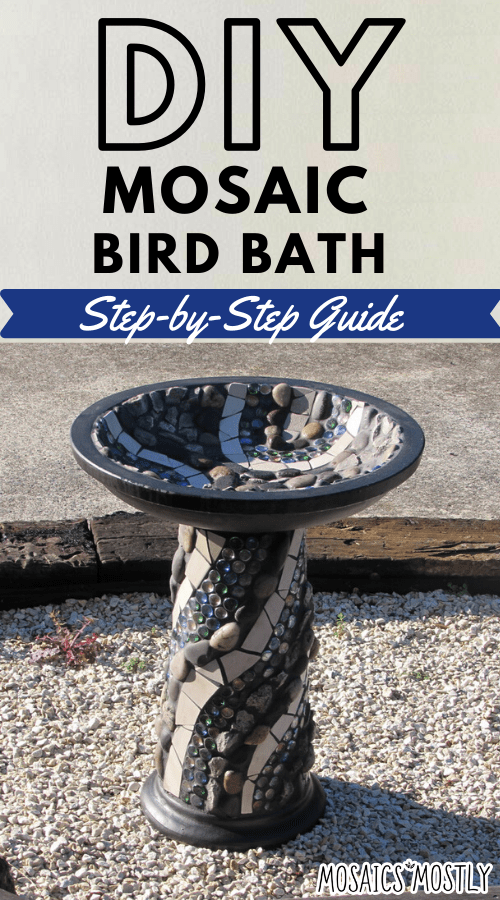
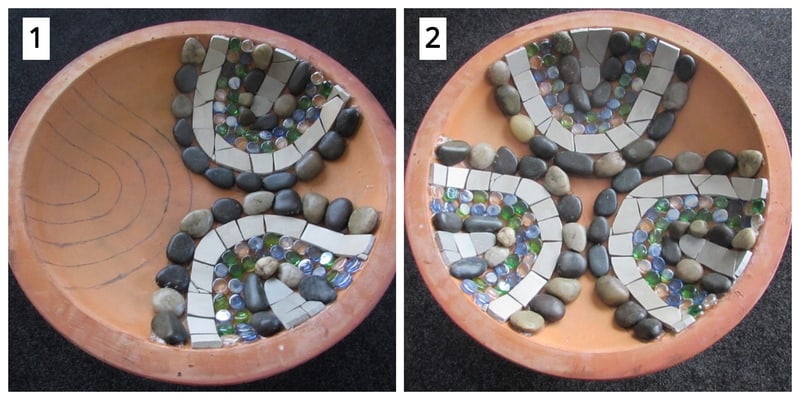
I wanted the design to flow around the structure, so I googled “circular designs” and selected one that I thought would work for the interior of the dish. My intention was to continue the design around the base in such a way that the two somehow connected visually.
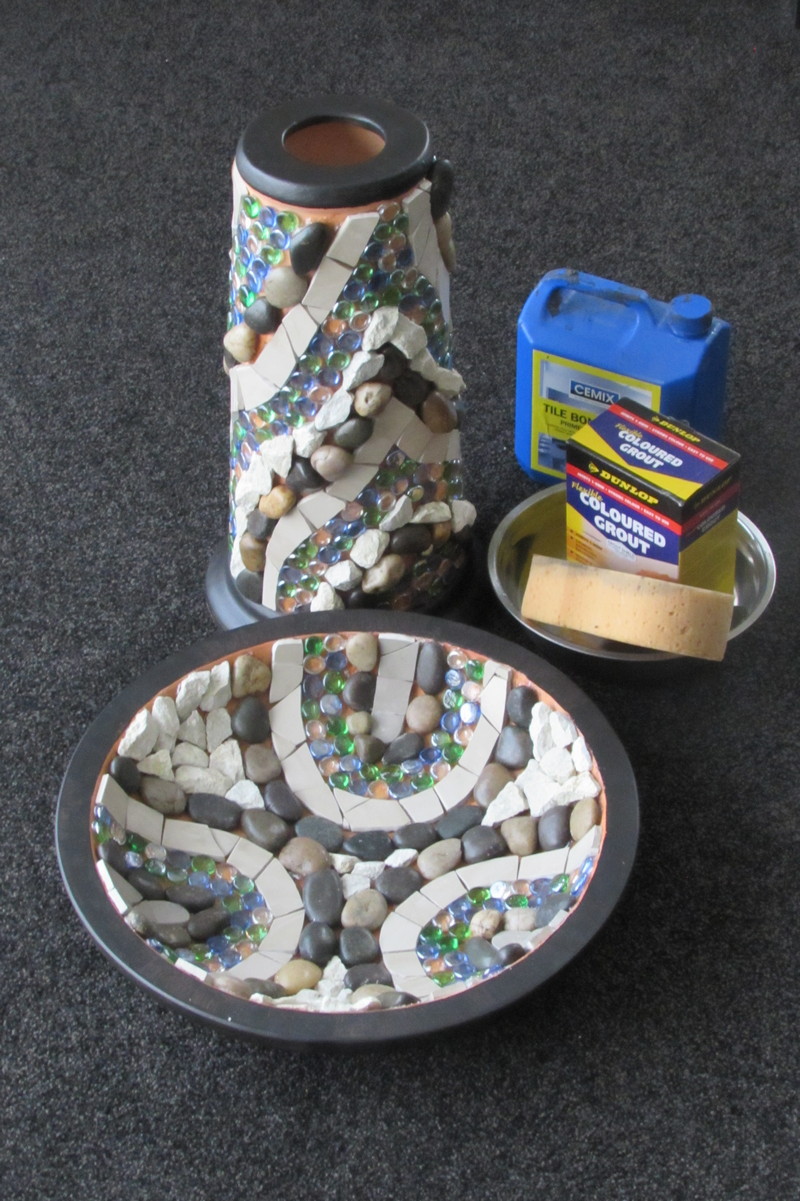
Materials Needed for DIY Mosaic Birdbath
- Cement or terracotta birdbath
- Stone
- Rocks
- Glass half marbles
- Ceramic floor tile
- Hammer
- Black exterior paint and brush
- Mosaic Cutters
- Glass grinder (optional)
- Scissors
- Marker or construction pencil
- Water resistant clear liquid adhesive
- Black grout
- Latex additive
- Mixing bowl, spoon, sponge and rags/towels
- Safety Glasses
How to Make Your Very Own DIY Mosaic Birdbath
Below you’ll find step-by-step instructions on how to make your very own lovely mixed media mosaic birdbath at home. Our little feathered friends will simply love you!
Step 1: Gather Your Materials and Tools
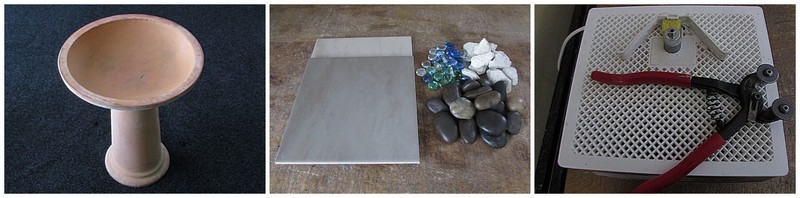
I selected a terracotta birdbath base but you can also use a cement one if you’d like. I selected an earthy tan floor tiles that I thought would work really well with the stones, gravel and clear, green and blue glass half marbles. You’ll need a glass grinder with a coarse head for this project to grind your tile pieces when necessary to fit.
If you’ve never used a glass grinder before, check out my post on how to sculpt tile on a glass grinder (insert link) here.
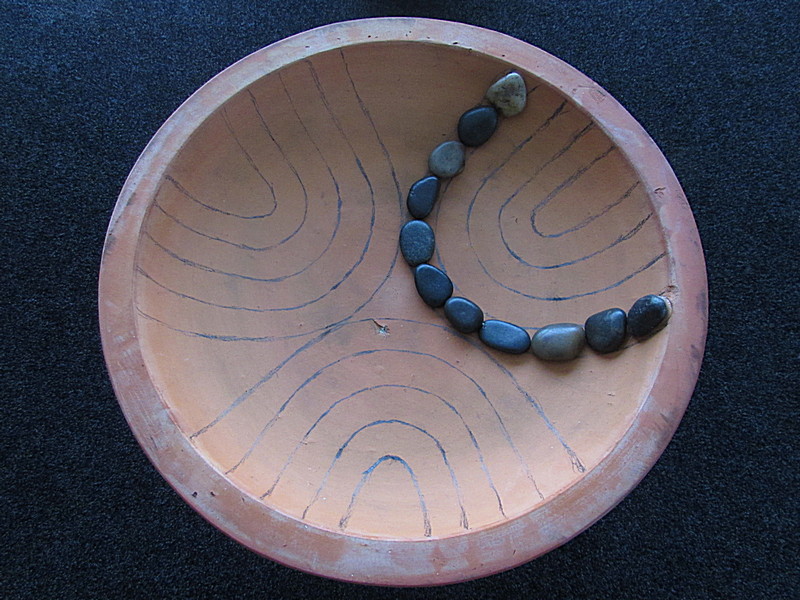
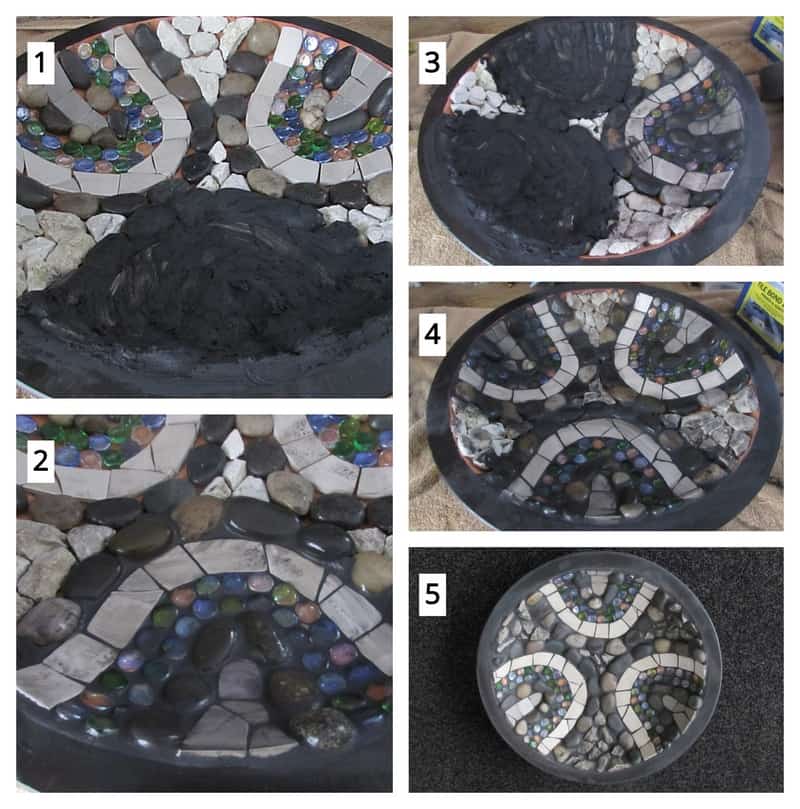
Step 2: Transfer Your Design to Your Dish
Enlarge the design on a copy machine to fit the very center of your dish. Cut out the center of the design and trace it on the dish. Cut out another section of the design so that you can trace the first portion of the ring design. Cut out the next portion to be traced and the next. Continue each curved line of the design out to the edge of your dish. Repeat these steps to complete the other 2 sections.
![]()
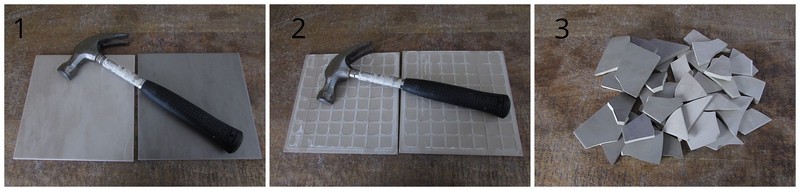
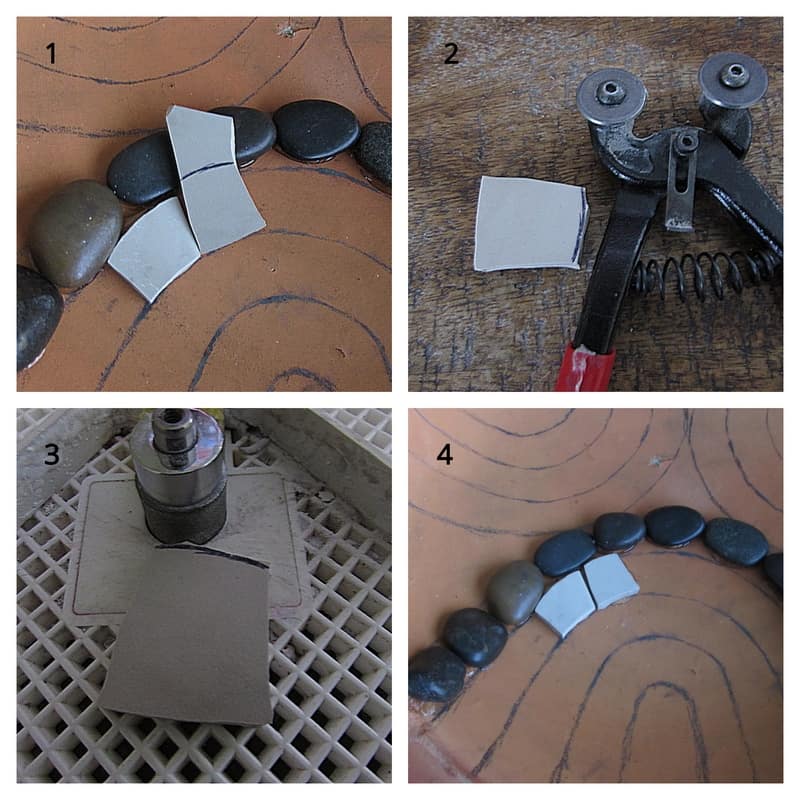
Step 2: Break Your Tiles Up
Take your hammer and break up your tiles. Make sure to break them on the back side of the tile so as not to disturb the surface finish of the tiles.
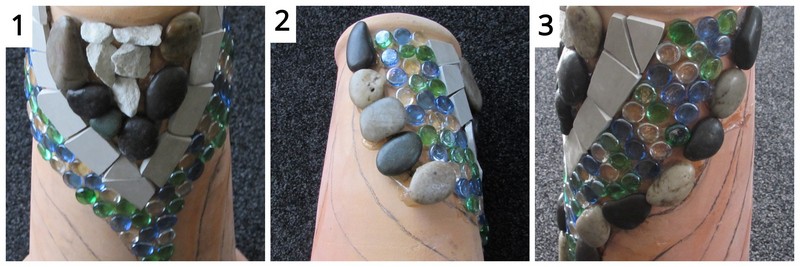
Step 3: Glue Your Materials On Your Dish
OK…So….Where going to combine 4 different types of materials to create this lovely birdbath dish. Most of the materials we’re using won’t require cutting or grinding. The tile pieces will. The tile pieces that you shape or sculpt on your grinder will guide all the other materials in place. Let’s start by gluing on a lovely row of smooth stone for your first area of your birdbath.
We’re going to begin our first section of tile. First we mark a piece to fit within the curve. Then we cut the piece with the mosaic cutters. The piece is then taken to the glass grinder for smoothing and shaping the edges. Finally we glue the piece in place.
We continue this process of completing the section. Because the dish is curved and you’re working on an irregular surface with a variety of irregularly shaped materials, it’s best to work two sections simultaneously to allow for adjustment within each section to achieve the tightest curves within the design. So, let’s complete the next section using the glass half marbles.
*Tip: When necessary, nip small pieces of tile with your mosaic cutters to help you to create the edge of the curve that you need.
.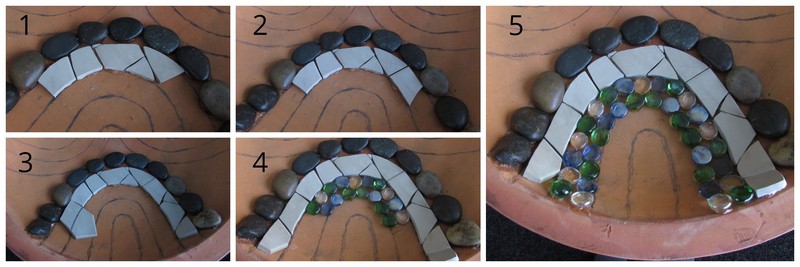
Finally, glue on more stones in the next section and complete the final section with the darker color tile that you’ve marked, cut and shaped on your grinder to fit. Then we move on to the next two sections and repeat the process.

Second and third sections completed!
Fill the other four sections with your white rock. Glue on each piece of rock individually.
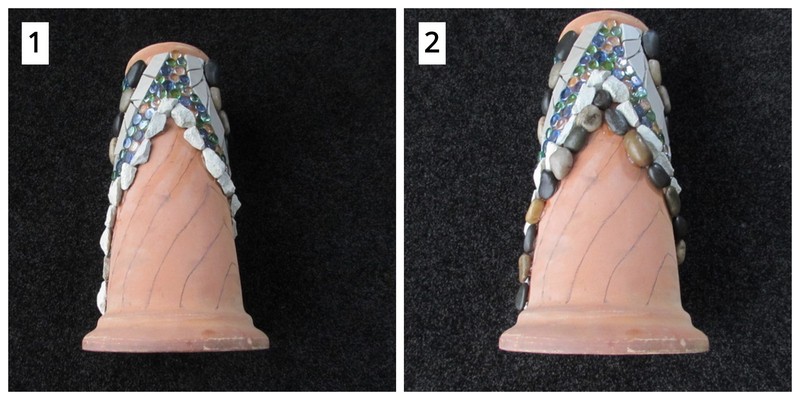
Step 4: Paint Your Dish
At this point, it’s a good idea to paint your dish with black exterior paint. That way, it can be drying while you work on the base for your dish. You should have your pieces painted before you grout so that you can grout to the painted border.
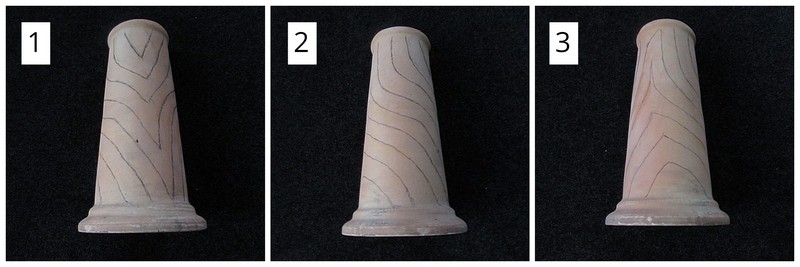
Step 5: Draw Your Design on Your Base
Draw an irregular curvy design around the base of your birdbath creating separate sections to work your mosaic design. The pattern should flow around the base as such. Also keep in mind that this design is not rigid, it’s simply a guide as you glue on row after row.
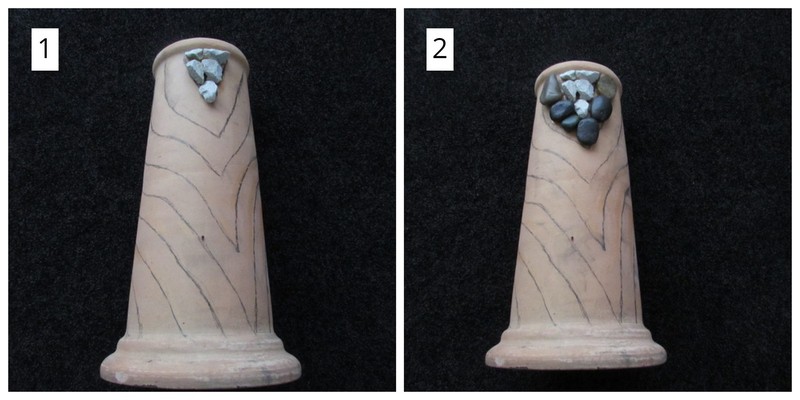
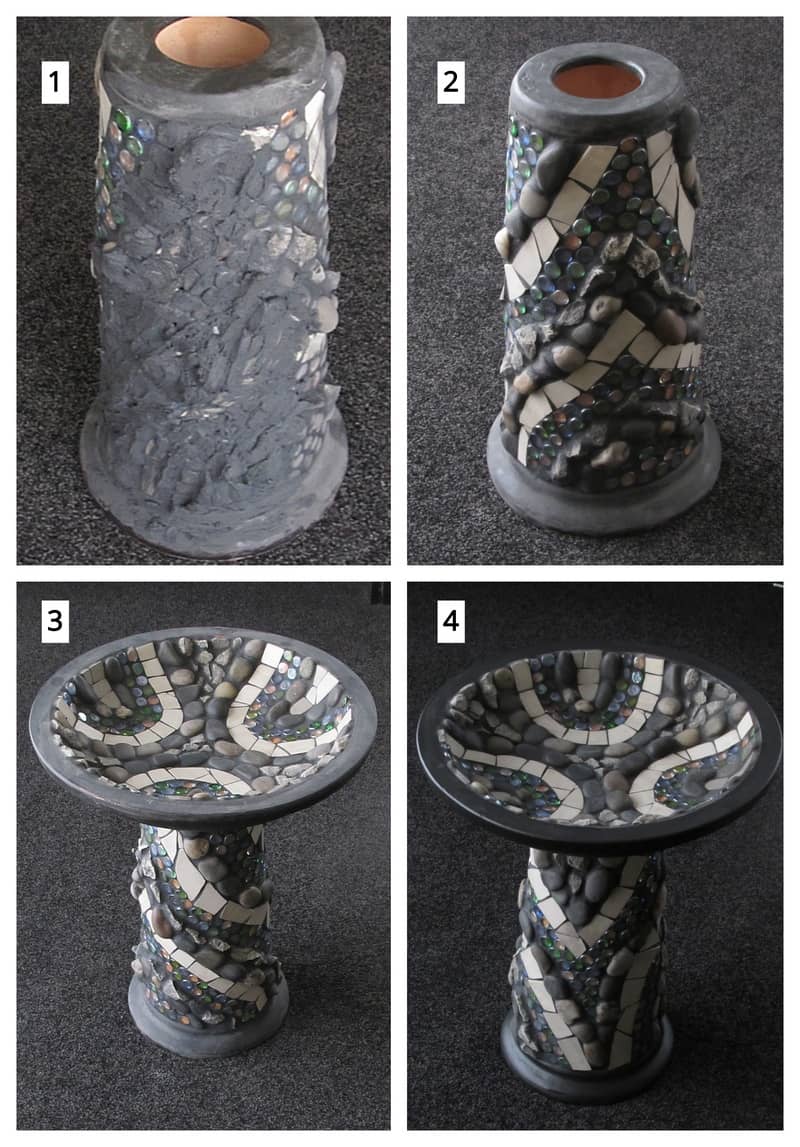
Step 6: Glue Your Materials on Your Base
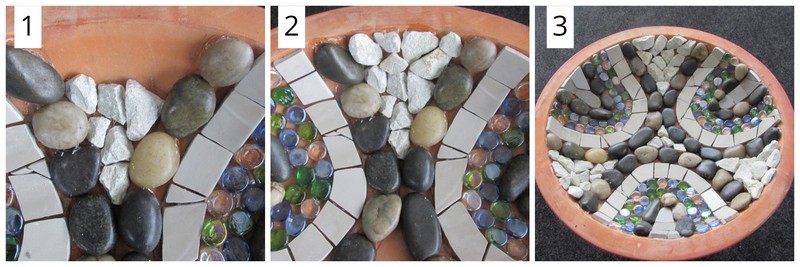
We’re going to glue the materials on your base just as we did your dish. Lay your base down to adhere all the different materials that way they don’t slide off. We’ll start off with gluing on gravel pieces in the first section and following with stone in the next section.
This is your tile section. I’ll show you again the process of creating the proper tile piece to fit. Mark the piece to fit. Cut the piece with your mosaic cutters. Smooth and shape the piece on the glass grinder. This piece may look like it fits, but because the base is cylindrical, the right tip needs to be cut off so that the piece fits flush on the base. Once cut, glue the piece in place. Continue this process until this tile section is complete.
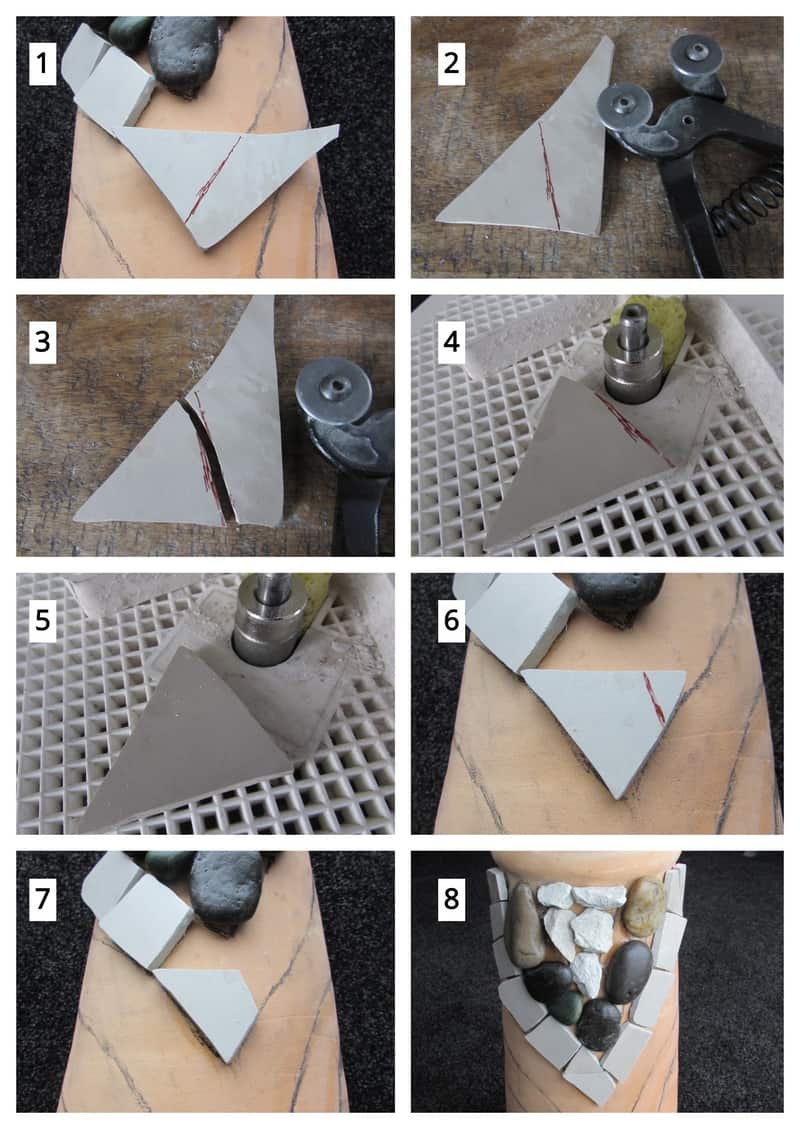
Next glue on a section of your glass half marbles. Next to that section, glue on a section of stones.
Then we’ll work on another another tile section and another glass section. At this point, you’re not really working to the drawn on design. You’re simply following the established curve that has been created.
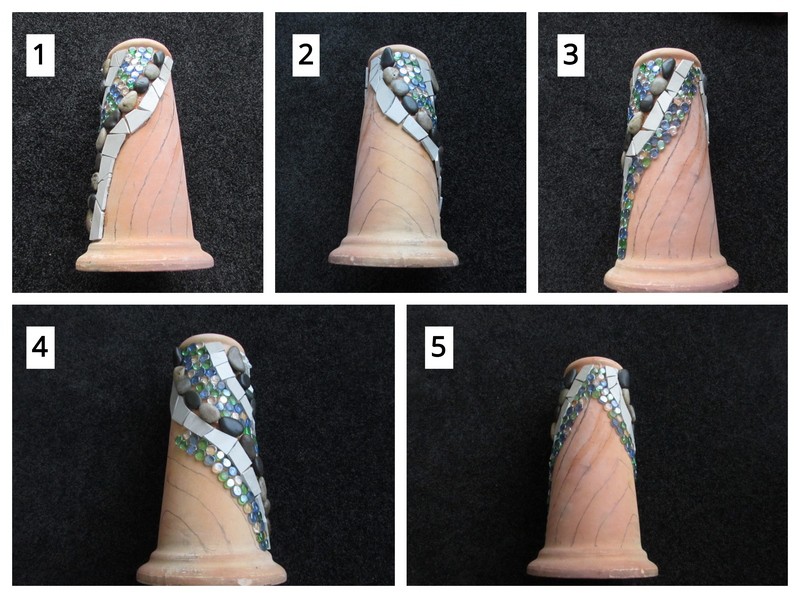
Next two section are gravel and stone. Remember, you’re not following your pattern you drew on the base any longer as it’s simply not necessary. You’re simply creating section after section until we have the entire base covered.
Time to finish our base! Complete a section of tile, glass half marbles, gravel, stones and then finally….glass half marbles!
Step 7: Paint Your Base
Paint the top and bottom of your base with your black exterior paint. This is your first coat on both the dish and the base as after you grout and clean you will paint them with a second coat.
Time to Grout!
All your hard work is now going to be recognized once the masterpiece is grouted! So let’s do this!
Step 8: Gather Your Grouting Materials
To grout both your dish and your base all you need is your grout, latex additive, mixing bowl, spoon , sponge, old towels or cloths and water! Make certain that where ever you’re grouting a large piece like this that the surface is covered with clothes or newspaper so that the grout does not stain anything.
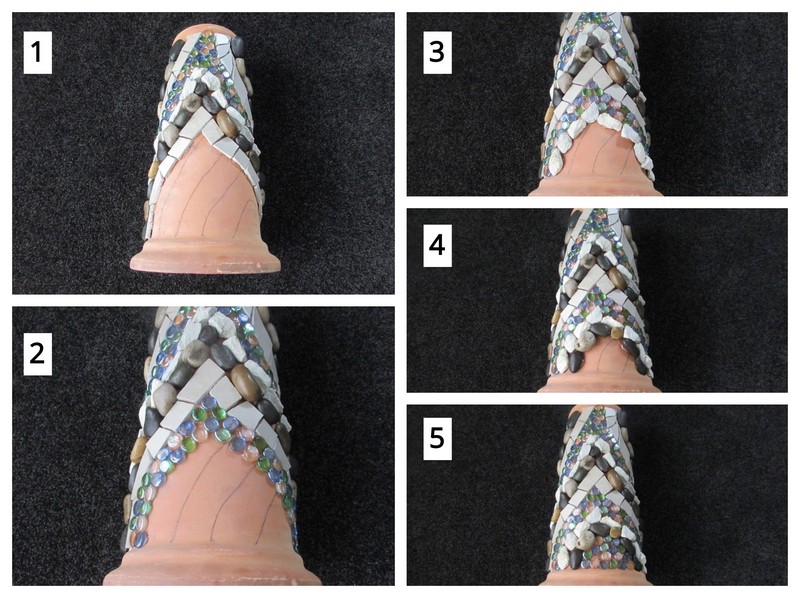
Step 9: Mix, Apply and Clean Off Your Excess Grout
It’s that time! Relax…it’s not so bad. You want to mix enough latex additive into your dry grout to achieve the consistency of oily peanut butter. Don’t worry if you add too much additive, you can always add more dry grout to balance the mixture.

Spread grout all over one of your sections. Clean the majority of the grout off with a moistened sponge before moving on to grout the other 2 sections. Clean the grout off of the other 2 sections before grouting the rock sections as they are the most difficult to clean. The rock with no longer be white but will turn a shade of gray. Completely clean the entire inner surface of your dish with your sponge and then finish with dry towels or rags.
Cover sections of your base with grout and clean with a moistened sponge. Make sure you’re next to a water source as the sponge will have to be rinsed off repeatedly. Clean the base completely. Apply your second coat of paint to your dish and base.
Your Zen birdbath is now ready for the birds to enjoy…..once filled with water:)
A Few Tips:
- When working with different materials on a project such as this one, you have to keep in mind that the design you select needs to be mutable as the pieces are irregular in shape and thickness.
- Patience with drying times is a must! 15 to 20 minutes drying time when working with heavier pieces that slide such as the stone is required before moving on to the next section.
- When grouting your piece, work in smaller sections to allow the proper cleaning time. It’s also more difficult to clean irregular surfaces, such as the rock and the stones.
- Each piece needs to be glued on with plenty of water resistant adhesive so that when the dish is filled with water, there is no way that water can seep through the grout and under the pieces possibly loosening them. This would cause damage to the mosaic. Make certain to use your latex additive only as the liquid to mix with your grout. This gives the grout more elasticity and prevents it from cracking as a result of different weather conditions. Years ago, when I made my first birdbath, I didn’t know what I know now. A perfectly gorgeous piece was completely destroyed by the elements as a result and had to be tossed.
- Select colors of both glass, tile, stone and rock that will contrast well with your black grout. I also suggest the use of black grout on exterior pieces as you don’t need to concern yourself with the joints collecting dirt or mildew. The piece will just stay looking fresh and newly made. Who could ask for anything more!

Danielle is the mosaic artist and teacher behind Mosaics Mostly. She has been creating mosaics for over 25 years, and has taught hundreds of people to create their very own mosaic DIY projects at home. She has been featured in multiple galleries and magazines, and has even had her own beginner mosaics book published! She loves crafts, and is always working on something new!

Thanks for the complete information, it was very helpful!
You’re so very welcome! Enjoy!
I am very excited about your post. I play around with stained glass and make garden dishes. Mosaic is another interest. Can’t wait to see your next project. Thank you for sharing.
Thanks so much Deborah:) Please enjoy and message me with any questions you might have:)
Cheers,Dani