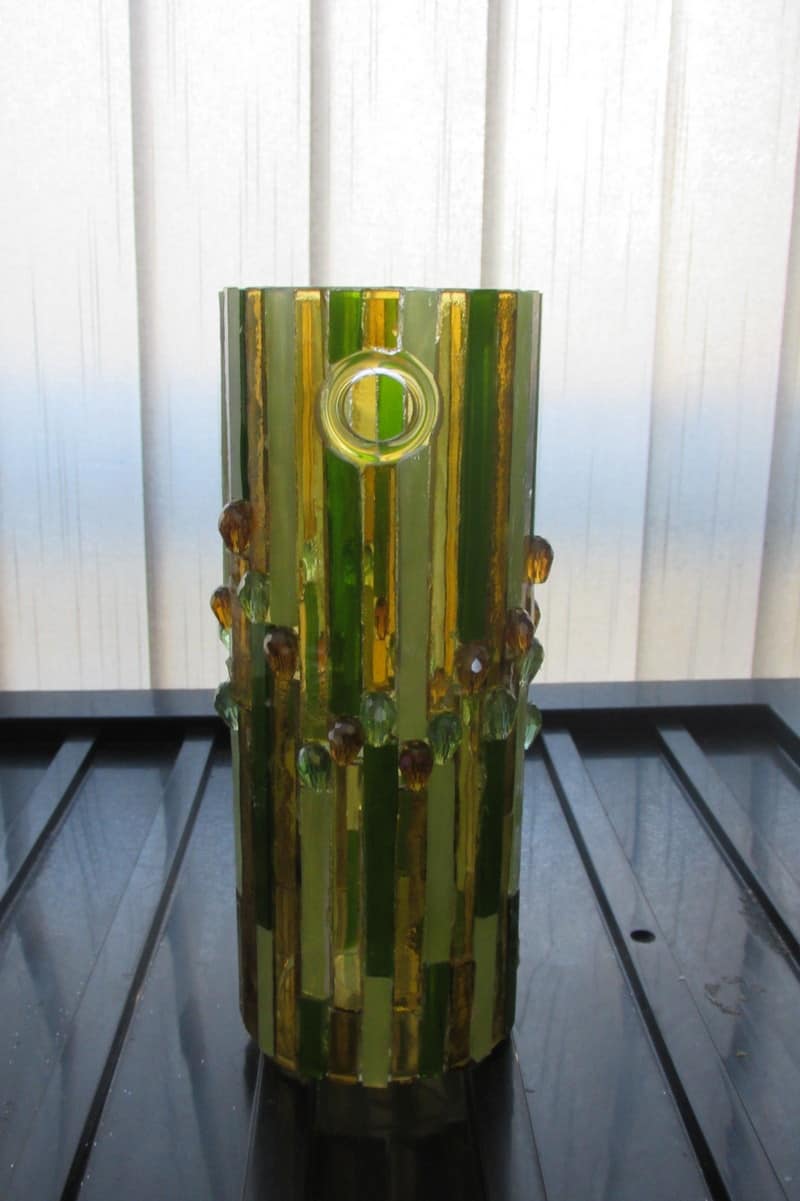
I found the perfect base to create lovely stained glass mosaic wall sconces! It’s a simple cylindrical hanging vase, yes a hanging vase! This vase was meant to be hung on a wall, filled with some water and have a small plant inserted to adorn your wall and also provide a home for a plant to thrive in nothing more than water or for cut flowers to be displayed. Here’s the where to find them on Amazon – Hanging Vase.
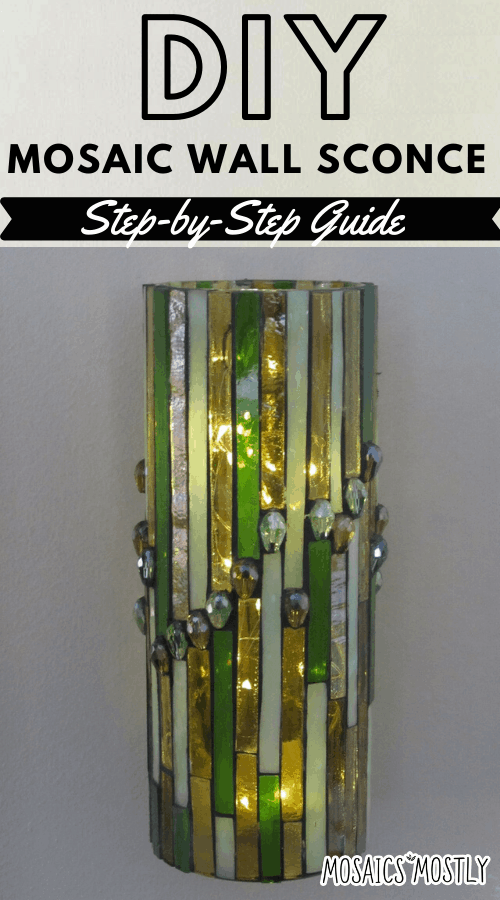
I’ve got something else in mind! How about we cover the vase with gorgeous pieces of colored stained glass and lovely glass beads, grout it, clean it and then insert battery operated fairy lights to create a gorgeous wall sconce for any room of your home or patio. Here’s the Amazon link to the glass beads I’m using – Glass Beads
Materials Needed for DIY Mosaic Wall Sconce
- Cylindrical wall hanging terrarium
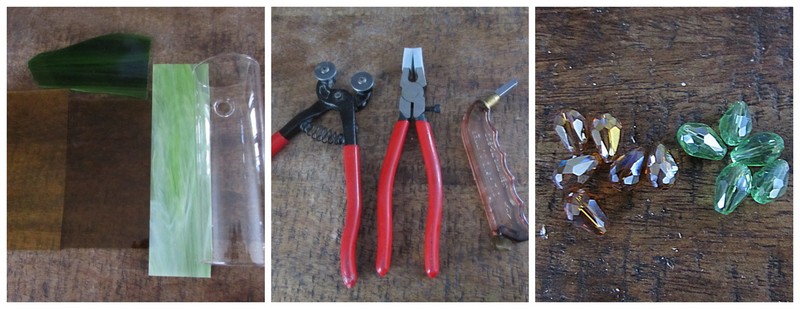
- Green and amber scrap stained glass
- Green and amber glass beads
- Glass cutter
- Running pliers
- Mosaic cutter
- Clear water resistant adhesive
- Black grout
- Latex additive
- Safety glasses
- Garden gloves, mixing bowl, spoon, sponge and old rags
- Tweezers
- Battery operated fairy lights
How to Make Your Very Own DIY Mosaic Wall Sconce
Below you’ll find the step-by-step instructions on how to make your own beautiful mosaic wall sconce at home. Let’s get started!
Step 1: Gather Your Materials and Tools
Before getting started, make sure that you have everything you need for this project within arms reach. For this particular sconce project, I’m using a cylindrical terrarium that I purchase through Amazon. I purchased a set of four terrariums actually for an extremely reasonable price! But that’s Amazon now isn’t it?
I’m also using two different shades of translucent/semi-translucent green glass and two different shades of translucent amber glass.
*Tip: Make sure to take a look at the scrap glass that you’ll be using with light passing through it before getting started so that you know what it will look like when it is lit by your fairy lights after the sconce is completed.
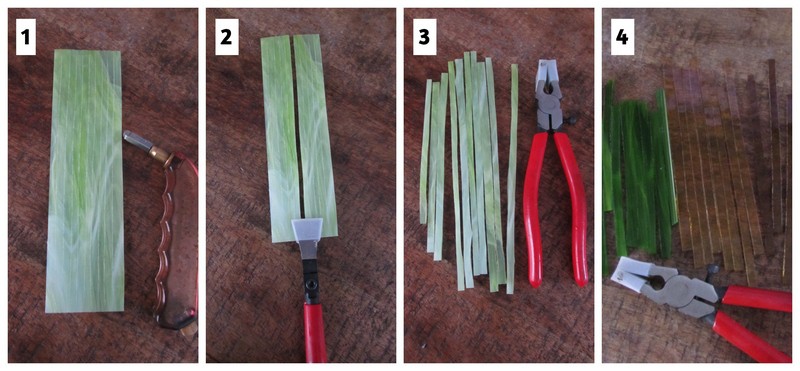
Step 2: Cut Your Glass
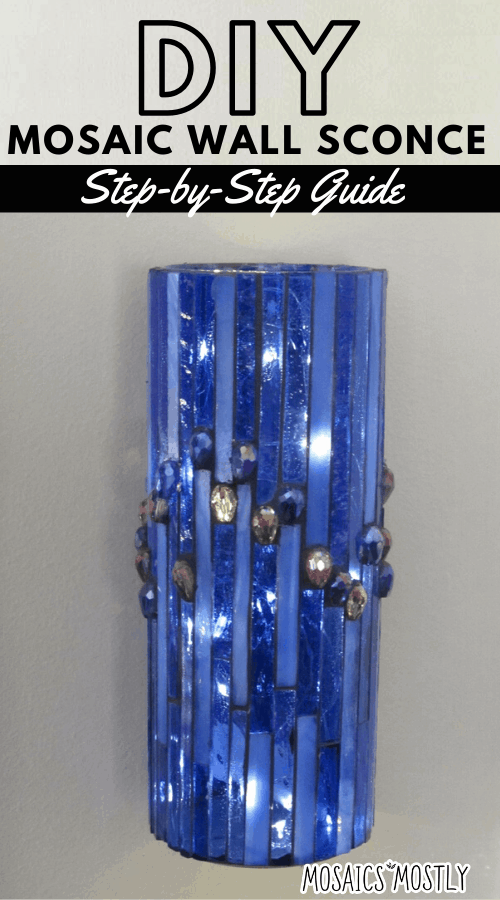
I decided that I wanted long vertical strips of color running through the design only to be broken up by the glass beads. I start by scoring my green glass vertically with my pistol grip glass cutter. Roll the diamond head wheel of your glass cutter in one direction only along the surface of your glass creating strips. Then line up the center of the head of your running pliers with each of the score lines and apply enough pressure to break the score.
Repeat this process until you’ve broken out all the strips of green glass. Create strips out of your other green scrap glass and your two amber shades using the exact same method. It’s up to you whether or not you’d like to cut all the strips the same width or vary them in thickness. For this project I’ve cut the all about the same width.
If you’re new to creating mosaics and need to learn how to cut glass properly, check out my post on How to cut stained glass here.
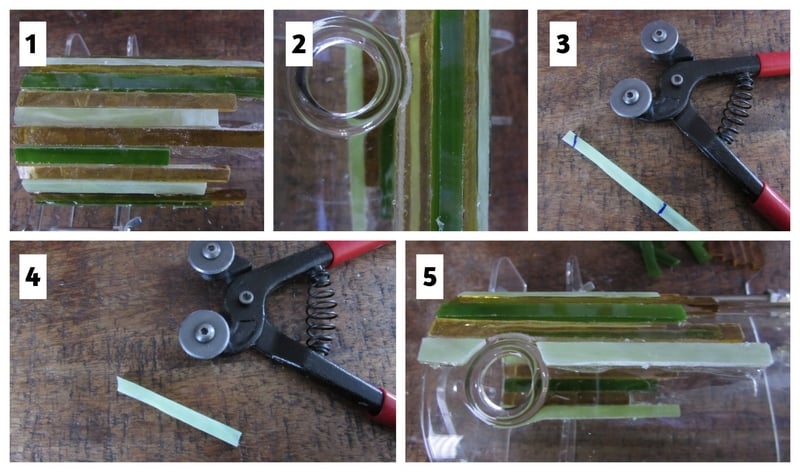
Step 3: Glue Your Glass Onto Your Base
It’s now time to intermix our lovely strips of stained glass while gluing them on to our base. Use your mosaic cutter to cut different lengths of glass to make the design interesting. When necessary, use your mosaic cutter to cut out an arched piece to fit around the back circular hanger hole.
You will also need to mark pieces to fit around that hole and then cut the strip with your mosaic cutters. You then glue the piece in place. Continue until you’ve covered the top half of your sconce with glass strips.
Under each one of the strips that you’ve glued on, glue on a green or amber glass bead. This irregular line of glass beads will really look beautiful when your sconce is completed. The beads help to create a dripping effect! You’ll love it…you’ll see!
Next, glue on more glass strips under each bead. Stagger the colors of glass of course and cut the pieces to fit with your mosaic cutters. There’s no rhyme or reason to this. Mix the colored strips up in any fashion you choose.
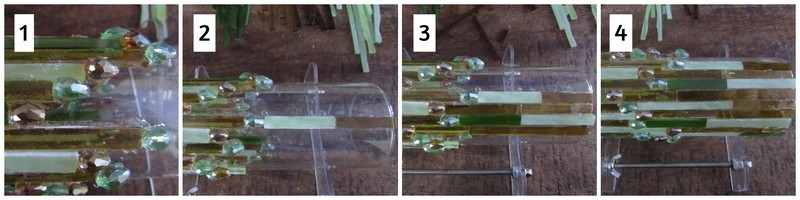
Continue this process until you’ve achieved full coverage on your glass base.
Now, Time to Grout!
You’ve covered your entire glass base with lovely stained glass strips and glass beads. The last portion of this project is preparing your grouting mixture, applying your grout to the surface that you’ve covered and finally cleaning your piece thoroughly.
If you’ve never grouted before, check out my post on How to Grout Your DIY Mosaics here.
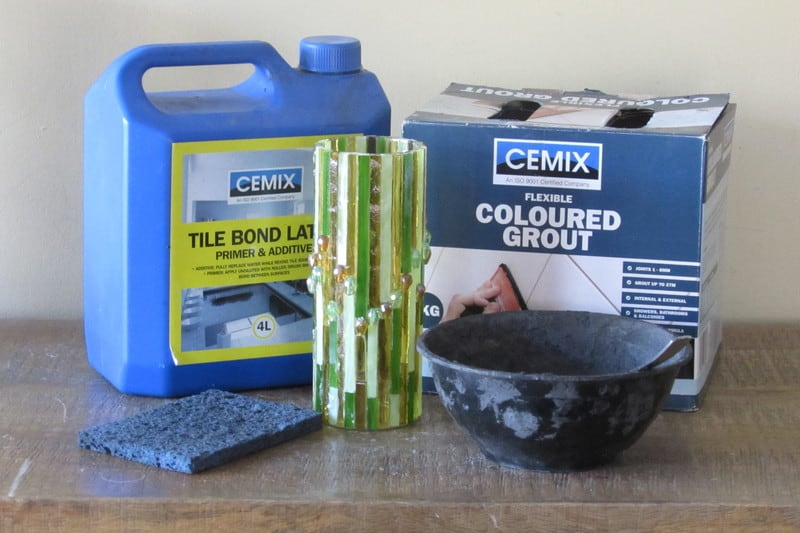
Step 4: Gather your Grouting Materials
To grout, all you’ll need is your black grout, latex additive, mixing bowl, spoon, sponge, old cloths and water. Oh yeah, and of course your sconce:) I recommend covering the surface that you are going to be grouting on with either old newspaper or old rags to prevent any of the grout from staining your work surface.
Step 5: Mix, Apply and Clean Off Your Excess Grout
Now you’re ready for the actual grouting process. First, you want to mix create your grout mixture. Mix the liquid latex additive into your dry grout. You’re wanting to achieve the consistency of oily peanut butter. Don’t worry if you add to much latex additive, simply add a little more dry grout until you reach the proper consistency.

Once your grout is mixed to the correct consistency, cover the surface of your sconce with the grout mixture. You want to make sure that you cover the entire surface so that the grout seeps into ever crevice. Don’t be afraid to use to much grout mixture as your going to be wiping it clean with your sponge anyway.
After your entire surface is covered, take your sponge and wet it, squeezing out the majority of the water, and wipe it over the surface of your sconce removing all the excess grout. Make sure to remove as much of the grout from around each bead with your sponge as alot of grout will pool around the beads. Take the time to remove as much grout off the surface with your moistened sponge as you can.
After you’ve removed as much grout as you possibly could with your sponge, finish cleaning the surface of your sconce with old cloth towel or rag.
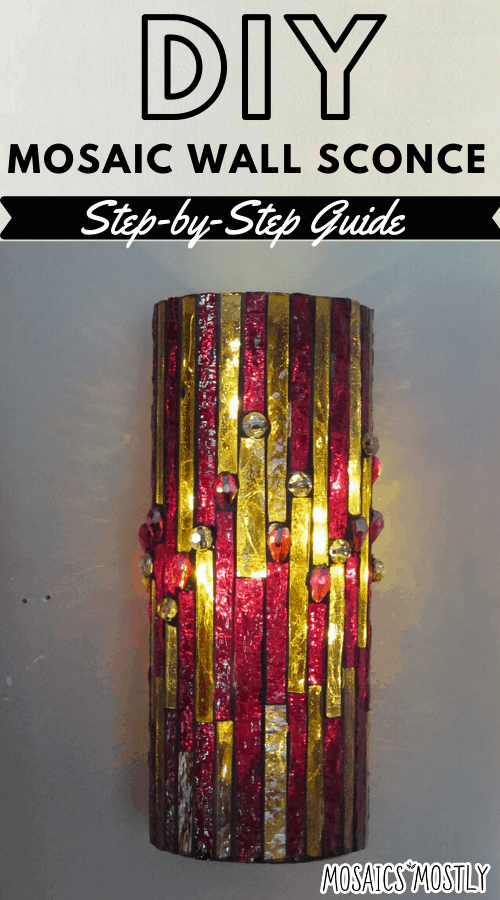
The last bit of cleaning to do needs to take place with the fairy lights on and inserted into your sconce. Take the time to inspect the piece and look for areas of the surface where glue is present between two pieces of glass instead of the grout mixture. You’ll need to remove this glue with tweezers or a sharp object and put some grout mixture in it’s place. This part is a bit time consuming and tedious, but trust me, it’s so worth it in order to achieve a professional looking sconce.
Take a look! Once lit, it looks like a million bucks!!

A Few Tips:
- Make certain to completely cover each piece of your stained glass strips and your beads with the clear water resistant adhesive in order to avoid seepage of the grout mixture underneath the glass strips or beads.
- Clean the excess glue as you go to save time during your final cleaning after grouting. Allow the glue to dry slightly and then remove it with a pair of tweezers as the glue dries to a rubbery consistency and is easily removed at this point.
- Don’t get frustrated if while cleaning or grouting your piece a bead becomes loose and needs to be reglued. This does happen. Just reglue it either after you’ve cleaned the rest of the piece or glue it on immediately and let it dry while you’re cleaning the rest of the piece.
- When hanging your sconce, hammer a finishing nail into the wall on the diagonal so that the sconce lays flush on the wall.
- Take some grout mixture on your index finger and create a nice smooth finished line on the top edge of your sconce and the bottom edge of your sconce.
- Make certain to always wear your safety goggles when working with glass.
Here are two other versions of the same sconce created with different colors of scrap stained glass and glass beads.
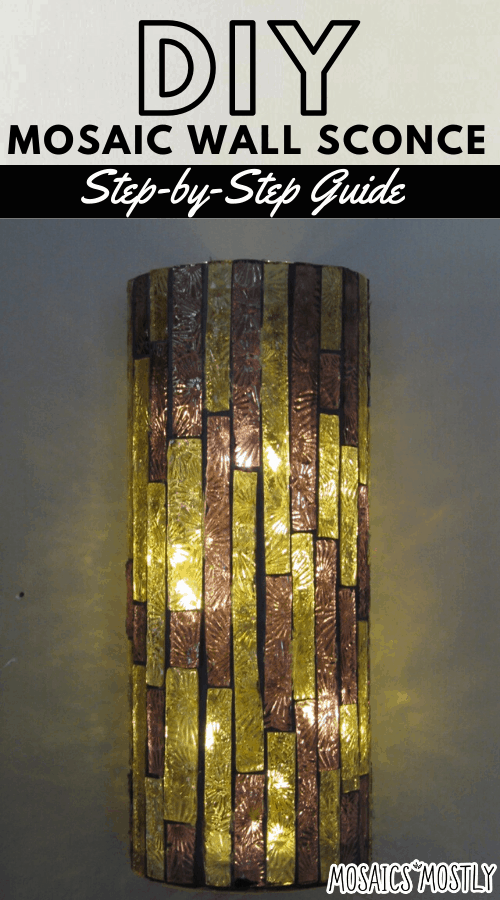
And here is a version of the sconce created with different colored scrap stained glass and no beads.
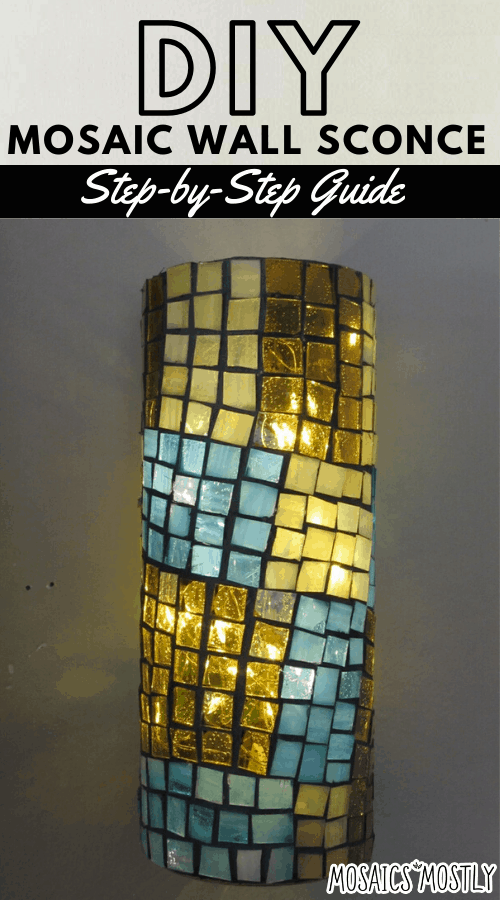
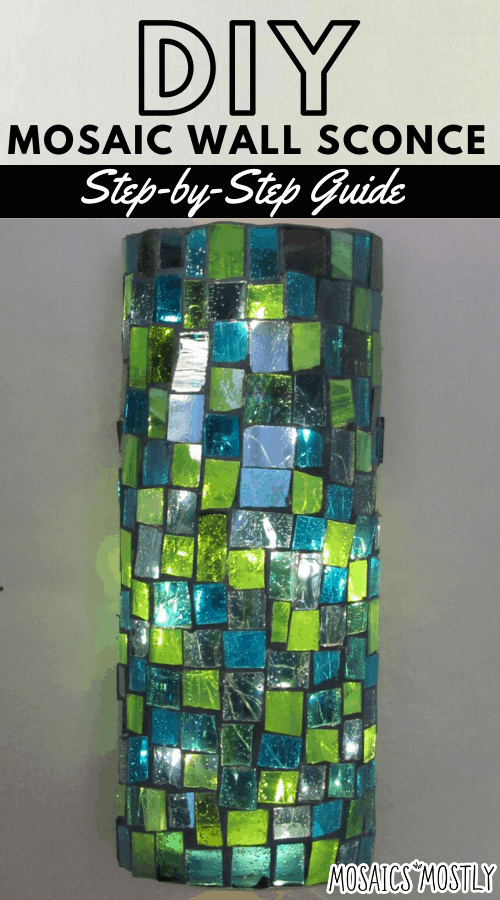
Here are two other versions of the sconce created with different colored scrap stained glass cut in irregular squares instead of strips and no beads. Remember to check out my post on How to Cut Stained Glass here where I show you how to cut irregular squares.
As you can see the possibilities are completely endless when it comes to a project such as this one. Most stained glass shops sell scrap glass by the pound. Stained glass shops also sell “off cuts” which are small pieces of glass that are larger than the scrap they would sell to you. Amazon also sells bags of mixed scrap glass and full sheets. Think of the glass as your crayons! and remember how exciting it was to open the large box of your new crayolas!! Trust me, it’s the same when you receive your order of glass!
These lovely sconces can be hung very safely with a finishing nail hammered in at an angle. They then lay flush against the wall:) Remember there is a hole in the back of each hanging vase:)

Danielle is the mosaic artist and teacher behind Mosaics Mostly. She has been creating mosaics for over 25 years, and has taught hundreds of people to create their very own mosaic DIY projects at home. She has been featured in multiple galleries and magazines, and has even had her own beginner mosaics book published! She loves crafts, and is always working on something new!
